Hello Everyone! My name is Shavonne and my social channels are called Once Upon a
Bungalow. I’m so happy to have been invited to Plant Project Canada’s webpage to share a
how-to on this very exciting project. This time I have instructions on how to build our Light-Up
Living Plant Wall. Check out our video for this project here! This project is for beginner to
intermediate woodworkers and is a great way to display your plants outdoors in the day or in the
evening. In case you missed it, click here for my instructions on making Planter Boxes with a
Blooming Trellis Archway, my first article with Plant Project Canada.
These instructions are based on our backyard living wall, feel free to adjust the
measurements to fit your space appropriately. Alright, Let’s get started on this unique and
whimsical plant wall…Here we go!
Here’s what you’ll need:
Material list:
– 1 ¾” Deck Screws
– 3 ½ ” Deck Screws
– 2 – Pressure-treated 4×4’s (8’-0” Long)
– 4 – Pressure-treated 2×4’s (10’-0” Long)
– 12 Pressure-treated fence boards (10’-0” Long)
– 2 Black Acrylic Privacy Panels (2’-0” x 4’-0”)
– 6 Hanging Plant Pots (I used metal plant pots)
– 3 Rectangle Plant Pots (For the top, these can be any pots you like!)
– Stain and or Paint
– LED Strip Lights (65.6ft, self-adhesive)
– 12 Metal Flower Pot Clips (Typically used for hanging clay pots on a fence)
– Optional: Vinyl cut out with a quote of your choice (This adds some magic to the project!)
– Plants! (I used all tropical plants that can be brought indoors in the winter)
Tools:
– Table Saw
– Metre Saw
– Tape Measure
– Various Clamps
– Speed Square
– Drill
– Impact Driver
– Pencil
– Level
step 1.
Creating the sides of the base to the Plant Wall: Cut two 4x4s at 65 ¾” on the metre saw and toenail these with four 3 ½” screws into your deck. Use a level to ensure your 4x4s are straight. Note: If creating a living wall on the ground, dig your 4x4s 3’-0” into the soil and anchor it with gravel or concrete. Add 3’-0” to the 65 ¾” measurement above. See the images below.
step 2.
Add 1 ½” x 1 ½” to the 4x4s to create an inset space to attach the fence boards: Next, take a 2×4 and cut it in half on the table saw lengthways, creating two 1 ½ x 1 ½ pieces. Cut these 1 ½ x 1 ½ pieces at 51” on the metre saw. Attach these vertically flush with the back and top of your 4×4 pieces. Anchor these with 3 ½” deck screws, every 12” forming a base for the fence boards to be screwed to. Once these pieces are in place on both sides, find the measurement inside of the 4x4s. See the images below.
step 3.
Add your fence boards: Measure from inside the 4×4 space and cut your fence boards to fit. Use a level to ensure the top board is straight. Attach fence boards on the outer edges with two 1 ¾” screws with no spaces between each board. Our fence boards were cut at 57 ¼”. We used 9 fence boards going
horizontally down, as we had a window we didn’t want to cover. If desired, boards can extend to the ground. See the images below.
step 4.
Make a frame for the black acrylic privacy panels to be attached to: Use your 2x4s to create a frame for the black acrylic privacy panels to be attached to. Cut the top and bottom pieces first at 57 ¼”. Place these two pieces at the top and bottom (flush with the top fence board and flush with the last fence board attached on the bottom.) Attach with two 1 ¾” deck screws on the ends of the board, toenail the sides to secure the boards. Cut three 2×4 pieces at 44”. Place 2 of the 44” 2×4 pieces on each side, snug beside the 4x4s and attach with two 1 ¾ deck screws on each side, along with a toenail screw on the sides. Next, find the center, use a level to ensure the board is straight, and then attach the third 44” board by using two 1 ¾” deck screws on both ends and then toenail the sides again until secure. See the images below.
step 5.
Add the LED Strip lighting: Drill one small hole in the bottom inner corner of each frame for the cord of the strip lights to go through. Attach self-adhesive LED strip lights around the inner edges of the frame you just made. With a 65.5ft pack of LED lights, which is sold in two separate sections, I wrapped the
LED lighting around the inner edge of the frame three times. Run an extension cord behind the plant wall to plug in the strip lights, and tuck any cords up behind the project to hide them from sight. See the images below.
step 6.
Add blocking to the plant wall to support the hanging plant pots: The plant pots need something strong to hold on to, as they cannot hang off the black panels alone. We used six hanging wall pots and needed two rectangular pieces behind each pot to act as studs behind each pot. Cut the remaining 1 ½” 2×4 pieces into twelve 3” rectangles. Attach “stud pieces” with two 1 ¾” deck screws in places that align with the plant pots required in the placement desired. Get creative and design your own unique placement, or feel free to copy ours! See the images below.
step 7.
Attach the black acrylic privacy screens: Next up, the black panels! Using four 1 ¾” deck screws for each panel, attach the black panels to the frame at the top and bottom. See the images below.
step 8.
Attach the hooks to hold the plant pots: Take 12 metal flower pot clips and attach each clip with one 1 ¾” deck screw to the blocking behind the black panel. If the design pattern of the black acrylic panel doesn’t work out to lay directly in front of your hook, use a washer to shim out the space and attach your plant clip. If two hooks are required for each pot, use a level to ensure you are creating a straight line that your pot will hang upon. See the images below.
step 9.
Add the outer frame and top piece to finish off the look: Using a table saw cut 2 fence boards to 4” in width. Cut two pieces with a 45-degree angle using a metre saw at 58” and two pieces at 50 ½” to form a border around the black panels securing them in place and creating your trim work. Secure these to the plant wall with 1 ¾” deck screws. Cut one fence board at its original width at 64” in length to create the top and final piece of wood to the plant wall. Place on top and secure downwards with 1 ¾” deck screws. See the images below.
step 10.
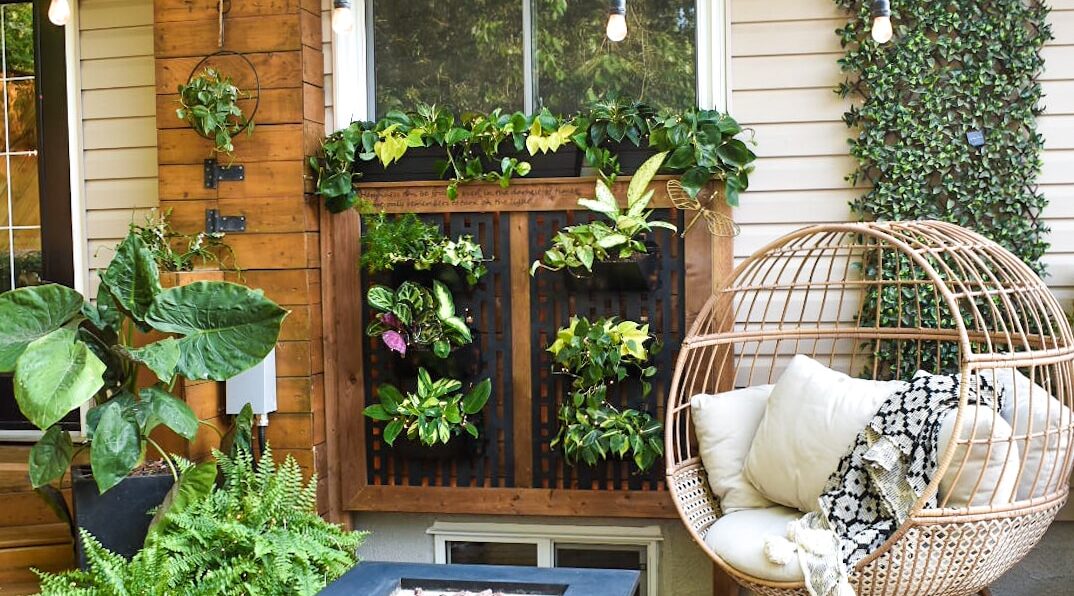
Add the plants: For our plant wall, I went with all tropical plants that I could bring inside during the winter months. The plants I chose include different variations of pathos, prayer plants, snake plants, and other various tropical plants. To ensure these plants stay happy in the summer heat, and with my tendency to over-water, I chose to use Miracle-Gro® Moisture Control Potting Mix. This soil helps you protect your plants from over and under-watering! It absorbs 33% more water than your basic soil and releases it as the roots need it. It’s also nutrient-rich and contains a slow-release fertilizer within the soil to provide those essential nutrients to your plants over time. Moisture control Potting Mix also helps with airflow within the dirt, giving the roots the oxygen they need, which is essential for the plant’s development and vitality. See the images below.
step 11.
Add personal touches and details: I added a vinyl sticker featuring a quote about light from our favourite book series. I thought this quote suited the project as it lights up beautifully at night. 10 points to Gryffindor if you can recognize where this quote is from! I also added a metal flying key to add more whimsy and personalization to the project. For extra glowing magic, add fairy lights to each plant! See the
images below.
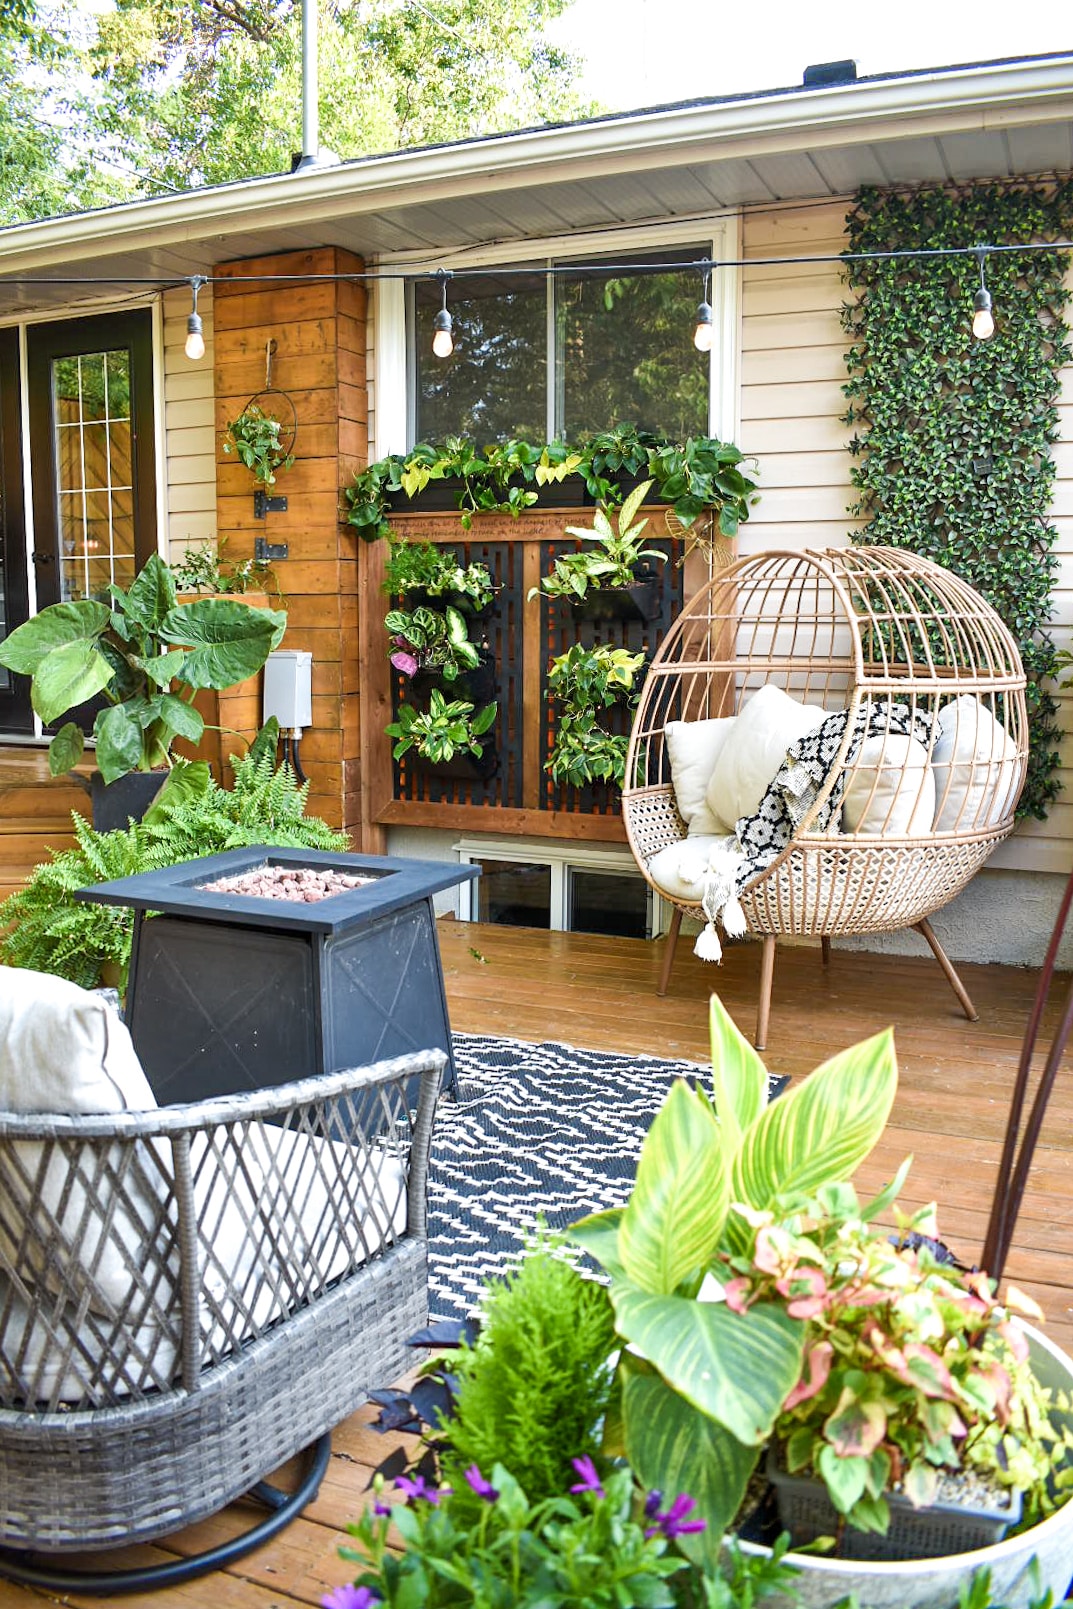
There you have it! That’s how you can build your very own plant wall. I hope you enjoyed our
tutorial. Please tag @PlantProjectCanada and @OnceUponaBungalow if you do create one too.
Find my family and me on all socials under the name “Once Upon a Bungalow.” Thank you to
Plant Project Canada for having us on the blog again, we loved creating this how-to! Check out
more images from this project below.
Happy Planting!
Xo Shavo
Follow Shavonne on Instagram and TikTok
#happycreating!