- A good potting mix (for this project we recommend Miracle-Gro® Cactus, Palm and Succulent Potting Mix)
- Activated Charcoal
- Your choice of terrarium-friendly plants: like succulents, air plants or miniature cacti
- Pebbles for drainage
- A spray bottle for watering
- Battery operated mini string lights
- A glass container for your terrarium plants
- Decorative or polished stones
- Crystals, small gnomes, or other mini decorations you want to add
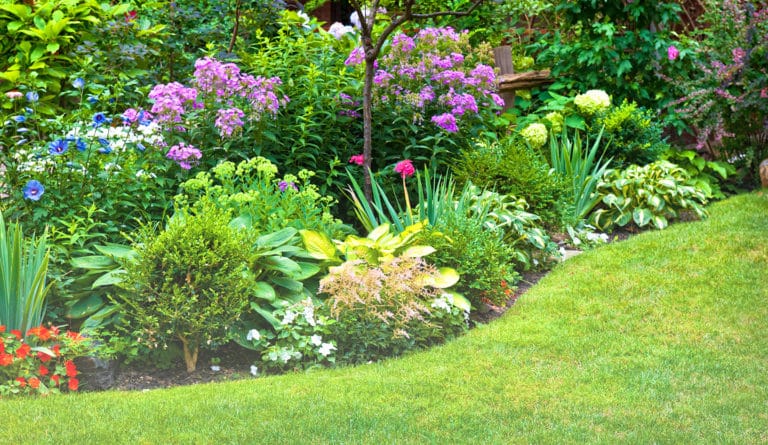
There’s something magical about terrariums. They take up so little space, and yet, house an entire ecosystem within them. If you’re reading this article, you’ve likely seen countless Pinterest boards of beautiful, tiny terrarium creations made to resemble small towns, wild forests, or other stunning locales.
But while terrarium inspo-pics are fun to look at, they can also spark that dreaded impostor syndrome within us. The thought of “can I really make something like this?” holds so many of us back from even attempting to start.
The truth is: terrariums are much simpler to create than most people think! All you need are a few base ingredients to start, and the courage to get creative.
ready to make your own world within a glass jar?
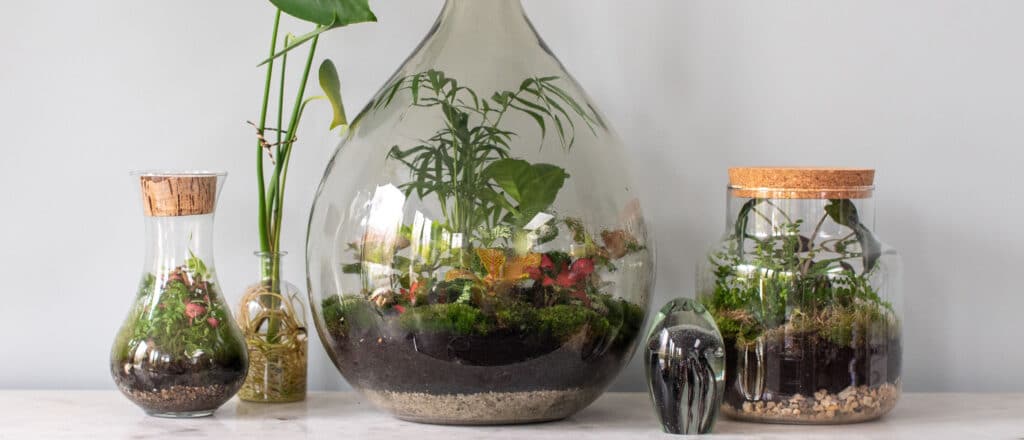


step 1: choose your terrarium “home”
Avant de commencer, réfléchissez au style de votre terrarium et au type de plantes que vous souhaitez y placer.
Les réponses à ces questions détermineront si vous devez opter pour un terrarium ouvert ou fermé.
Si vous souhaitez avoir des plantes tropicales qui se développent dans des conditions humides, un terrarium fermé est idéal. En revanche, si vous optez pour des petits cactus ou des plantes grasses, un terrarium ouvert est la meilleure solution.
step 2: build your base
Got your perfect terrarium container? Great! Now, the real fun begins.
Start by adding a 1-1.5 inch layer of pebbles, followed by a thin layer of charcoal. The pebbles act as drainage holes, while the charcoal helps reduce the amount of bad bacteria that might start developing as your plants grow.
Once you’re done, add about 2.5 inches of your potting mix. Make sure you have enough soil for your plants’ roots to fit.
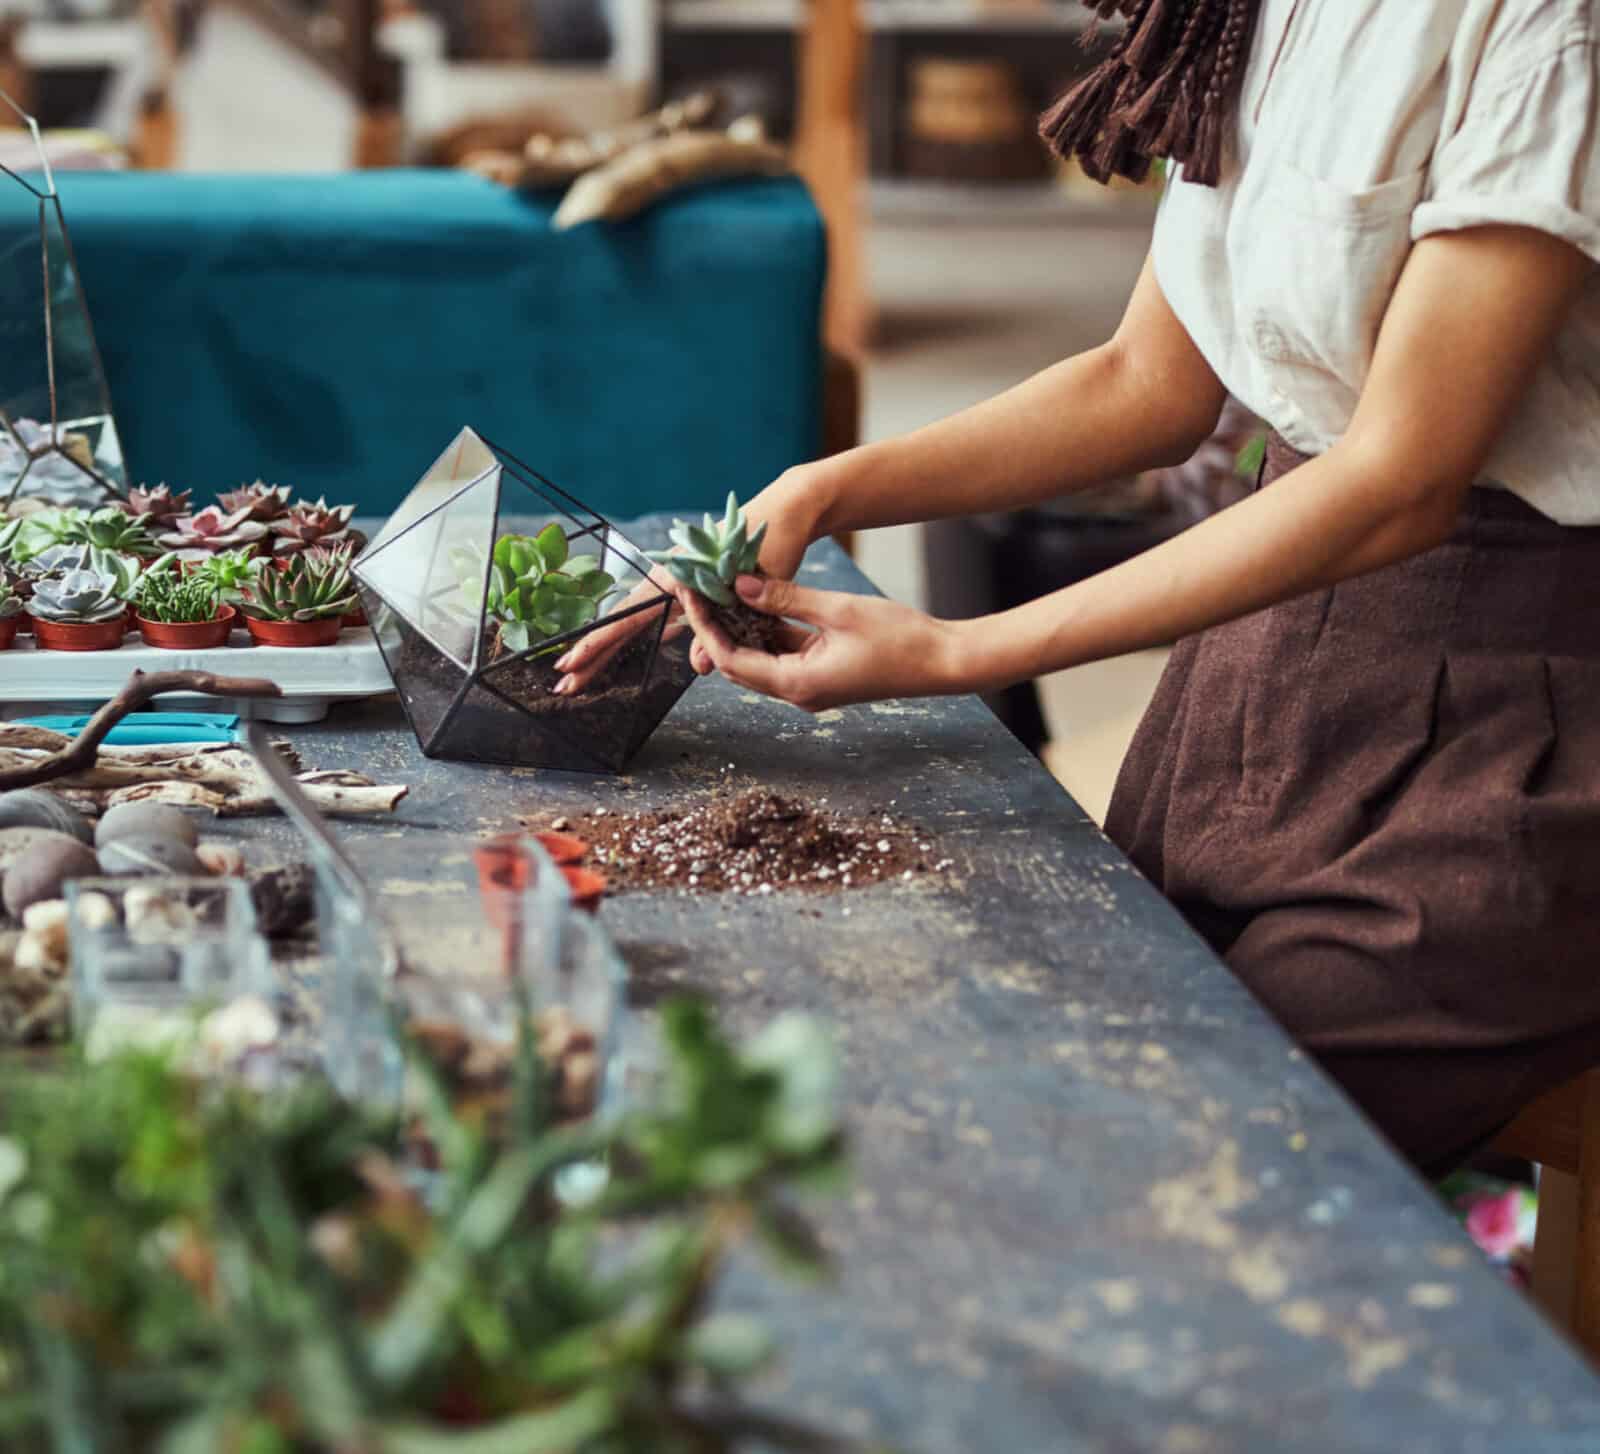
step 3: add your plants
Remove your plants from their original pot. Gently massage their roots to get rid of excess soil, and create small holes in your terrarium for your plant roots before carefully placing them inside.
We recommend starting with the bigger plants
step 4: have fun with it!
Now comes the best part – decorating your terrarium.
You can add polished stones, crystals, small figurines, or any other miniature decorations to make your terrarium unique to you.
Bring out your inner child, and don’t hold back!
step 5: light it up
Carefully weave your string lights into your terrarium, making sure that they’re not getting in the way of your plants. Place your battery pack somewhere easily accessible.
Once you’re all done, turn on the lights – and watch your terrarium come to life.
Not only do string lights add a touch of mythical beauty to your creation, they also provide much needed artificial lighting to the plants inside.
step 6: feed your ecosystem
Terrariums need very little upkeep to stay alive and thriving. But the amount of water they require depends on the type of terrarium you have.
Water evaporates faster in open terrariums, so they typically require a few sprays of it every couple weeks. Closed terrariums, however, retain water for much longer, so you only need to water them about twice a year.
Congratulations – you’ve officially created your own little ecosystem! Enjoy watching and documenting the growth that happens within your terrarium, all while fielding countless compliments from your friends and family.
#happycreating!
your go-to guide to seed starting for late starters
If the idea of starting seeds just crossed your mind, or you simply didn’t have the time to tackle this project earlier in the year, do not fear!
Because yes – contrary to popular belief, you absolutely CAN start your seeds in April. It’s not too late.
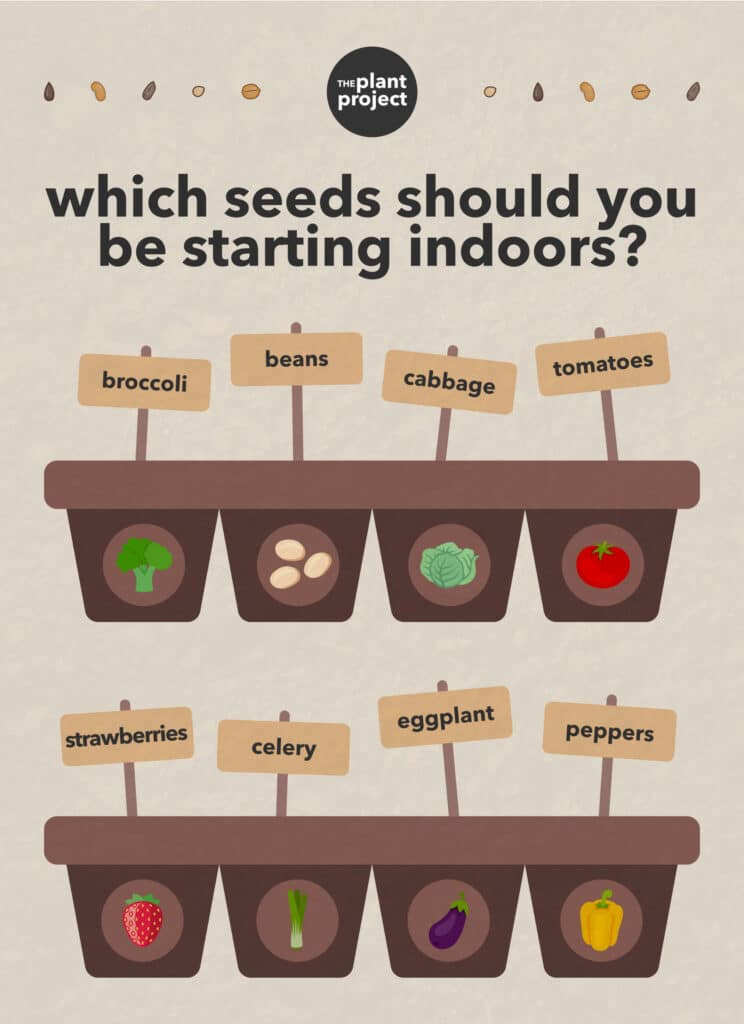
Especially if you’re into delicious late bloomers, like asparagus, beets, peppers, and even catnip (your furry friends will love you forever!).
let’s get started! but first…
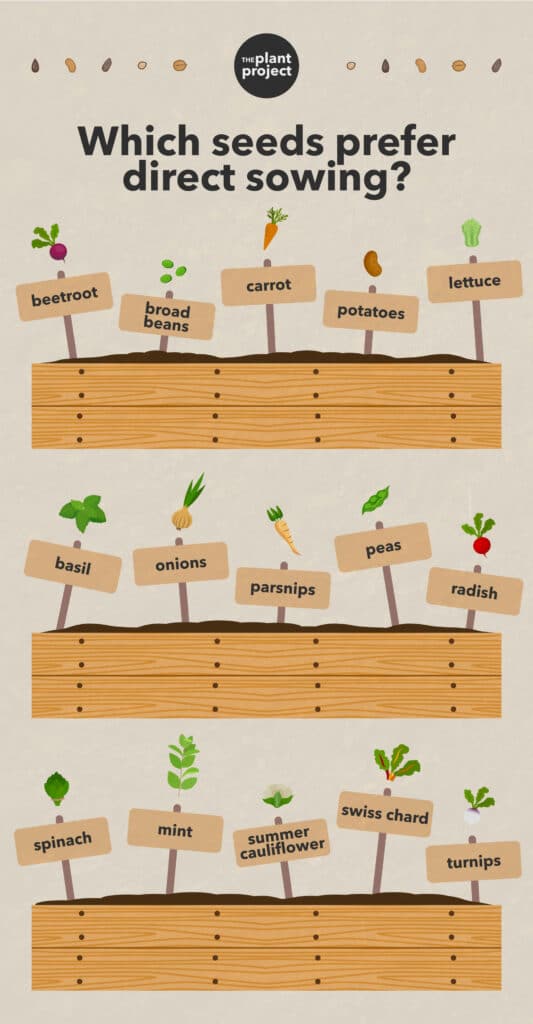
Check the last average frost date in your region with this helpful chart. It includes useful guides for which seeds you can start now, which seeds prefer direct over indoor sowing, and when the best time to transplant your indoor seedlings would be.
there are two ways to sow your seeds. Let’s get into them!
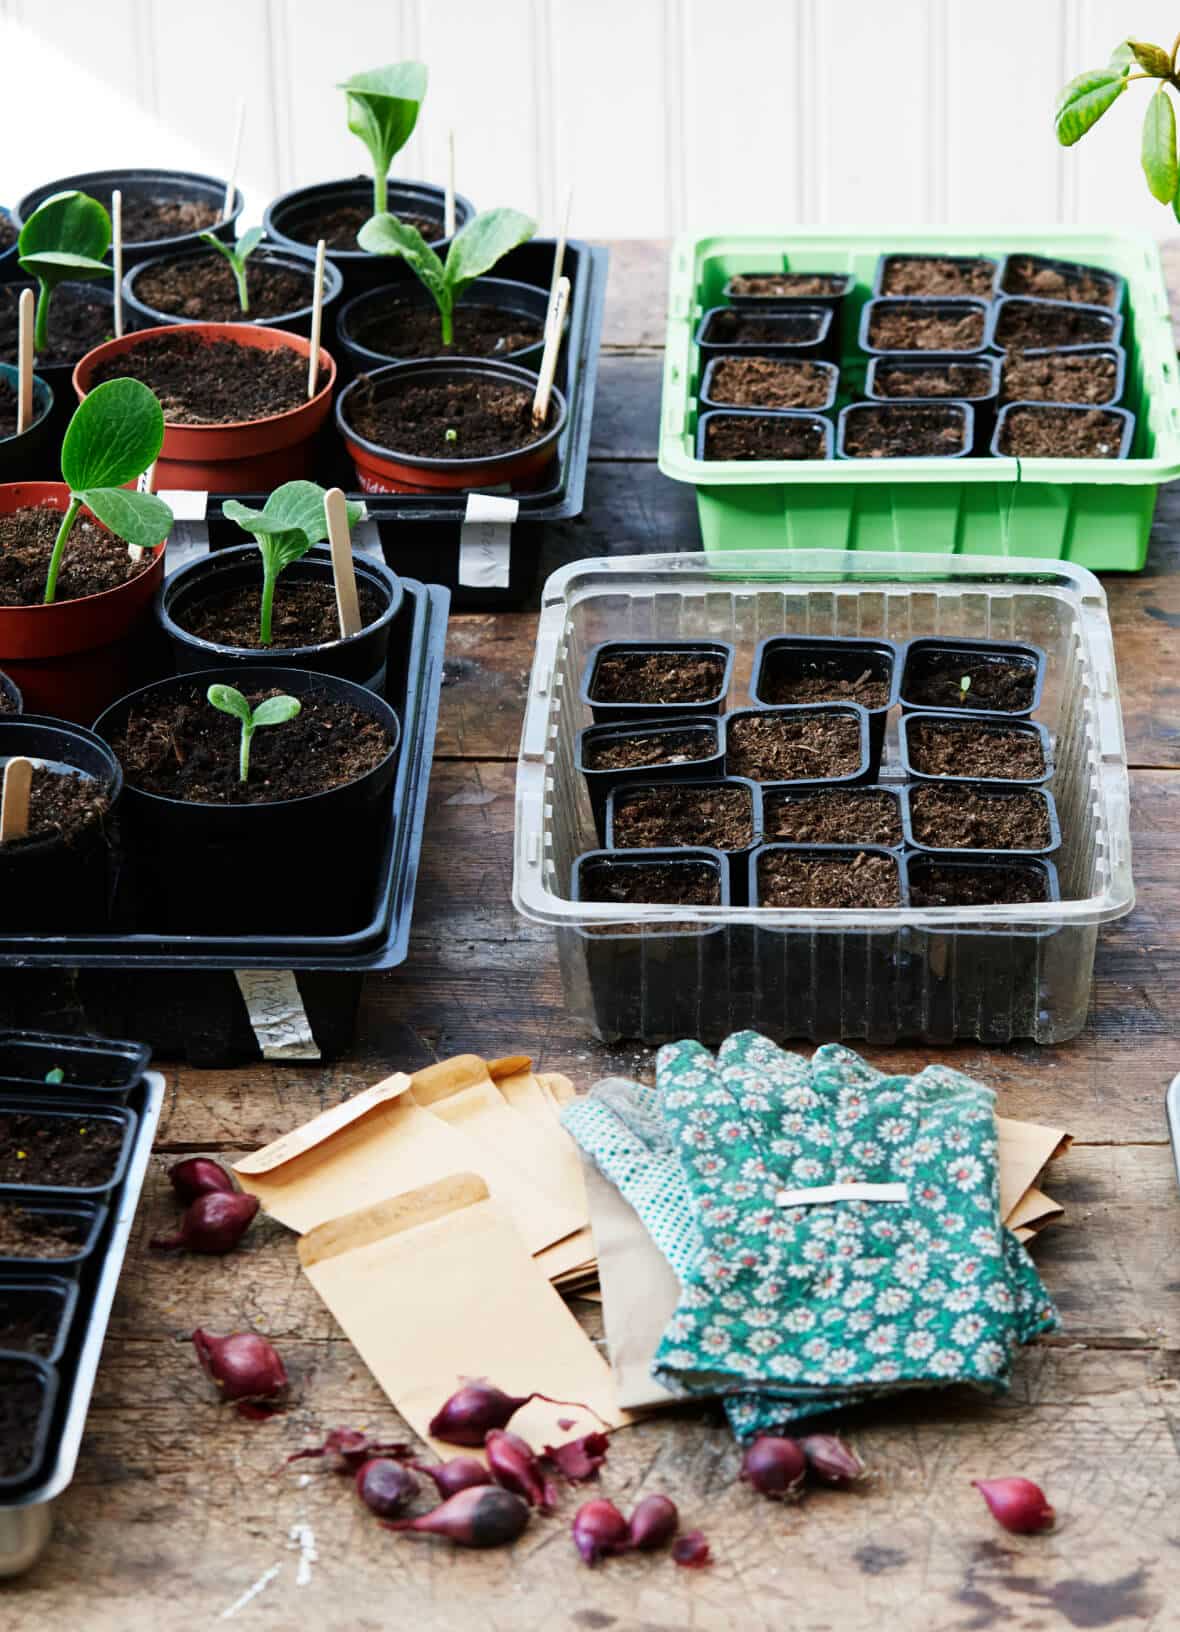
option 1: indoor Sowing
Indoor sowing is the process of starting your seeds indoors, and then gradually exposing and transplanting them outdoors. Almost every seed can be started using this method – but particularly long-season crops, which, as the name implies, take a longer time to grow.
here’s what you need to get started:
- Your seeds
- Miracle-Gro® Seed Starting Potting Mix
- A seed tray
- A drip tray
- A heat mat
- LED or glow lights
- A plastic seed starting cover
- Stickers for labeling
1
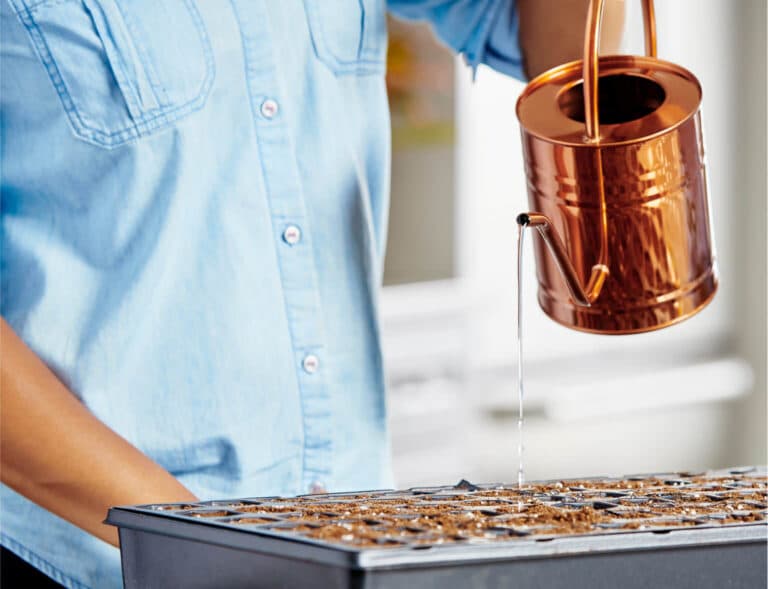
step 1: prepare your potting mix
Fill a large bowl with your potting mix, and add in a sprinkle of water to ensure even soil moisture.
2
step 2: prepare your seed tray
Place your seed tray inside your drip tray, and fill each cell with soil, just below the top of the cell.
3
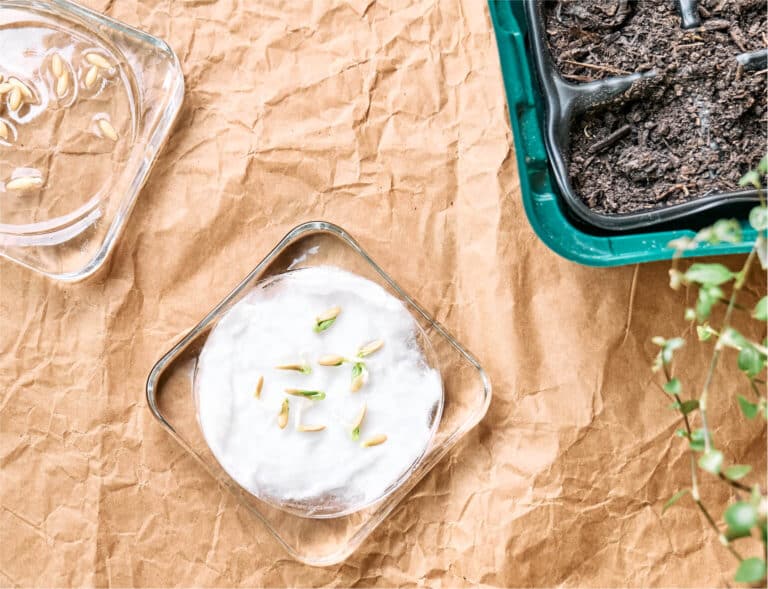
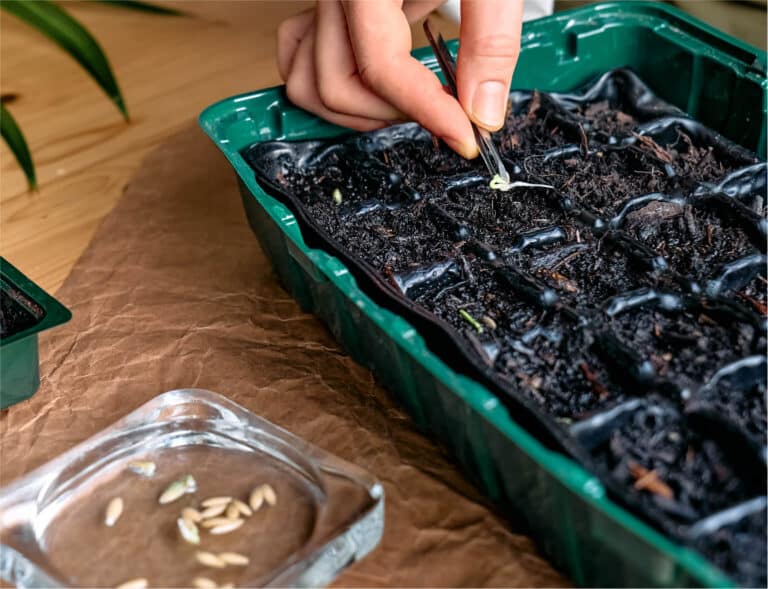
step 3: sow your seeds
The rule of thumb with seed sowing is: plant yours two to three times as deep as they are wide. So if your seeds are tiny, you can sprinkle a few over the soil. If they’re larger, you can push a couple of them into the soil in each cell, ensuring they’re covered by a layer of it. To better understand how deep you need to place your seeds, read the packaging they come in.
4
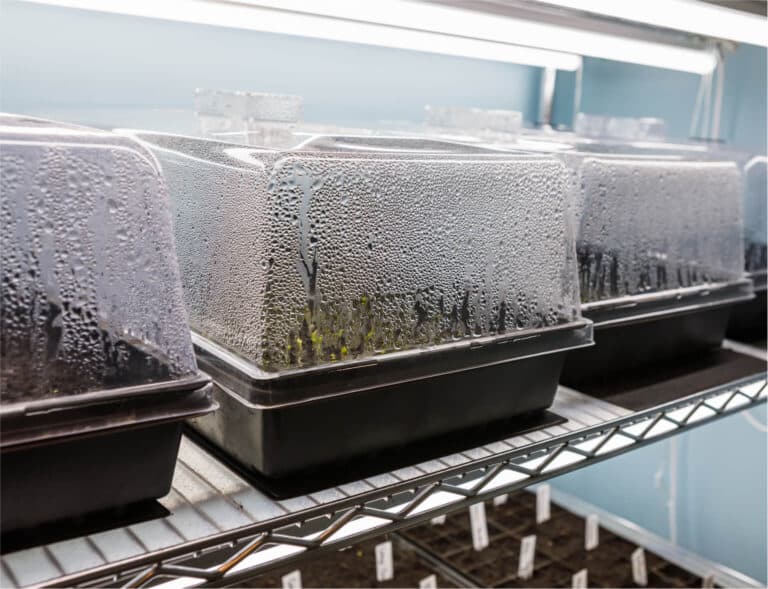
step 4: prepare for growth!
Add labels to each seed container. Then, place your plastic cover on top of your tray, and put it on the heat mat, under your LED or glow lights. Once your seedlings start growing, gradually expose them to the outside environment. Then, mid May or June, they’ll be ready to be transplanted.
option 2: direct sowing
This method involves planting your seeds directly into your garden or outdoor space, rather than sowing them indoors first, and then transplanting. While indoor sowing gives you more control over your seeds’ environment, direct sowing allows for the development of stronger, healthier plant roots.
here’s what you need to get started:
- Your seeds
- Craft sticks for labeling
1
step 1: prepare your soil
Take the time to get your soil fully ready, by removing all the weeds, rocks, and debris. Then, loosen your soil with a garden fork, raking it until you have a level surface.

2
step 2: prepare your seeds
Depending on the type of seeds you have, you might need to manipulate them slightly before placing them in the soil. For example, some seeds need to be softened, by being soaked in water prior to planting. Others need to be scarified, by being rubbed against sandpaper to thin their hard shells. Read your seeds’ instruction packet to ensure you’re preparing them properly.

3
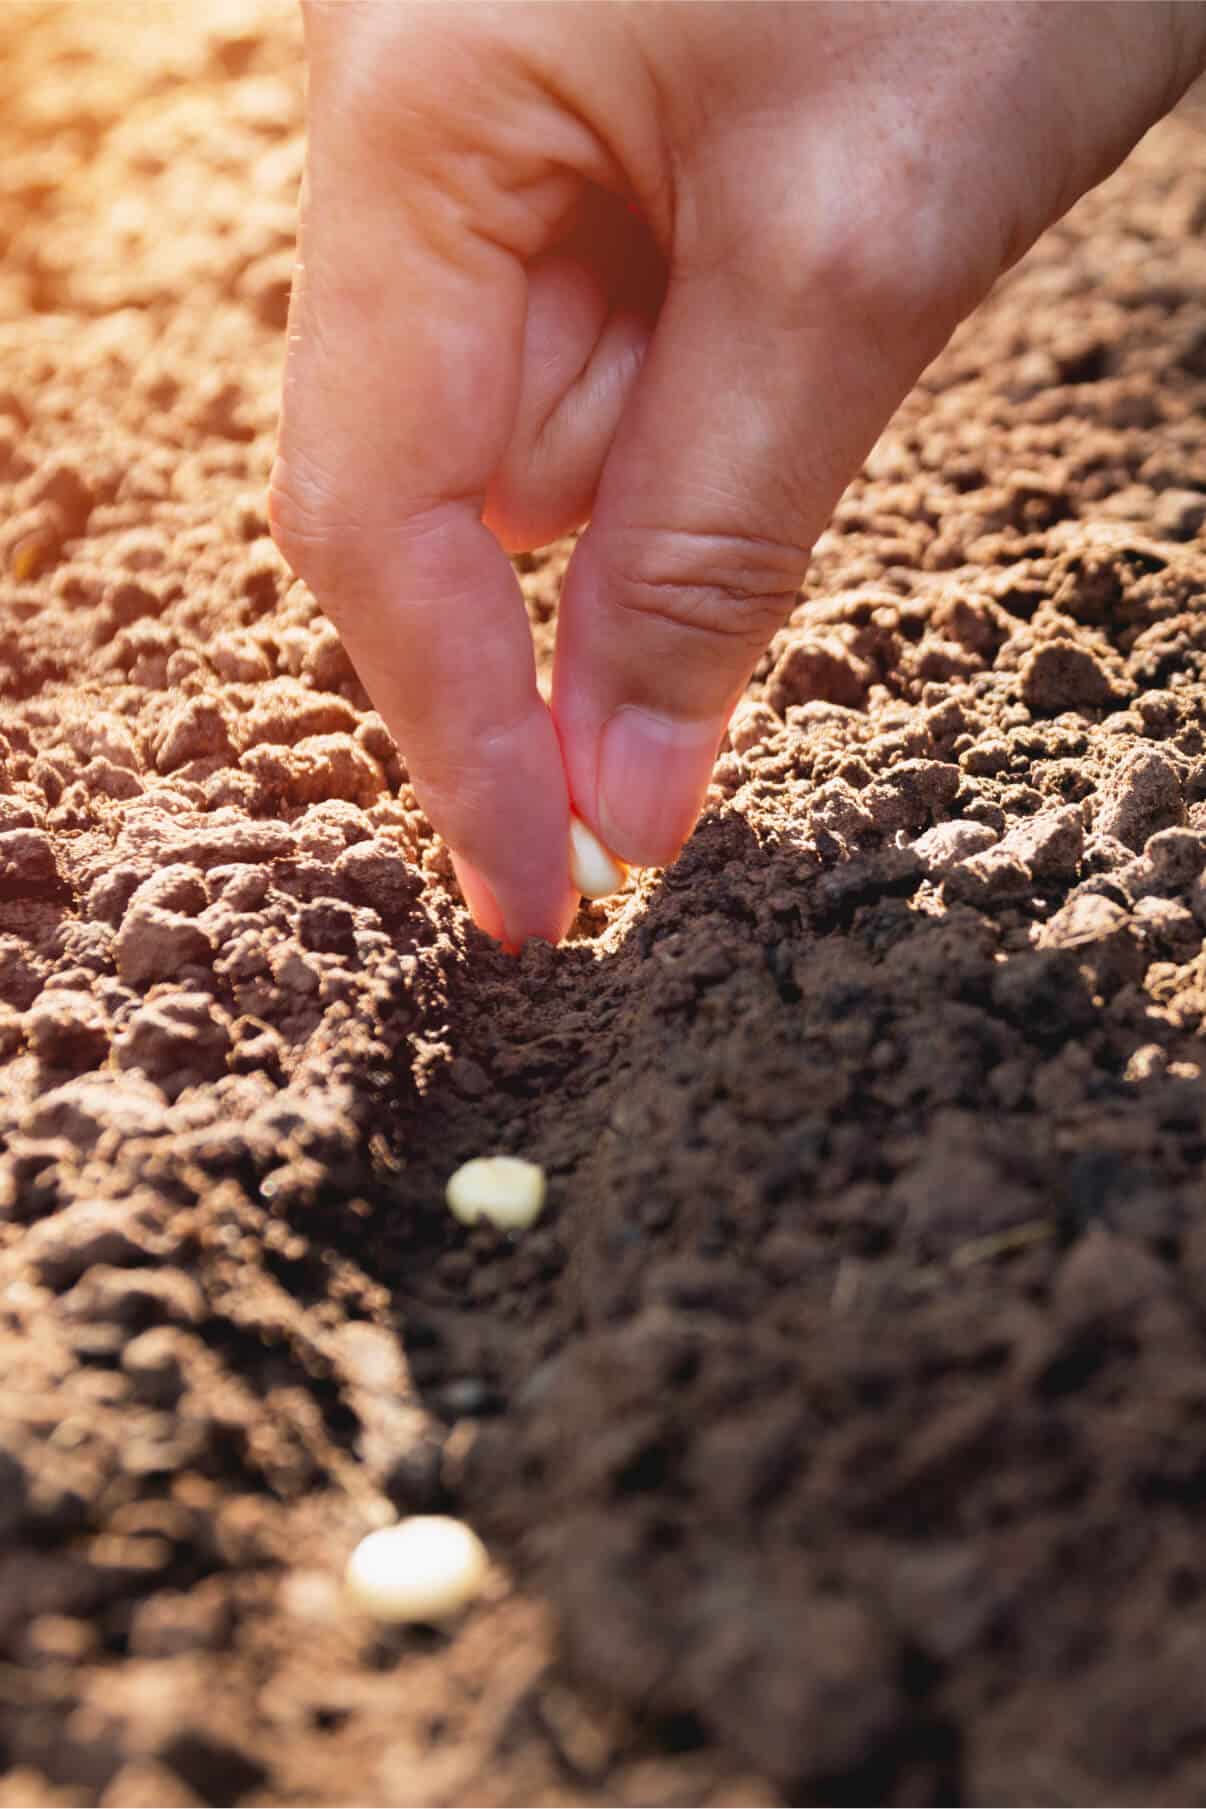
step 3: plant your seeds
Just like with indoor sowing, try to stick to the seed size-to-soil depth rule. The bigger the seed, the deeper you want to sow it. Tiny seeds can simply be sprinkled on top of the soil, while bigger seeds will need to be buried at a prescribed depth. But don’t stress! Seeds aren’t particularly picky, and will likely germinate regardless of soil depth.
4
step 4: moisten your soil
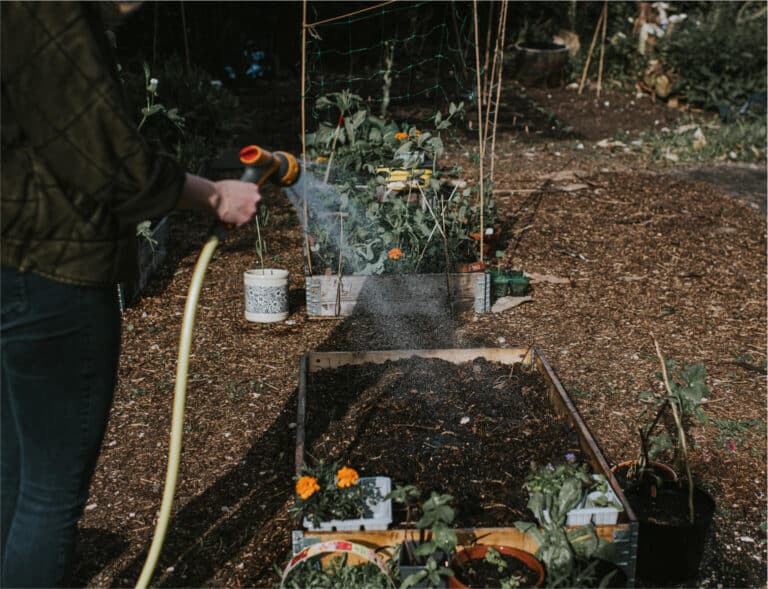
Never – we repeat, NEVER- let your soil dry out fully after planting your seeds. Nothing gets in the way of seed growth more than dry soil. To give your seeds the best chance for success, gently water them using a light-pressure setting on your hose, and make sure to not leave any puddles – or you risk overwatering.

5
step 5: X marks the seeds
Use your labeled craft sticks to mark where you planted your seeds. This will help you keep track of their germination, monitor their growth, and not accidentally overcrowd them with new seeds or mistaken them for weeds.
Still got questions about the seed starting process? Let our experts help, by leaving a comment in our Plant Chat!
#HappySeedStarting
It’s the most wonderful time of the year: seed starting season is upon us! Starting your own seeds is by far the most cost effective way to create a lush, bountiful veggie garden in your own backyard. Here are three different ways to start your seeds: one simple setup requiring little equipment, an intermediate setup with a Root Farm Grow Light, and an AeroGarden to really kickstart those seeds.
MiracleGro Seed Starting Potting Mix + Window
This is the simplest seed starting method. Basically requiring sunlight and soil, it is also the method that requires the least investment (sunlight is free!).
To start seeds using this method, you need:
- A sunny window to put your seeds
- Seed starting pots (can substitute for egg cartons or nursery pots)
- Seeds
- MiracleGro Seed Starting Potting Mix
- Plant labels (can use popsicle sticks)
- Permanent marker
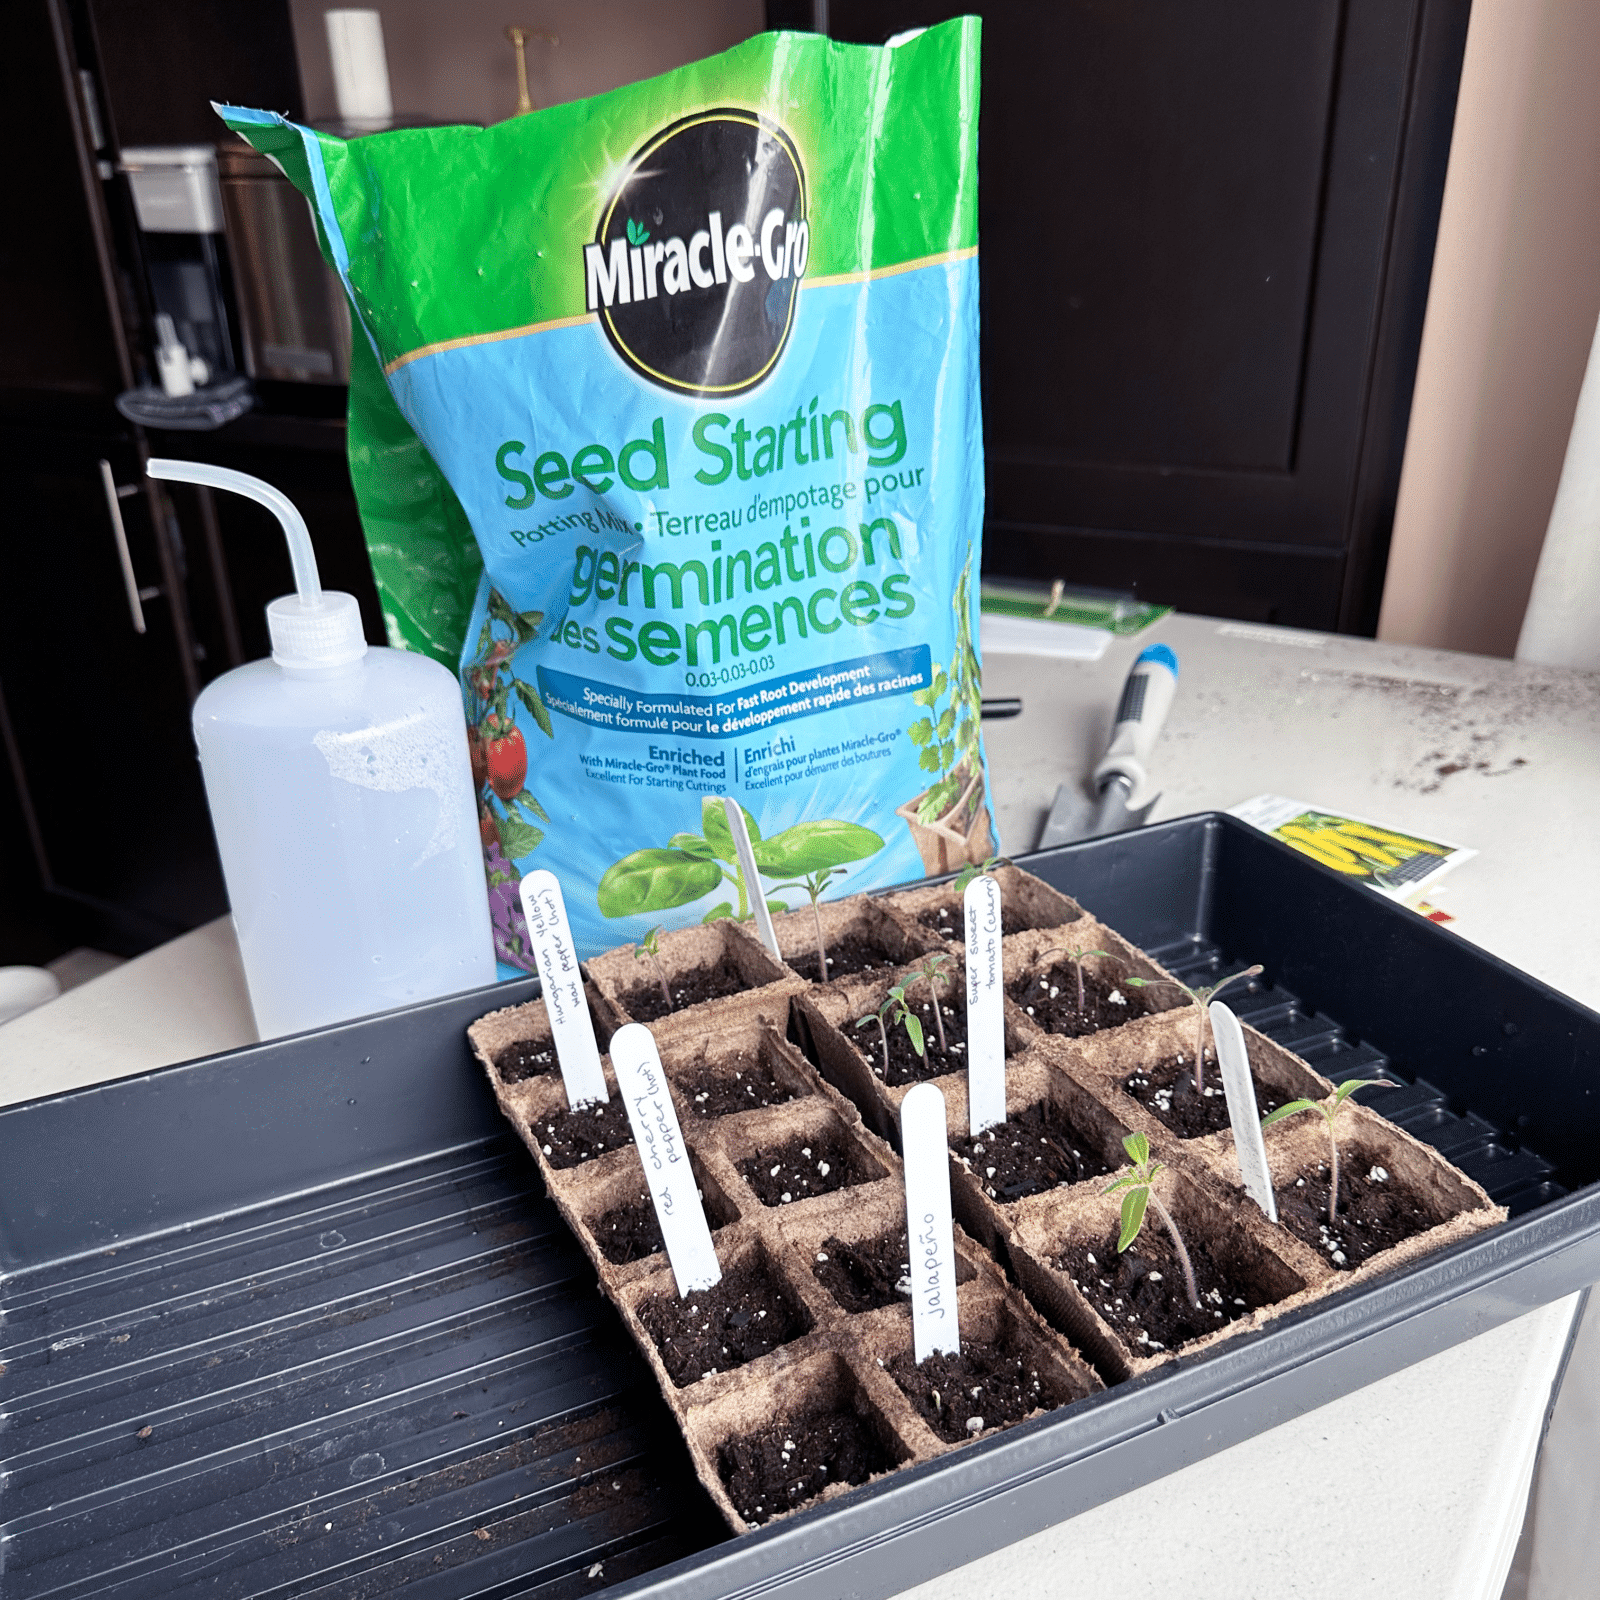
This seed starting setup is as simple as filling the pots with MiracleGro Seed Starting Potting Mix and placing a seed in each pot. Label the future seedlings with permanent marker on plant labels or popsicle sticks and place them on a sunny windowsill. Be sure to water them every day or two to keep the soil moist.
MiracleGro Seed Starting Potting Mix + Root Farm Grow Light
Starting seeds this way takes things up a notch by adding in a grow light. Grow lights are great because they give your plants a consistent source of light, regardless of whether the weather decides to cooperate. I love the Root Farm Grow Light because it’s large enough to fit a whole tray of seeds underneath, and it keeps the seeds on the warm side as well.
To start seeds using this method, you need:
- Root Farm Grow Light
- Seed starting pots (can substitute for egg cartons or nursery pots)
- Seeds
- MiracleGro Seed Starting Potting Mix
- Plant labels (can use popsicle sticks)
- Permanent marker
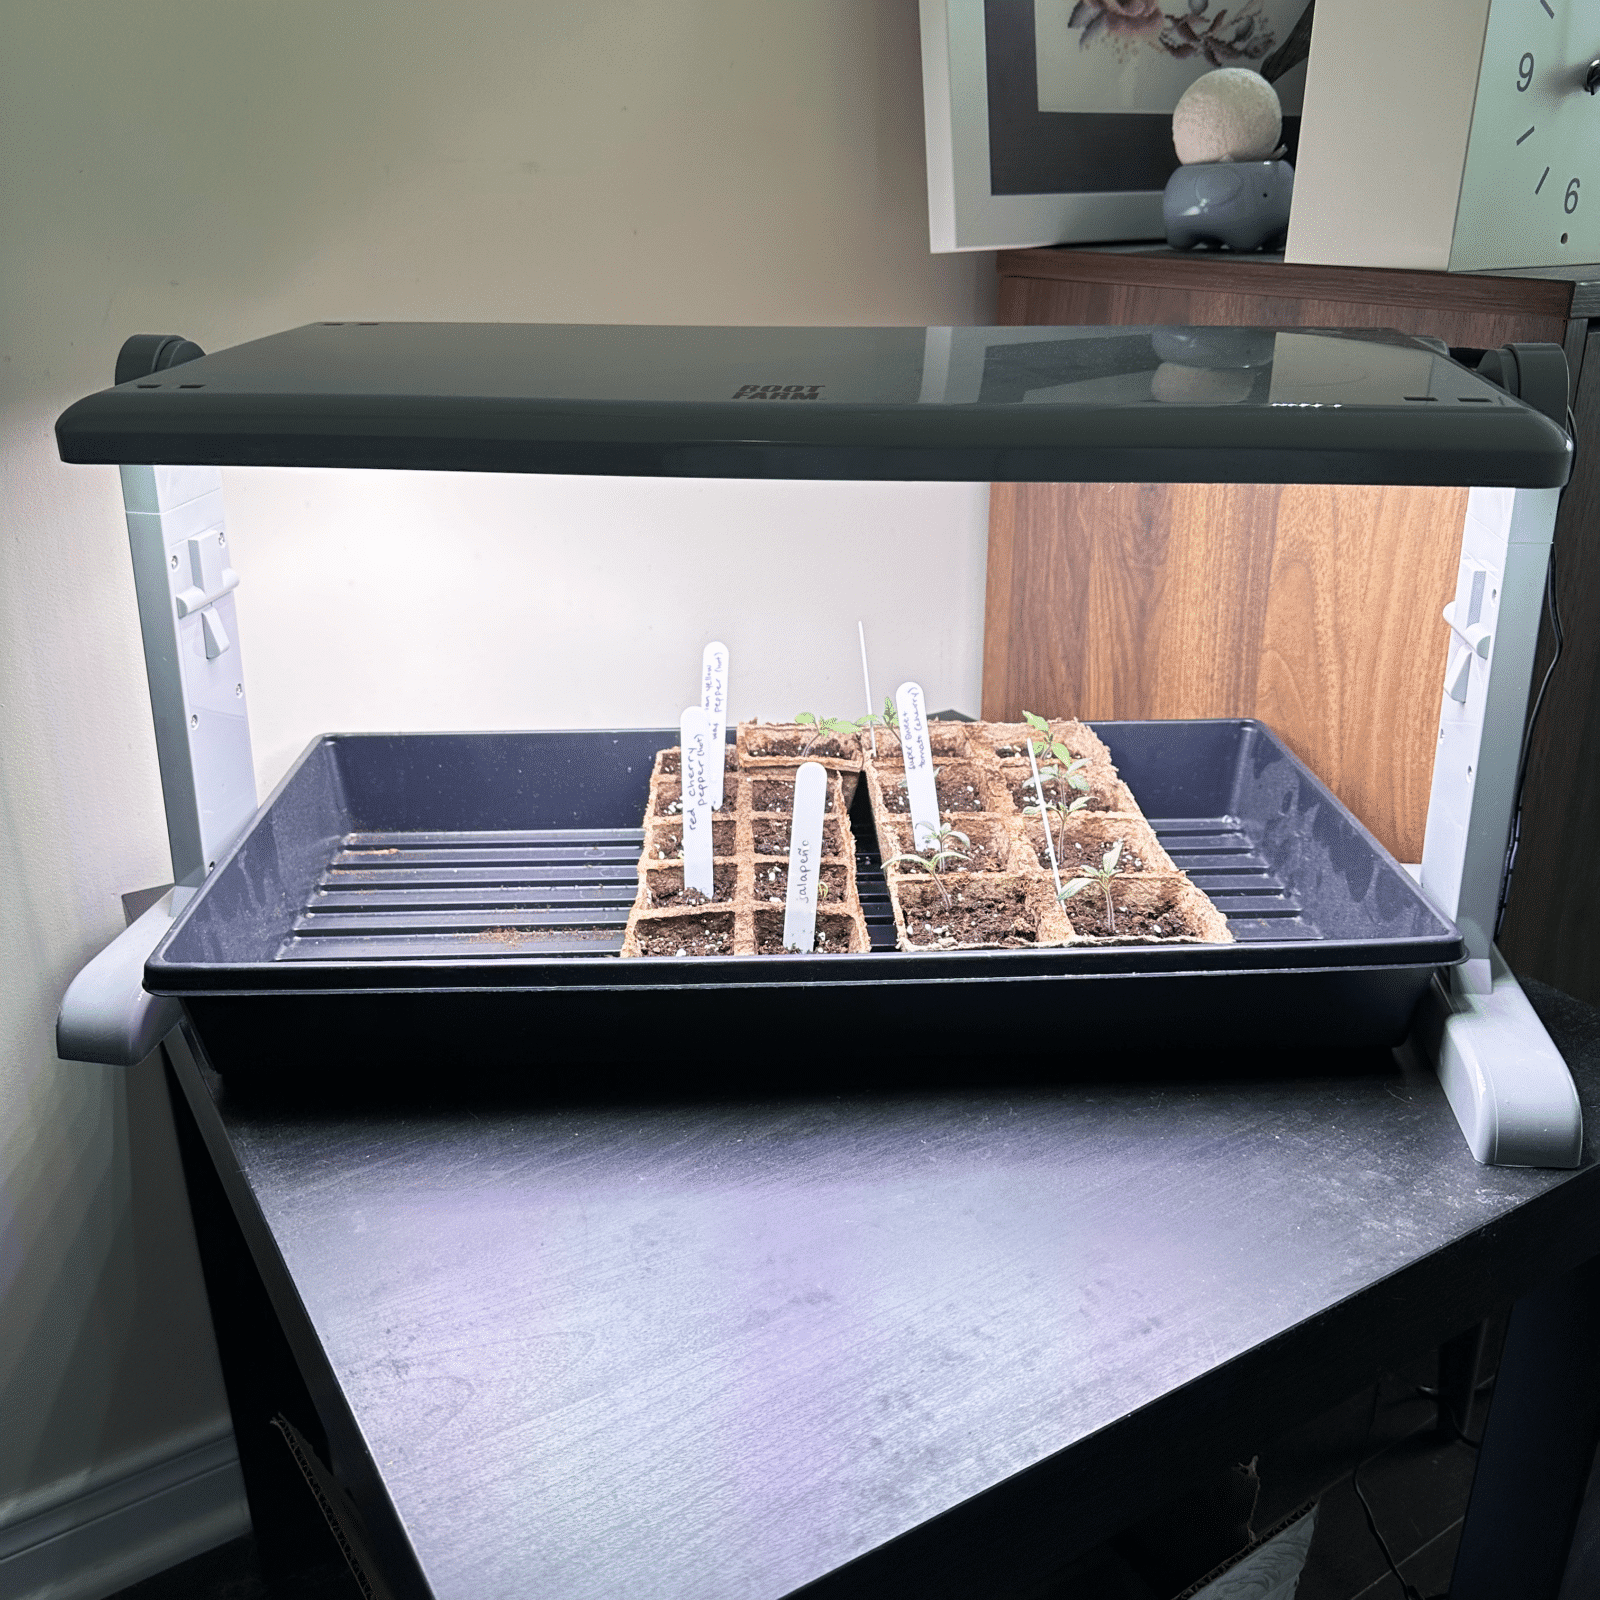
This seed starting setup is similar to the previous one. Begin by filling the pots with MiracleGro Seed Starting Potting Mix and placing a seed in each pot. Label your seedlings with permanent marker on plant labels or popsicle sticks. Assemble the Root Farm Grow Light and plug it in, placing it over the seeds. Water the seeds every one to two days to keep the soil moist.
Pro tip: Try plugging your Root Farm Grow Light into a smart plug. Use the app on your phone to set a schedule so you don’t have to worry about turning it on and off every day!
AeroGarden Seed Starting System
Of these three methods, the fastest way to get your seeds to germinate is, without a doubt, the AeroGarden Seed Starting System. AeroGarden is a hydroponic growing system for 5x faster growth than soil. The AeroGarden Seed Starting System is an accessory that is sold separately from the AeroGarden, and is available for the various models (be sure to choose the Seed Starting System made specifically for your AeroGarden model.)
To start seeds with the AeroGarden Seed Starting System, you’ll need:
- AeroGarden (Harvest Elite is pictured, but you can use any model)
- AeroGarden Seed Starting System accessory (Harvest Elite is pictured; choose the version made for your AeroGarden model)
- Seeds
- Water
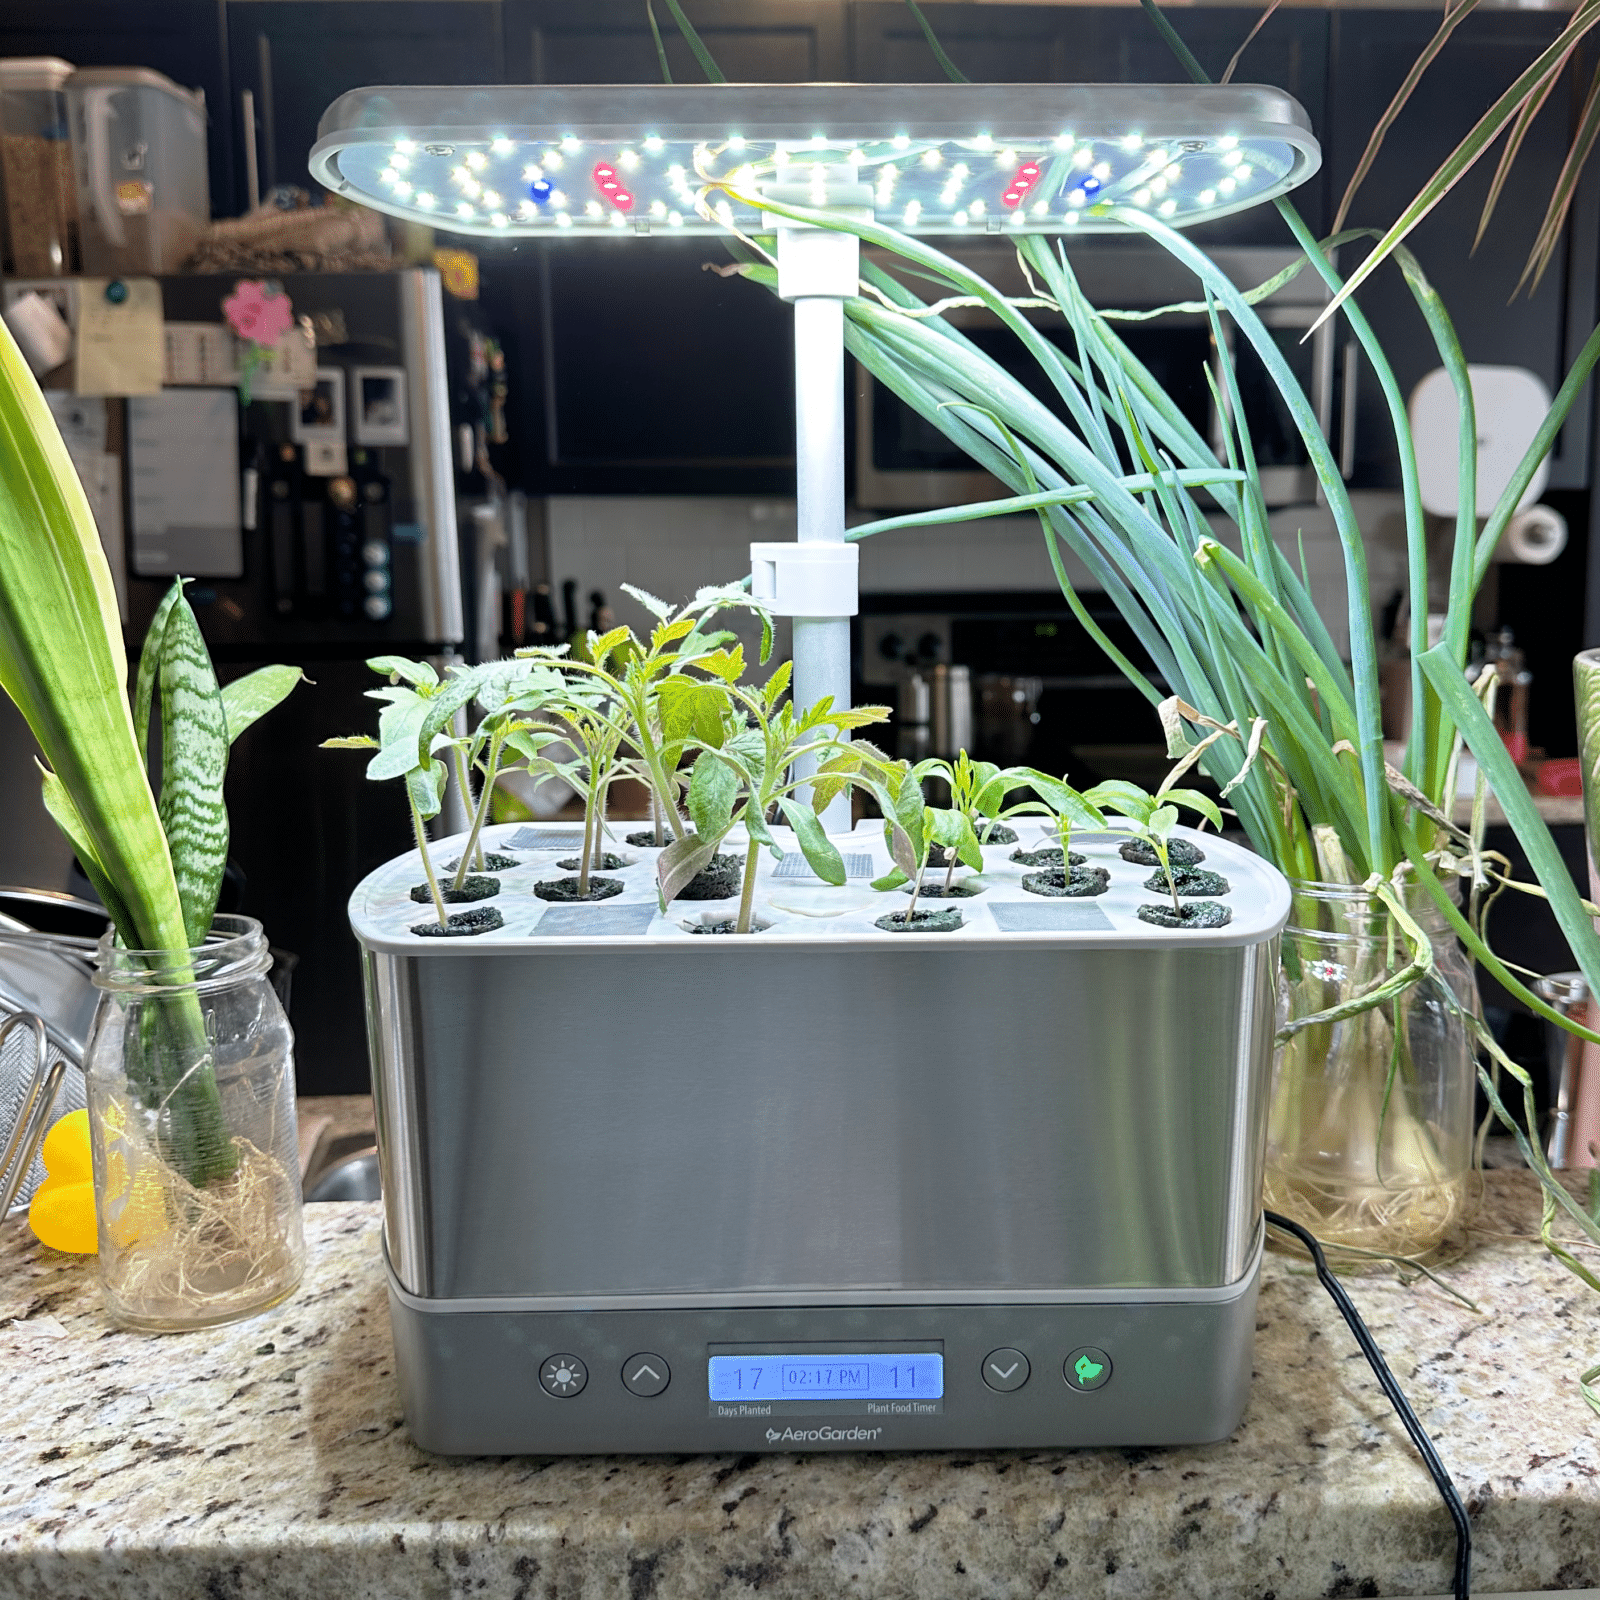
Begin by pre-soaking the grow sponges in water. Swap the standard AeroGarden grow deck for the Seed Starting System grow deck and place one sponge in each of the holes. Place a seed in each of the grow sponges. Plug the AeroGarden in and go follow the steps to start a garden. Fill the reservoir with water and plant food (according to directions on the back of the bottle).
Pro tip: To “label” your seedlings, draw a diagram of the AeroGarden grow deck (or take a photo with a smartphone) and label each space according to which seed you planted where.
For more advice and ideas on Aerogardens, visit www.aerogarden.com.
#easypeasy
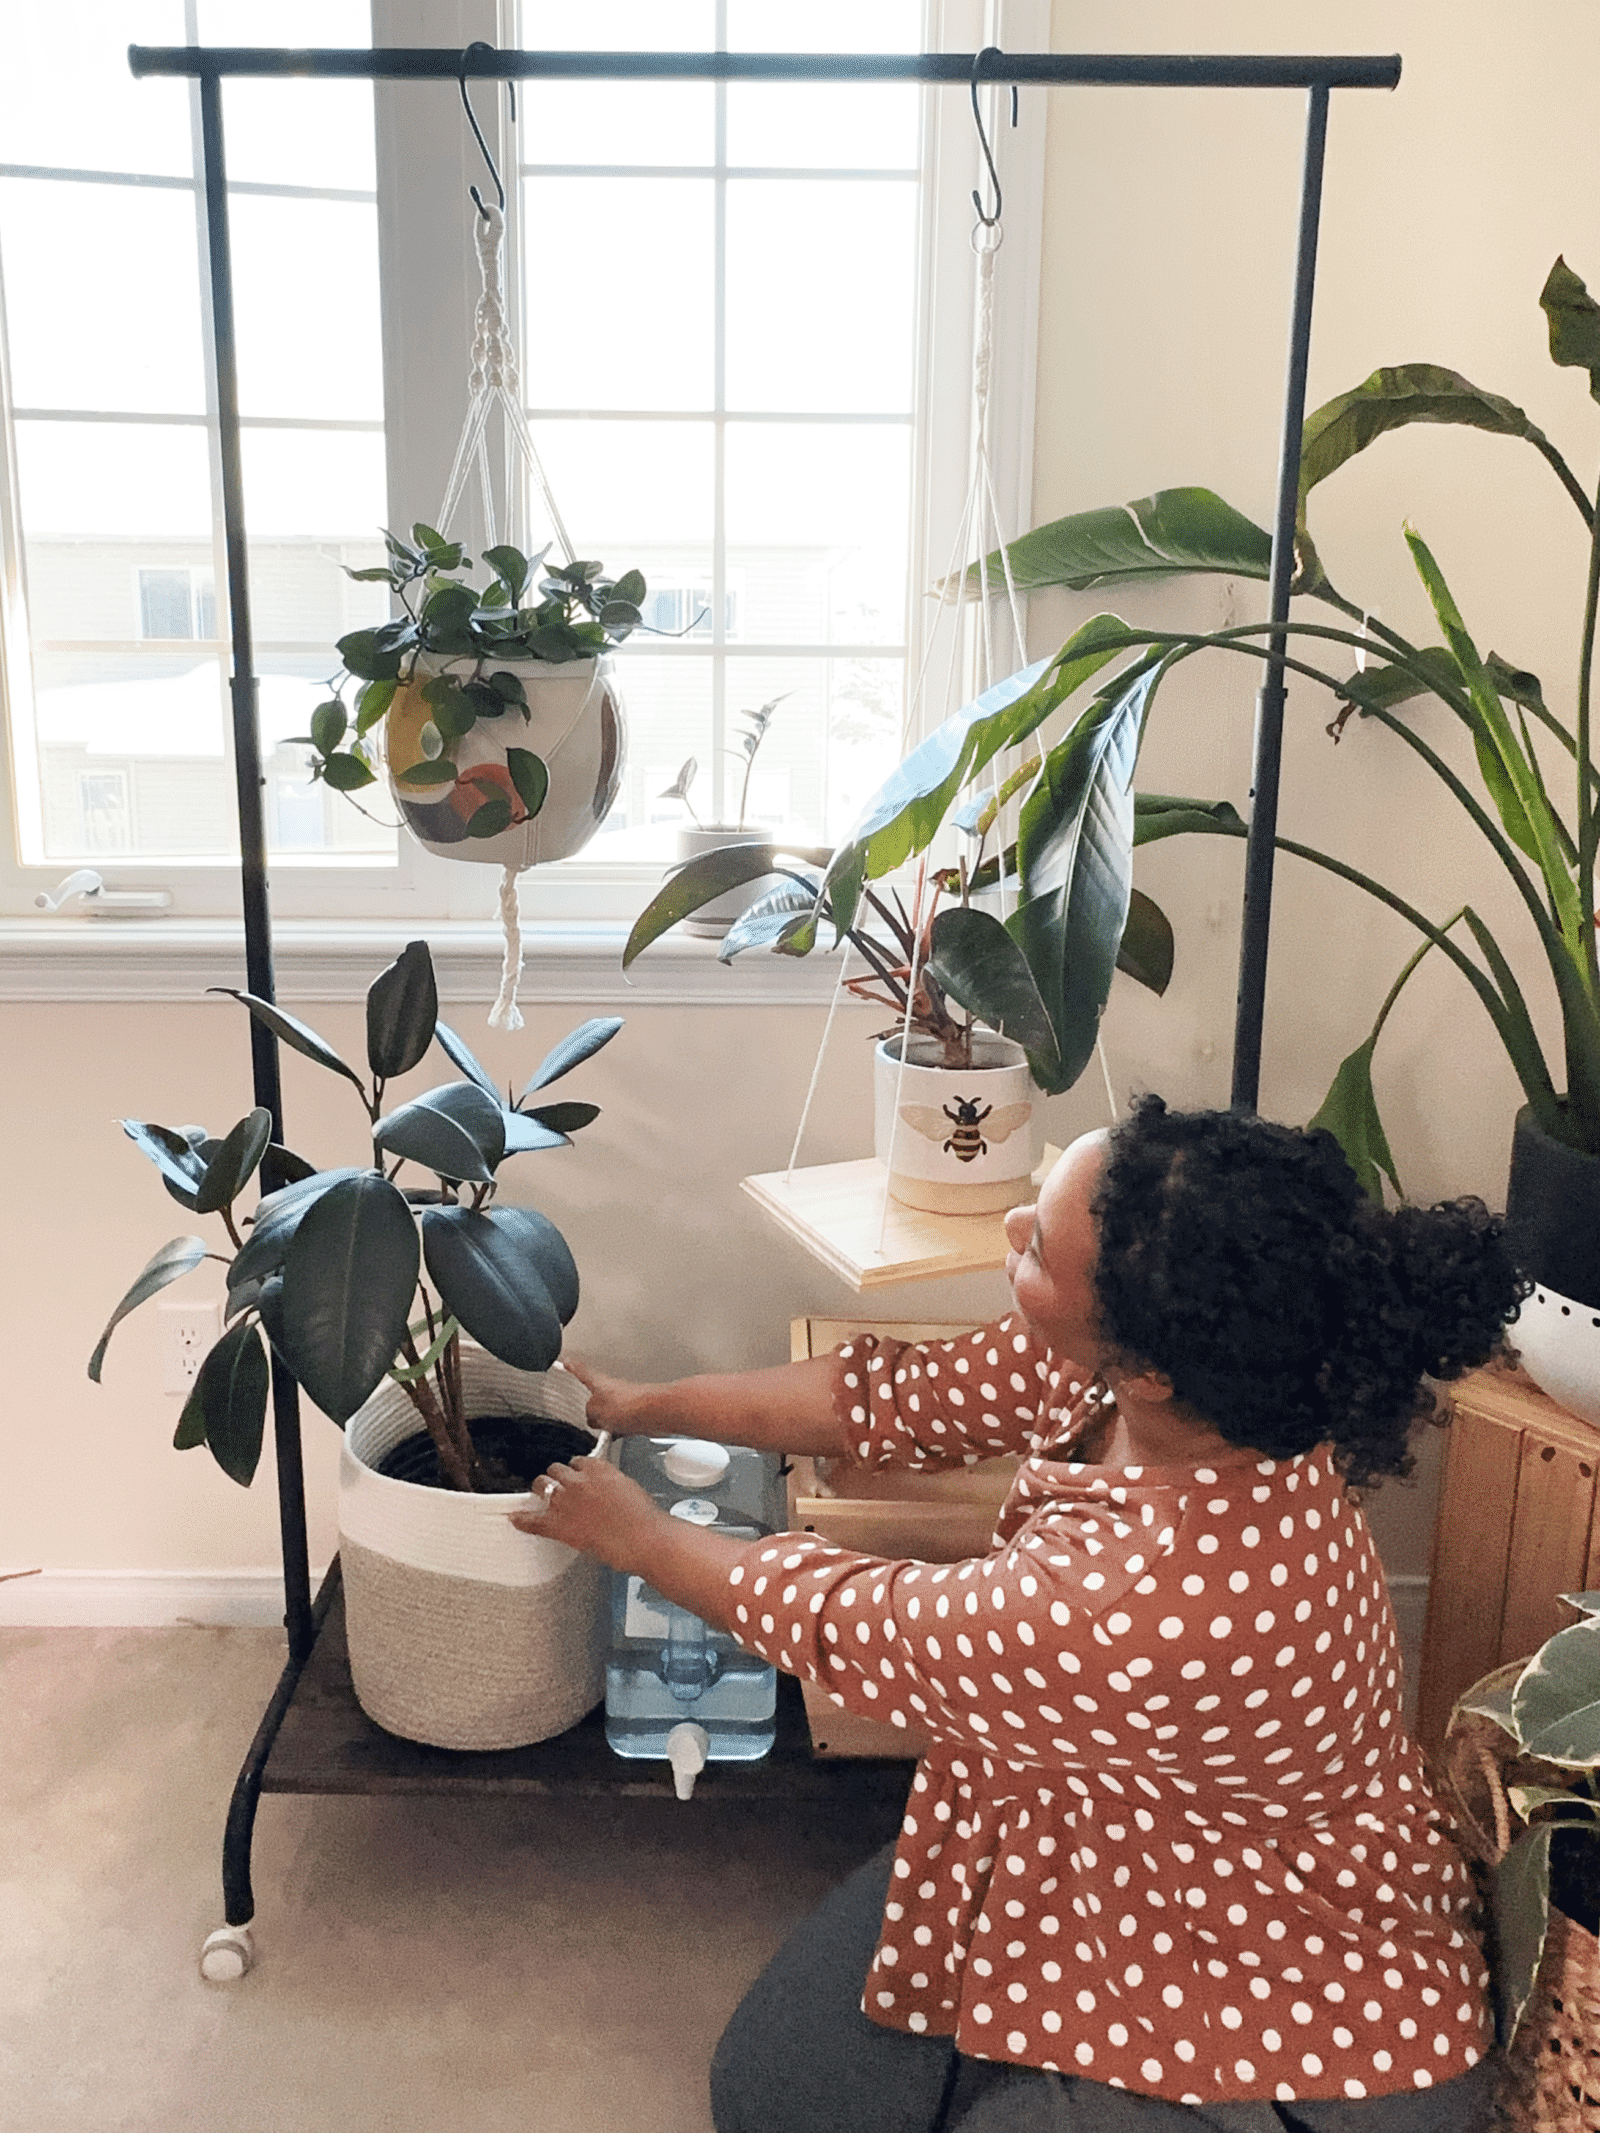
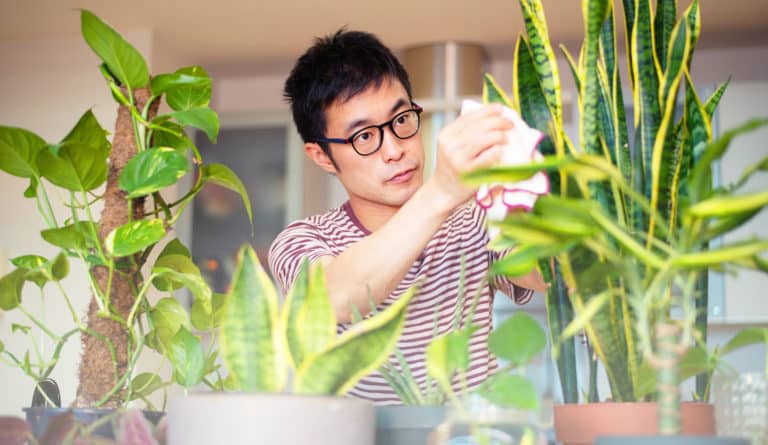
Whether you’ve run out of shelf space for your plant babies or are looking for a rental-friendly way to bring hanging plants into your life, a hanging plant stand can be a cute and functional addition to your space.
here’s how to turn a humble clothing rack into a minimalist plant stand
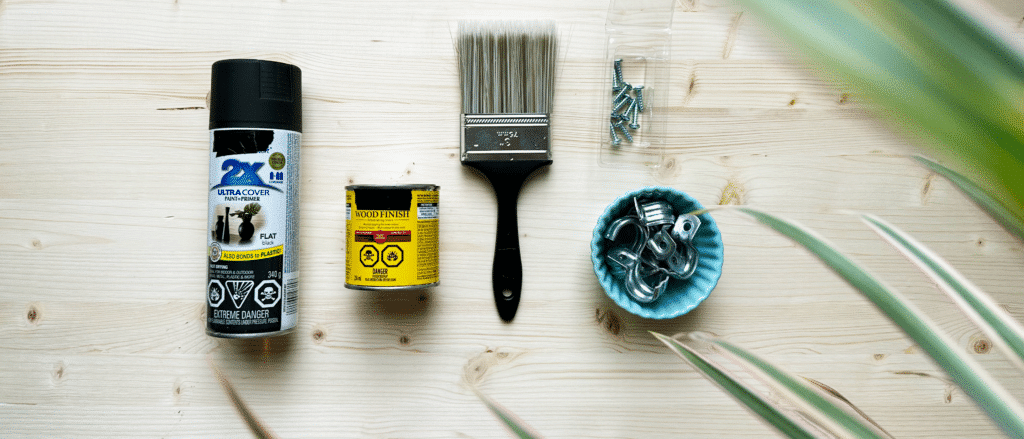
here’s what you need to get started:
- steel clothing rack (available at many big box stores)
- project panel/wood/plywood (to fit clothing rack)
- 4 EMT straps (sized to fit around pipes of the plant stand)
- 4 wood screws
- flat black spray paint (or colour of your choice)
- wood stain
- paintbrush
- drill or screwdriver
- sand paper
- saw
- pencil
- measuring tape
- hanging plants and pots
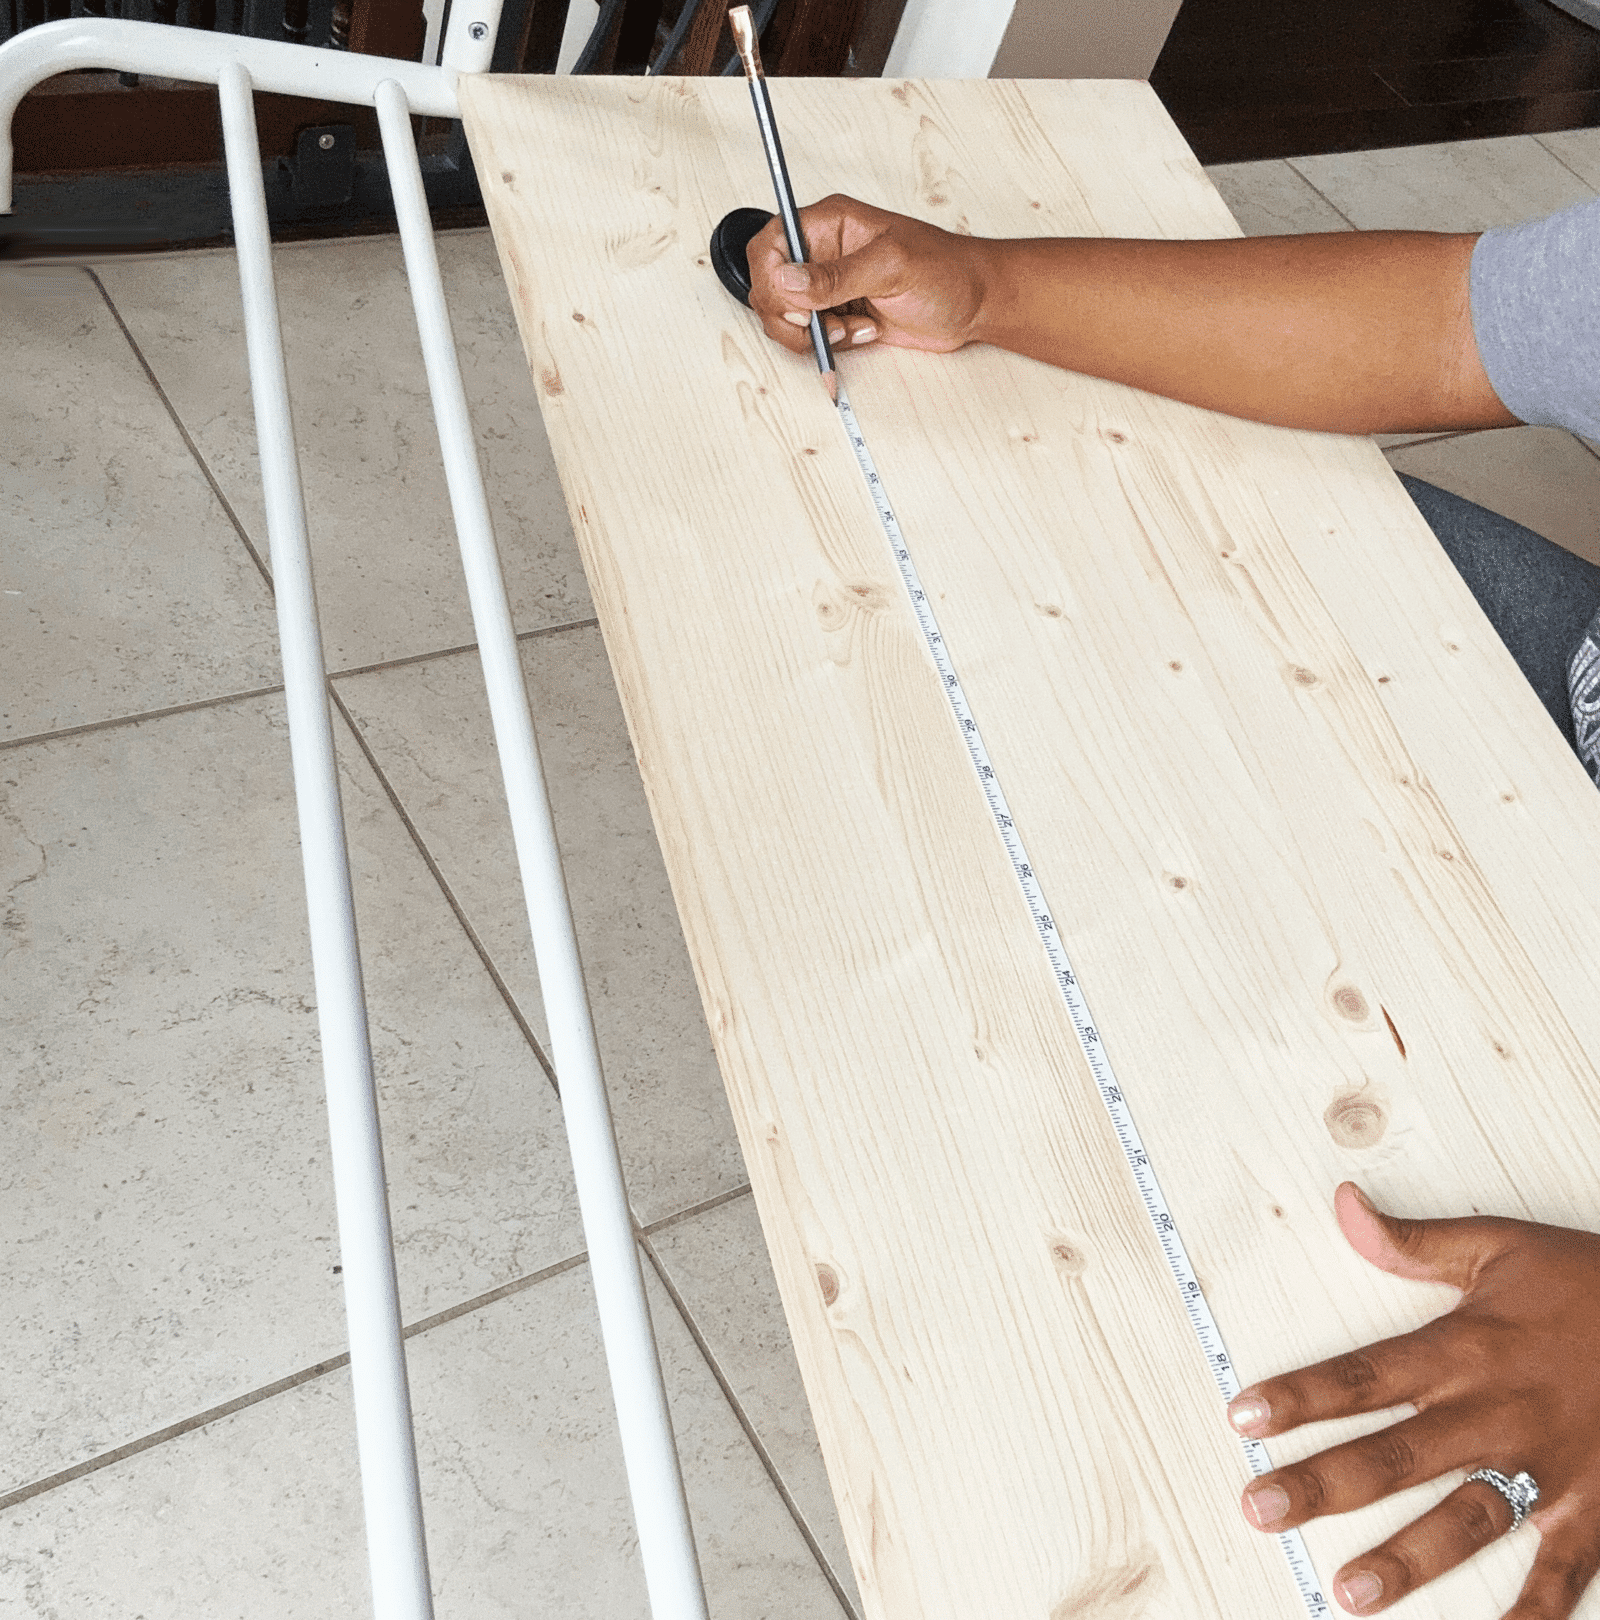
step one.
Measure the base of the clothing rack, where you will eventually add the bottom shelf, and note the dimensions. With a pencil and measuring tape, use those dimensions to mark the piece of wood where it will need to be cut to fit on the base.
step two.
Use a saw to cut along the guidelines you made in step one.
If you don’t have a saw (or aren’t comfortable using one), most major hardware stores will cut wood pieces down to size for you – just be sure to bring the exact dimensions you need!

step three.
Sand any cut edges on the piece of wood.rnrnTo finish the shelf, coat it with the wood stain of your choice. Skip this step for a more boho look, or paint the shelf instead for a modern farmhouse vibe.
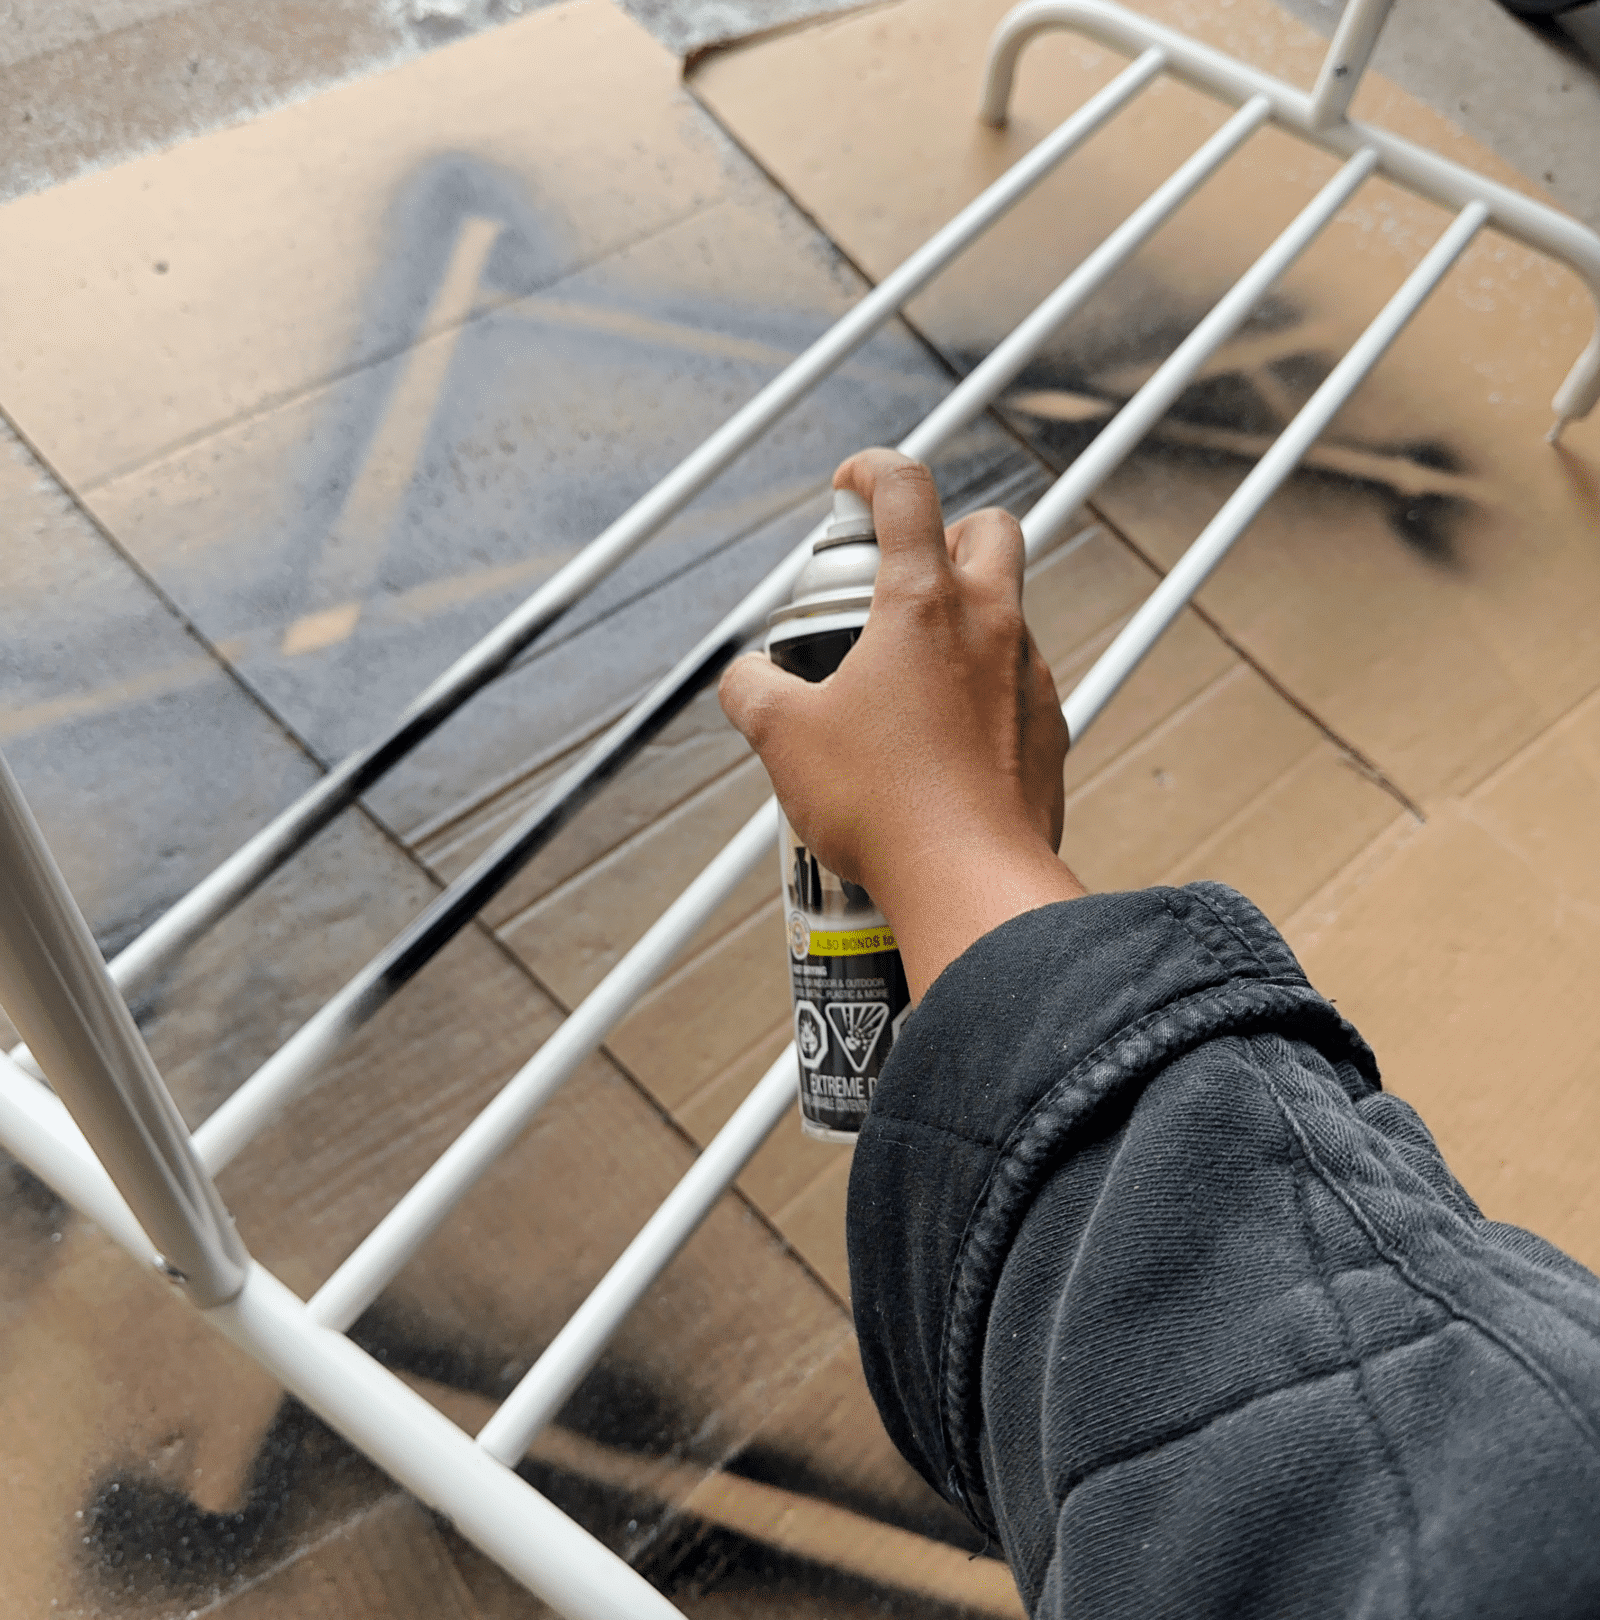
step four.
Spray paint the clothing rack. You may need to do several thin coats to ensure full coverage, letting each coat fully dry before going in with the next.
step five.
Use four EMT straps and wood screws to attach the piece of wood to the bottom shelf area of the clothing rack.
step six.
The final step – and my favourite one! – is to style your plants on your new plant stand. Place larger plants or plant care supplies on the lower shelf, and smaller hanging plants in macrame hangers from the top bar. Vary pot and basket choice to really express your style and help your new plant stand fit in with your space!
#easypeasy
let’s be honest: watering plants can feel a bit like a chore sometimes. We love our plant babies, but life just gets in the way.
but do not fear – plant straws are here. This simple, easy to install self-watering plant straw system is your key to plant-watering freedom. So, whether you forget to water your plants, or you are planning a getaway and want to make sure yours are taken care of, then this post is for you.
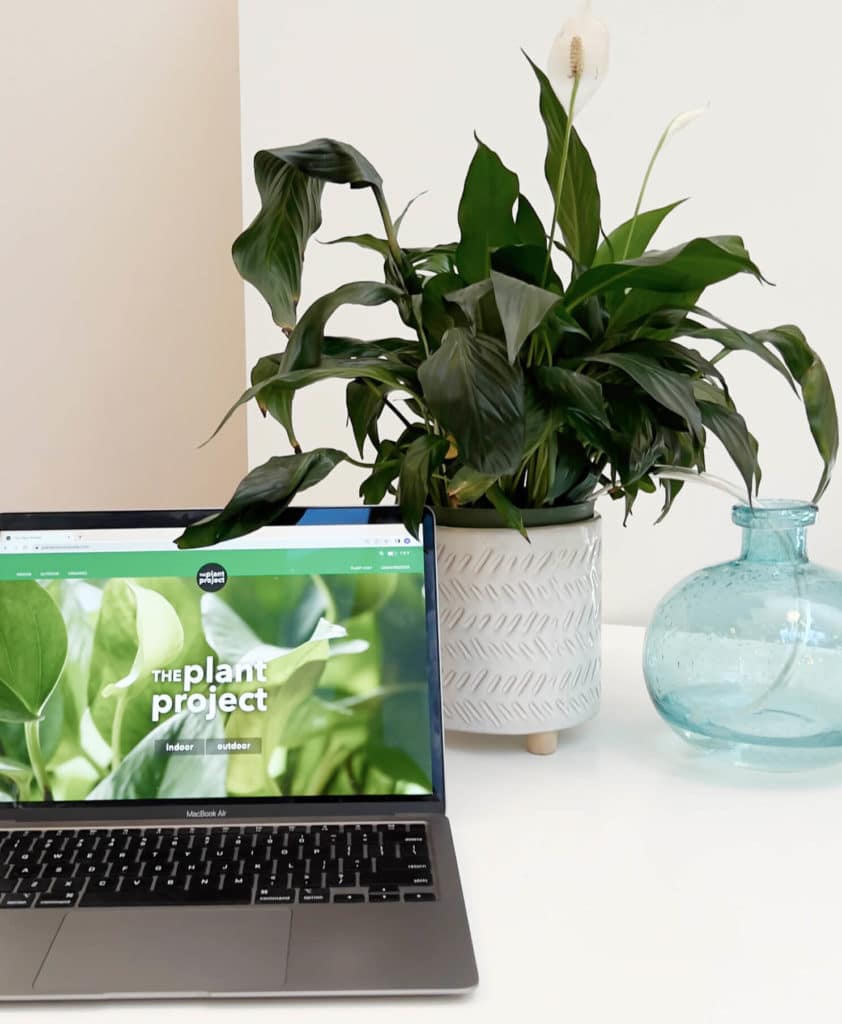
thirst things first: what are plant straws?
Plant straws are made using two simple things : a long cotton cord, and a thin metal tube. One end of the cord is buried in the soil of a plant, while the other end lies in a vessel of water. The cord draws out moisture from the vessel and releases it into a plant’s soil. The thin metal tube, which the cord is strung through, keeps the cord stable – and makes the entire system look chic. So, expect LOTS of compliments pouring in once you have set up your plant straw.
how do plant straws work?
If you are shaking your head furiously and thinking, “this can’t be real,” you are not alone. The idea of a cotton cord watering your plants can seem too good to be true. But don’t click away just yet! There’s a scientific explanation to how all this works.
The cord inside the tube wants to stay evenly moist, so it constantly draws out water from the vessel you placed it in. Meanwhile, your soil instinctively absorbs moisture from the wet cord when it needs a dose of hydration.
ready? let’s gro.
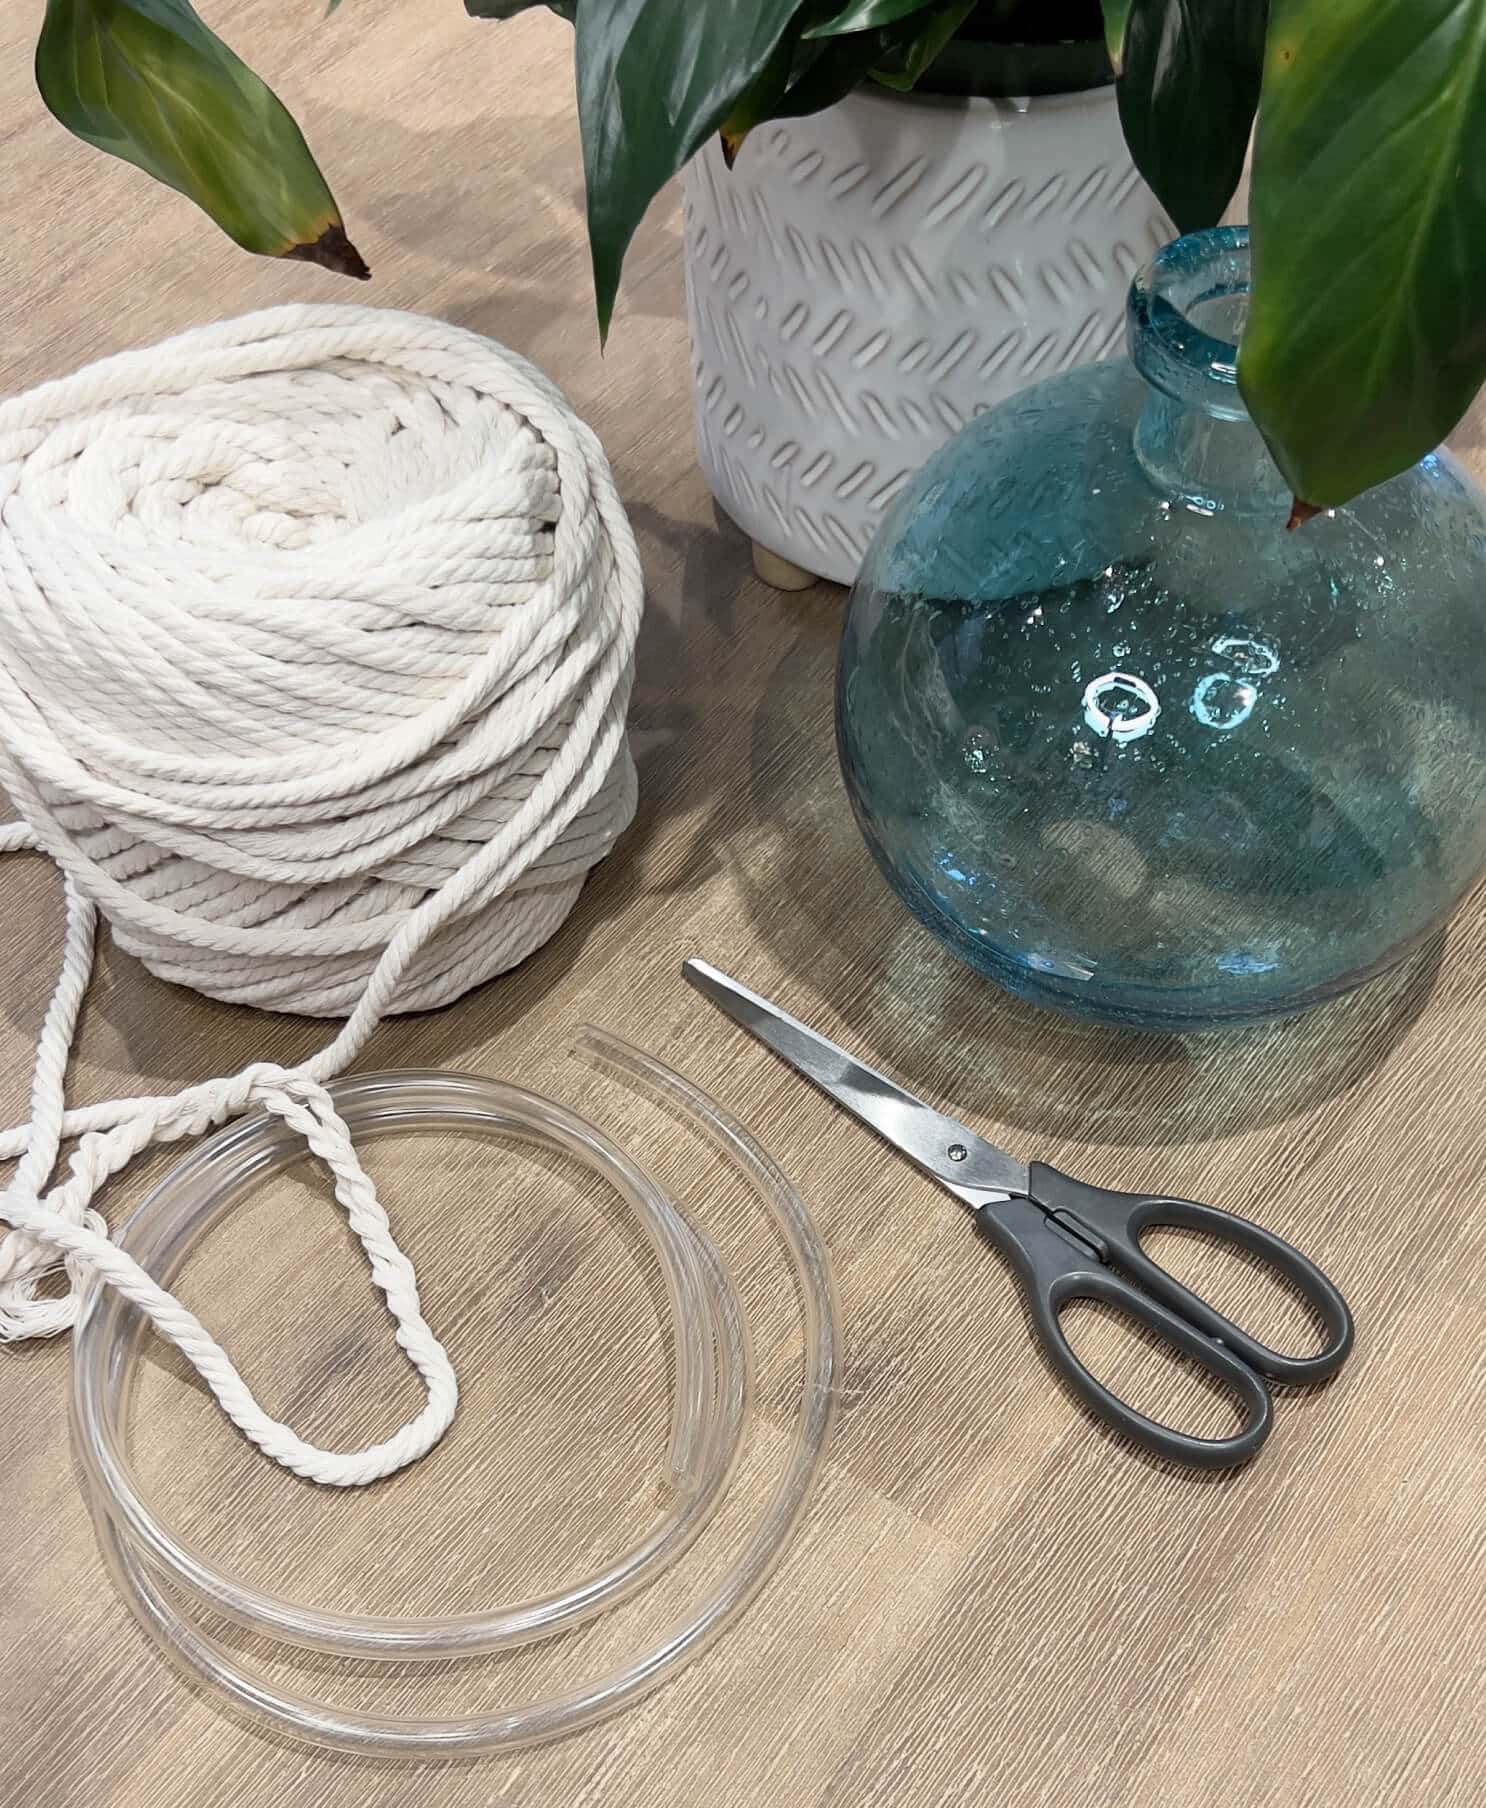
here’s what you need to get started:
- A plant tube of your choice
- A cotton cord that is a several inches longer than your tube
- A glass vessel
- And – obviously – water!
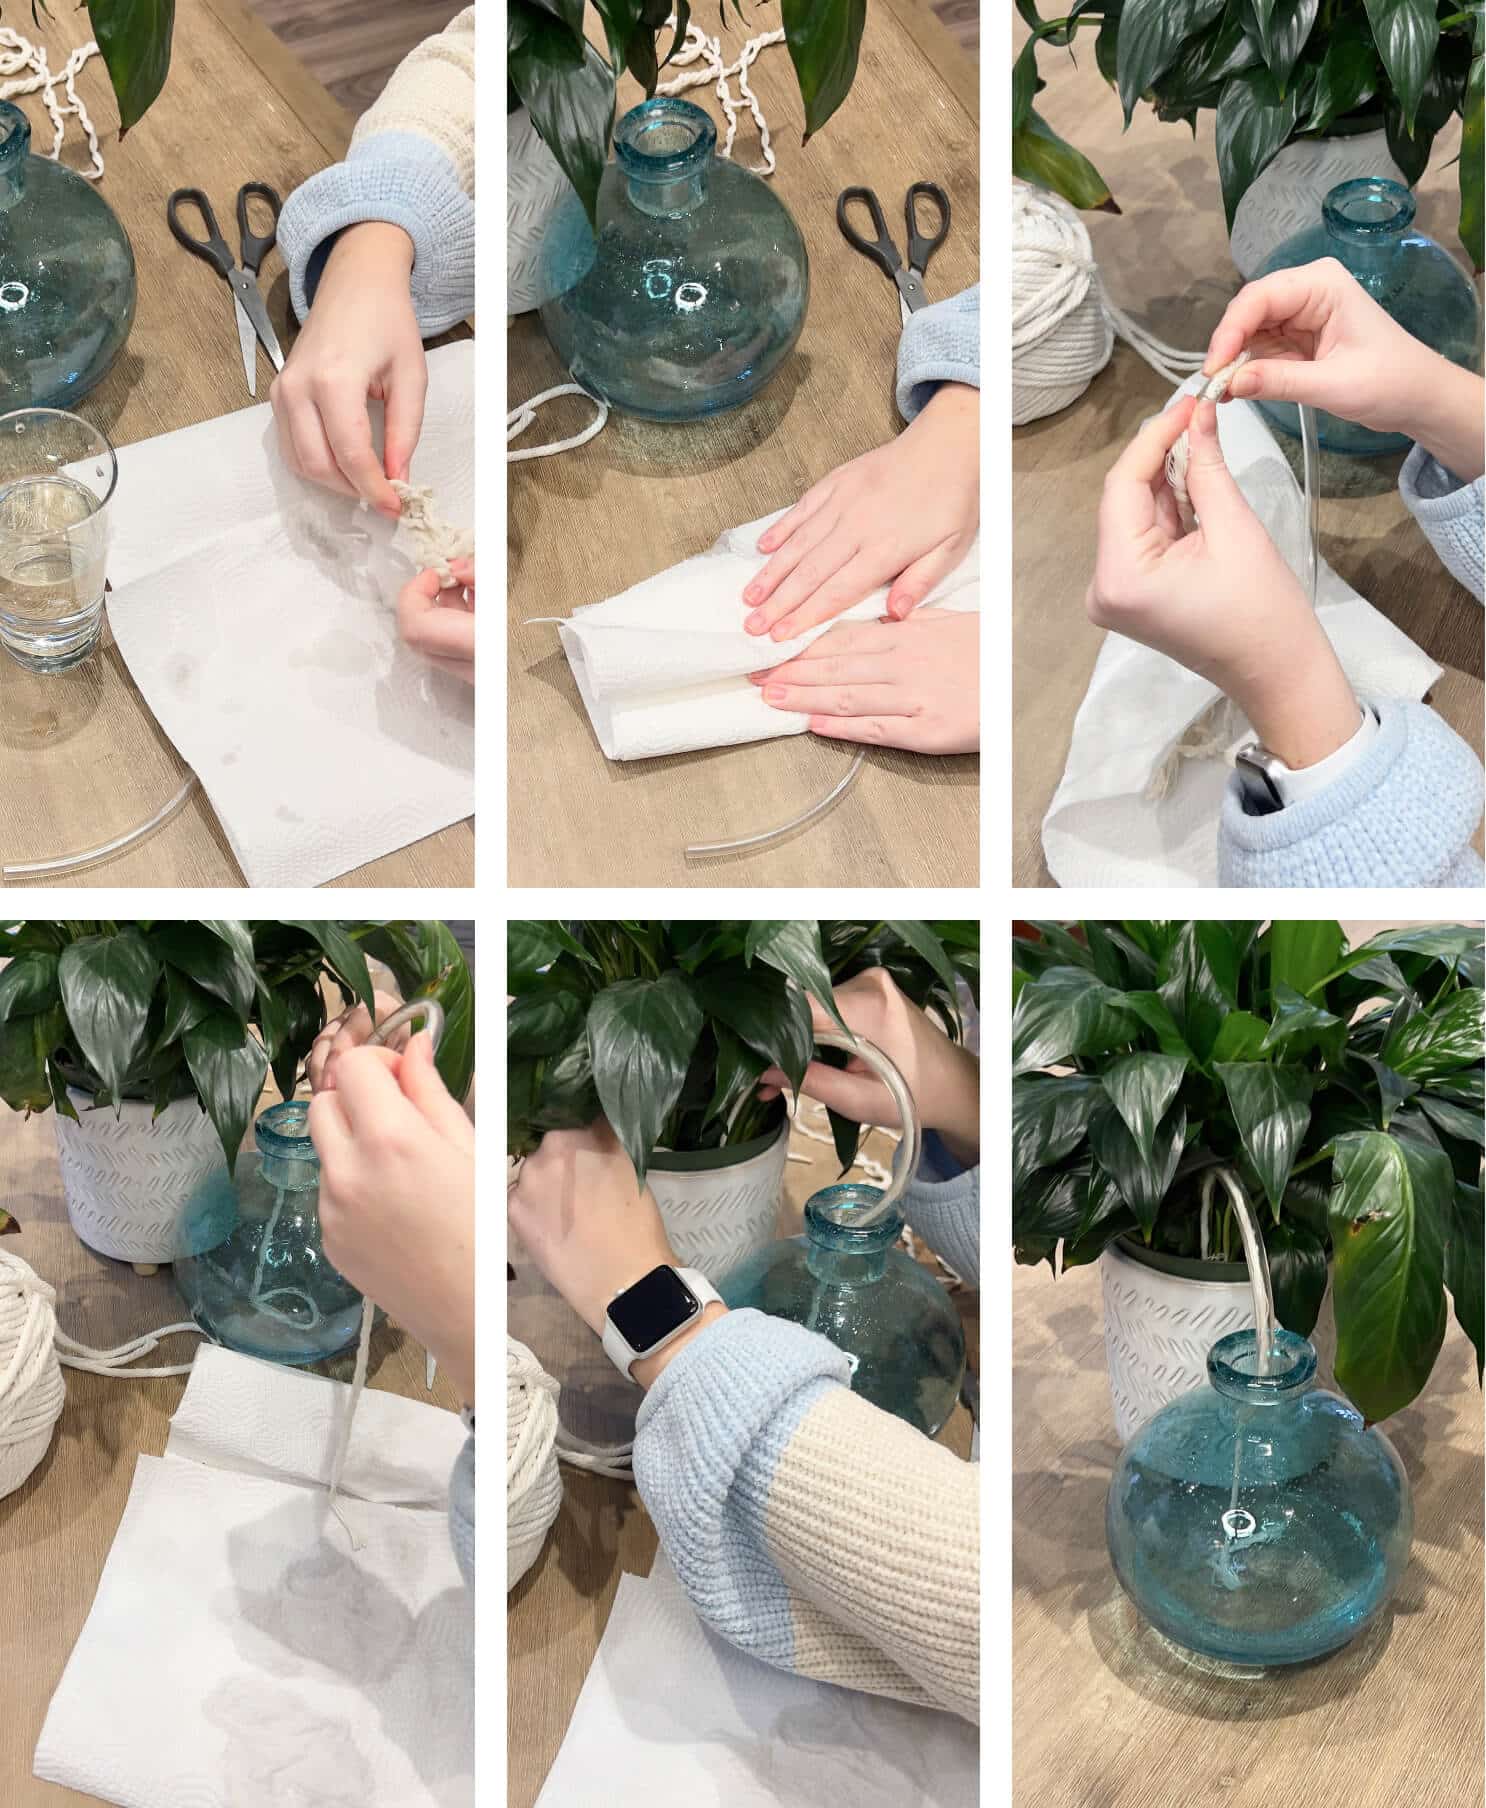
step one. measure twice, cut once.
Start by measuring how much of the cotton cord and tube you need. Be sure to leave a few inches that can sit in your plant as well as in the water of your vessel.


step two. H2O is the way to go
Next up, wet your cotton cord in water until it is fully soaked. Then, squeeze out the excess.
step three. show us your roots
Feed your cord through the tube. Take one end of your cord and push it several inches below the soil’s surface. Depending on how much water your plant needs, you might want to bury more of your cord within.
step four. just add water
Feed what is left of your cord through your tube. Then, fill up a glass vessel with water, and place the remaining end of the cord in it.
step five. sip sip, hooray
Cheers to crossing “water my plants” off your to-do list for good! Now that you have set up your self-watering plant straw system, the only time you will need to think about watering your plants is when it’s time to feed them, or when you need to refill your vessel.
Do your plants actually need a straw?
The answer: it depends. The thirstier your plant is, the more we recommend you invest in a plant straw! For example, if you have got a Monstera Deliciosa or Monstera Adansonii, a plant straw could really benefit their extra hydration needs.
Got more questions about plant straws? Or just want to chat? Come hang out with us and our plant experts in the Plant Chat.
#easypeasy
plant straw sstem
plant straw
plant straw

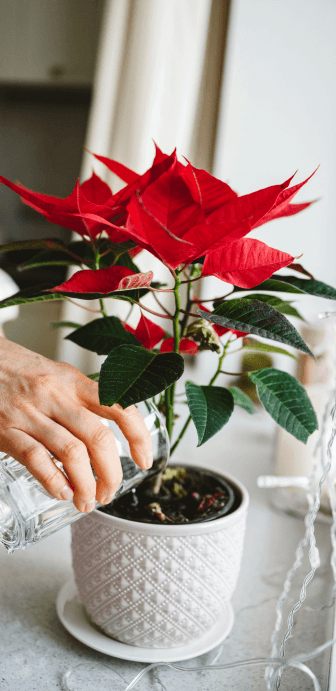
poinsettia
aka euphorbia pulcherrima
Poinsettia are native to Mexico and Central America. They are often used as decoration and gifts during Christmas holidays.
variations
There are over 100 varieties of Poinsettias. Some variations include ‘Premium Picasso’, ‘Monet Twilight’, ‘Shimmer’, and ‘Surprise’ poinsettia.

light
indirect
Need about 6 hours of indirect sunlight daily

water + feeding
not too thirsty
Water in moderation when soil is dry to the touch

toxic
kind of
They’re not toxic to humans or pets. However, the white, milky sap can irritate some people’s skin and can cause an upset stomach.

location
flexible
They’ll be happy in a semi-shaded or sunny area

humidity
love it
Poinsettia enjoy 50 – 75% humidity, so boost up the moisture

size
small friends
Potted poinsettia will remain small at 8 – 12 inches

pro tip
dry soil is ok
Allow the soil to dry out between watering, especially in the spring.

fun fact
need light and dark
The short days and long nights of fall and winter are perfect for poinsettia. It’s actually what causes them to bloom.

beyond the basics
-
soil + potting
Whether poinsettia is growing indoors or outdoors, they prefer a loose, well-draining potting mix. Consider using Miracle-Gro® Moisture Control® Potting Mix. You can also add Perlite and Peat Moss to your soil for some added nutrients.
-
when to repot
As your poinsettia grows, so does its roots. To avoid your poinsettia getting root-bound, repot it in the spring. It’s generally recommended that by mid-May, your poinsettia will be ready to repot. Choose a pot that is about 2 inches wider and deeper than its current pot. And of course, refresh the soil when you repot.
-
propagation
The most common way to propagate poinsettia is by taking a cutting. Propagating from cuttings ensures a clone of the parent plant. No surprises! To start, wait until the spring to take your cutting. Using sharp scissors or pruners, cut a 3 – 4 inch stem from the parent plant. Then cut off a few of the lower leaves to promote root growth from the cut edge. Be sure to leave at least 3 leaves at the top of the cutting. Transplant your cutting to a small container with well-draining potting mix such as using Miracle-Gro® Seed Starting Potting Mix. Keep your cutting in a bright, humid area, and mist the leaves regularly to stimulate growth.
-
pest control
Whiteflies are the most common pests for poinsettias. Do regular checks under the leaves of your poinsettia and keep an eye out for clumps of greenish eggs. Use a gentle insecticide like Ortho® Bug B Gon® ECO Insecticide Ready-to-Use to easily and quickly get rid of white flies.

troubleshooting
-
Why are my cuttings collapsing?
Bacterial rot. This causes the base or stem of the cuttings to become mushy and eventually collapse. You may also notice a smell surrounding your plant, which is also caused by this bacterial infection. You may be able to mitigate this by proper watering and misting practices. It’s best to cut off misting and watering for a while once you notice the stems are a little soft.
-
Why are my poinsettia’s leaves turning black?
Temperature fluctuations. Sudden temperature fluctuations will shock these tropical plants. To keep your poinsettia happy, make sure it’s in a bright space that can also receive a few hours of shade or darkness. Be sure to keep your plant away from radiators, fireplaces and space heaters too.
-
Why is my poinsettia so pale all of a sudden?
Could be spider mites. These little pests feed off the plant’s sap, causing the leaves to turn pale and sometimes develop little red spots. If you catch spider mites early enough, you may be able to salvage your plant. Use a gentle insecticide like Ortho® Bug B Gon® ECO Insecticide Ready-to-Use to gently take care of this problem. A recovering poinsettia will perk up and brighten up within a week or two.
-
Why are my poinsettia leaves drooping and yellow?
Over- or underwatering. Both over and under-watering your poinsettia will cause its leaves to droop or look wilted. If you’re over-watering your plant, be sure to let its soil dry out a bit. Discard any excess water at the bottom of its pot to prevent it from sitting water and developing root rot. If you’re underwatering, consider boosting your watering routine with Miracle-Gro Indoor Plant Food for the next two watering cycles. You can also start misting the leaves of your poinsettia to increase its water in-take. But don’t overdo it, let the soil dry out a bit between watering.
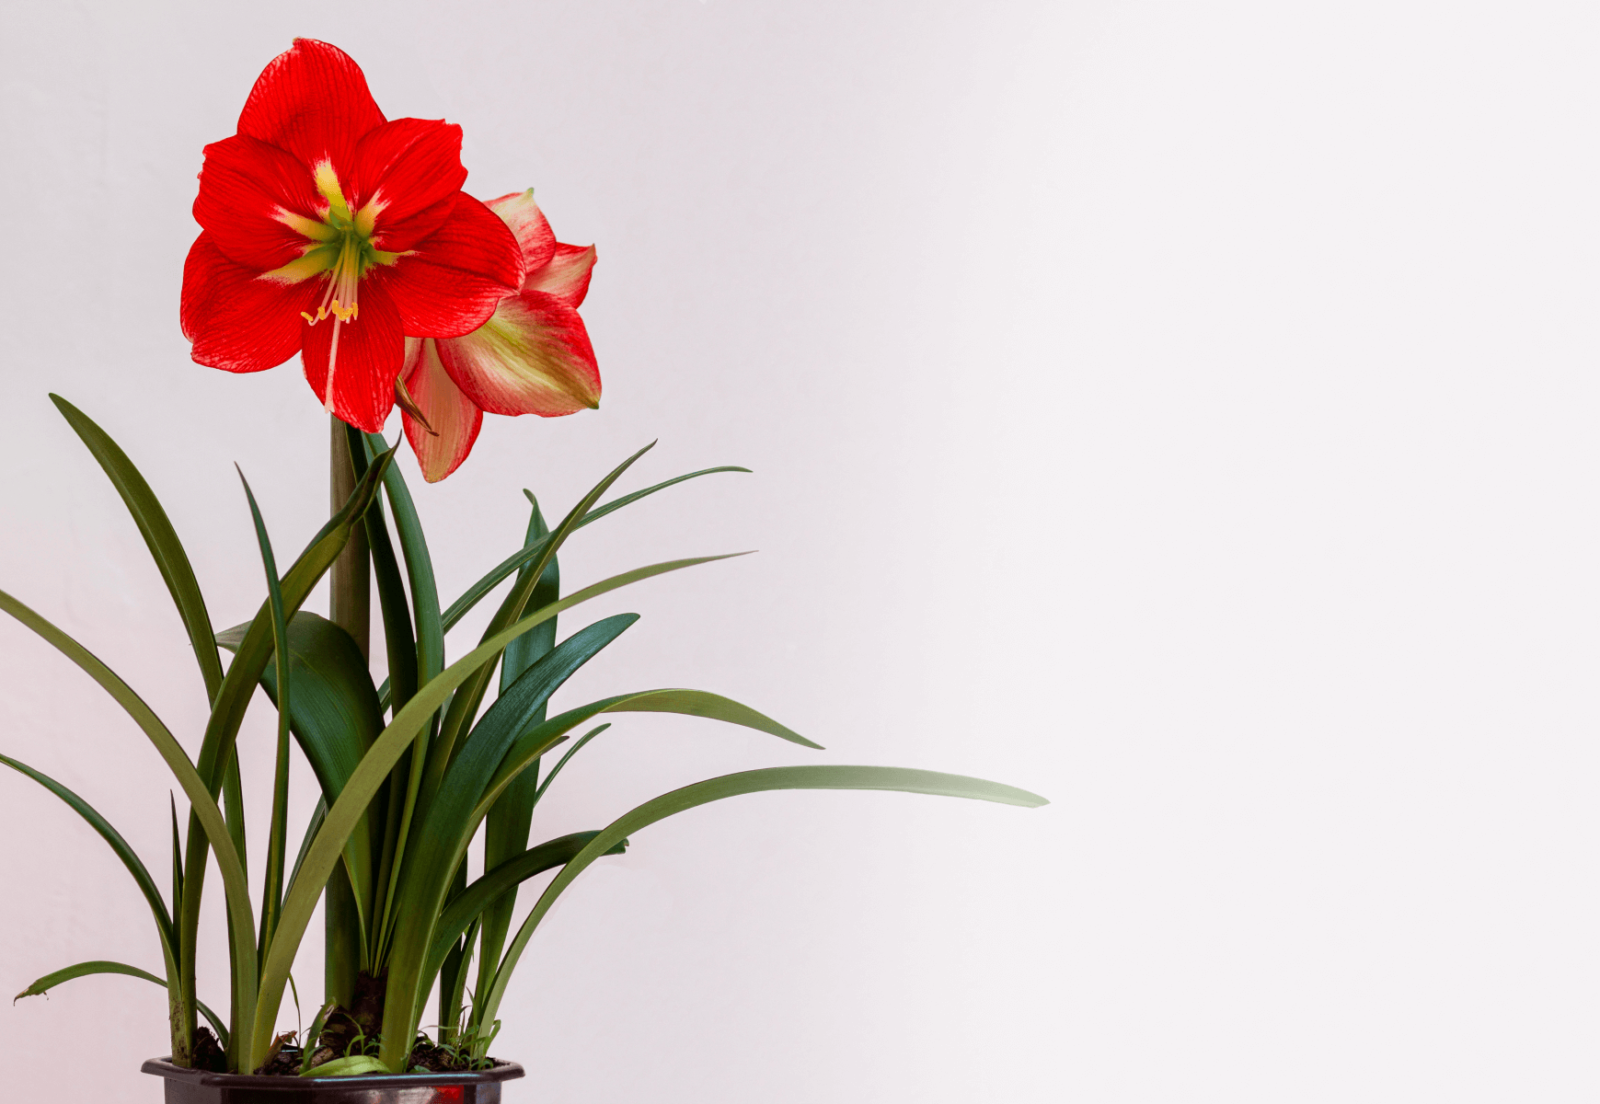
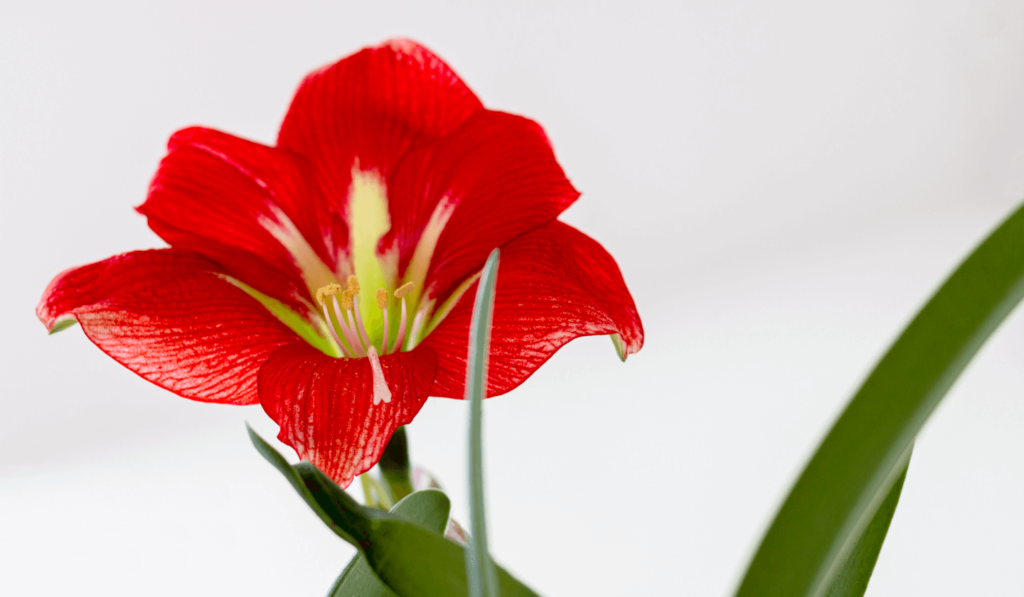
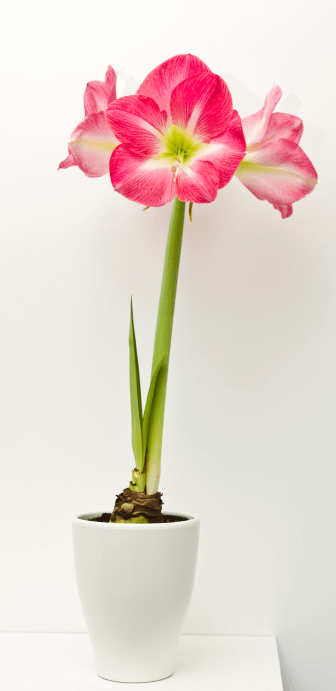
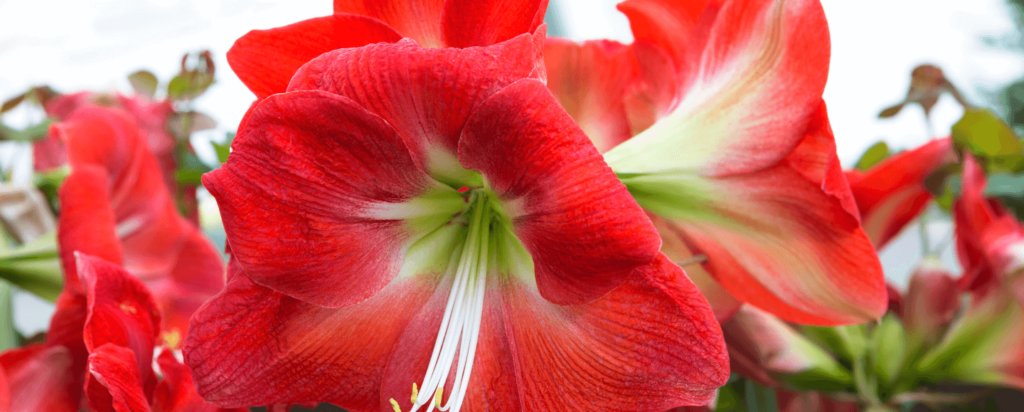
amaryllis
aka hippeastrum genus
a plant native to warm, tropical climates. There are over 1600 species in this plant family.
variations
Ferrari’ Amaryllis, ‘Dancing Queen’ Amaryllis, ‘Mont Blanc’ Amaryllis, ‘Papillio Improved’ Amaryllis, ‘Faro’ Amaryllis, ‘Estella’ Amaryllis, ‘Athene’ White Amaryllis, ‘Double Dragon’ Amaryllis
light
bright, direct
Needs a sunny window to get at least 4 hours of sun daily
water + feeding
not too thirsty
Only water once the top 2 inches of soil have dried.
toxic
yes
The bulbs are the most toxic, but blooms can also be hazardous if eaten
location
picky pals
Need lots of bright, direct sunlight
humidity
not too much
Amaryllis don’t need misting
size
medium
Can grow up to 4 – 6 inches
pro tip
big bulbs mean lots of flowers
That’s right. We like big bulbs, and we can not lie. The bigger the bulb the more blooms you can expect. In fact, a Jumbo bulb (34/36 cm) can produce 3 stems with about 4 to 5 flowers per stem.
fun fact
It’s a look-a-like
The flowers on an amaryllis look very similar to a lily but they are not actually the same flower. They are very distant relatives!
beyond the basics
-
soil + potting
Amaryllis needs to be planted in a light, well draining potting soil. Consider using Miracle-Gro® Indoor Potting Mix. The combination of coconut coir and perlite help control moisture and release water when your plant needs it. If you’re growing a single amaryllis bulb, you can plant it in a 6-inch pot. If you’re growing multiple bulbs (about 2 –3) use a bigger pot, closer to 10 – 12inches. As always, make sure your pot has a drain hole and be sure to leave the top 1/3 of your amaryllis bulb sticking out of the soil.
-
when to repot
Your amaryllis won’t need to be repotted very often. In most cases, you will only need to repot your amaryllis after 3 – 4 years. It’s best to repot once your amaryllis has gone through a dormant stage, typically this means repotting in the spring.
-
propagation
There are 3 ways to propagate amaryllis:
- Through Seeds. Look for seed pods about four weeks after your amaryllis begins to flower. When the seeds are ready, they’ll split open a bit and turn yellow. Then you can gently shake out the little black seeds.
- Separating bulbs/offsets. Look for firm bulblet that are about a third of the size of the “mother” bulb. Trim back any extra foliage to 2 inches above the bulb. Gently remove the bulblets and replant as soon as possible. You can remove the bulblets with either a small knife or just your fingers.
- Choose a bulb at least 6 inches in diameter. Cut into four pieces, vertically, making sure each section has at least two scales. Plant with the basal plate (bottom) of the bulb pointing down, covering only a third of the bulb with soil.
-
pest control
Keep an eye out for common pests like mealybugs and fungus gnats. If you spot these pesky bugs, you can use a gentle insecticide like Ortho® Bug B Gon® ECO Insecticidal Soap to get rid of them without damaging your plant.
troubleshooting
-
Why won’t my amaryllis bloom?
There could be a few reasons. The main reason could be that your amaryllis isn’t getting enough light. Once you’ve moved your plant to a bright window that gets light for about 4 hours a day, you should see blooms. Still nothing? Try adding a little plant food to bump up the nutrients. Consider using a tropical plant food like Miracle-Gro® Tropical Plant Food.
-
Why are my amaryllis leave drooping?
Over or underwatering. The issue could also be that your amaryllis isn’t getting enough light. If you know that your watering schedule is okay, then try moving your plant to a more direct light source.
-
How do I know if my amaryllis bulb is rotten?
Look for colour and texture. If your bulb has a uniform colour and firm texture, it’s a healthy bulb. If you spot signs of a pest infestation, mold or any damage to the actual bulb, these are red flags that indicate your bulb will likely rot. Seeing shriveled or brown skin on the outside? That’s totally normal.
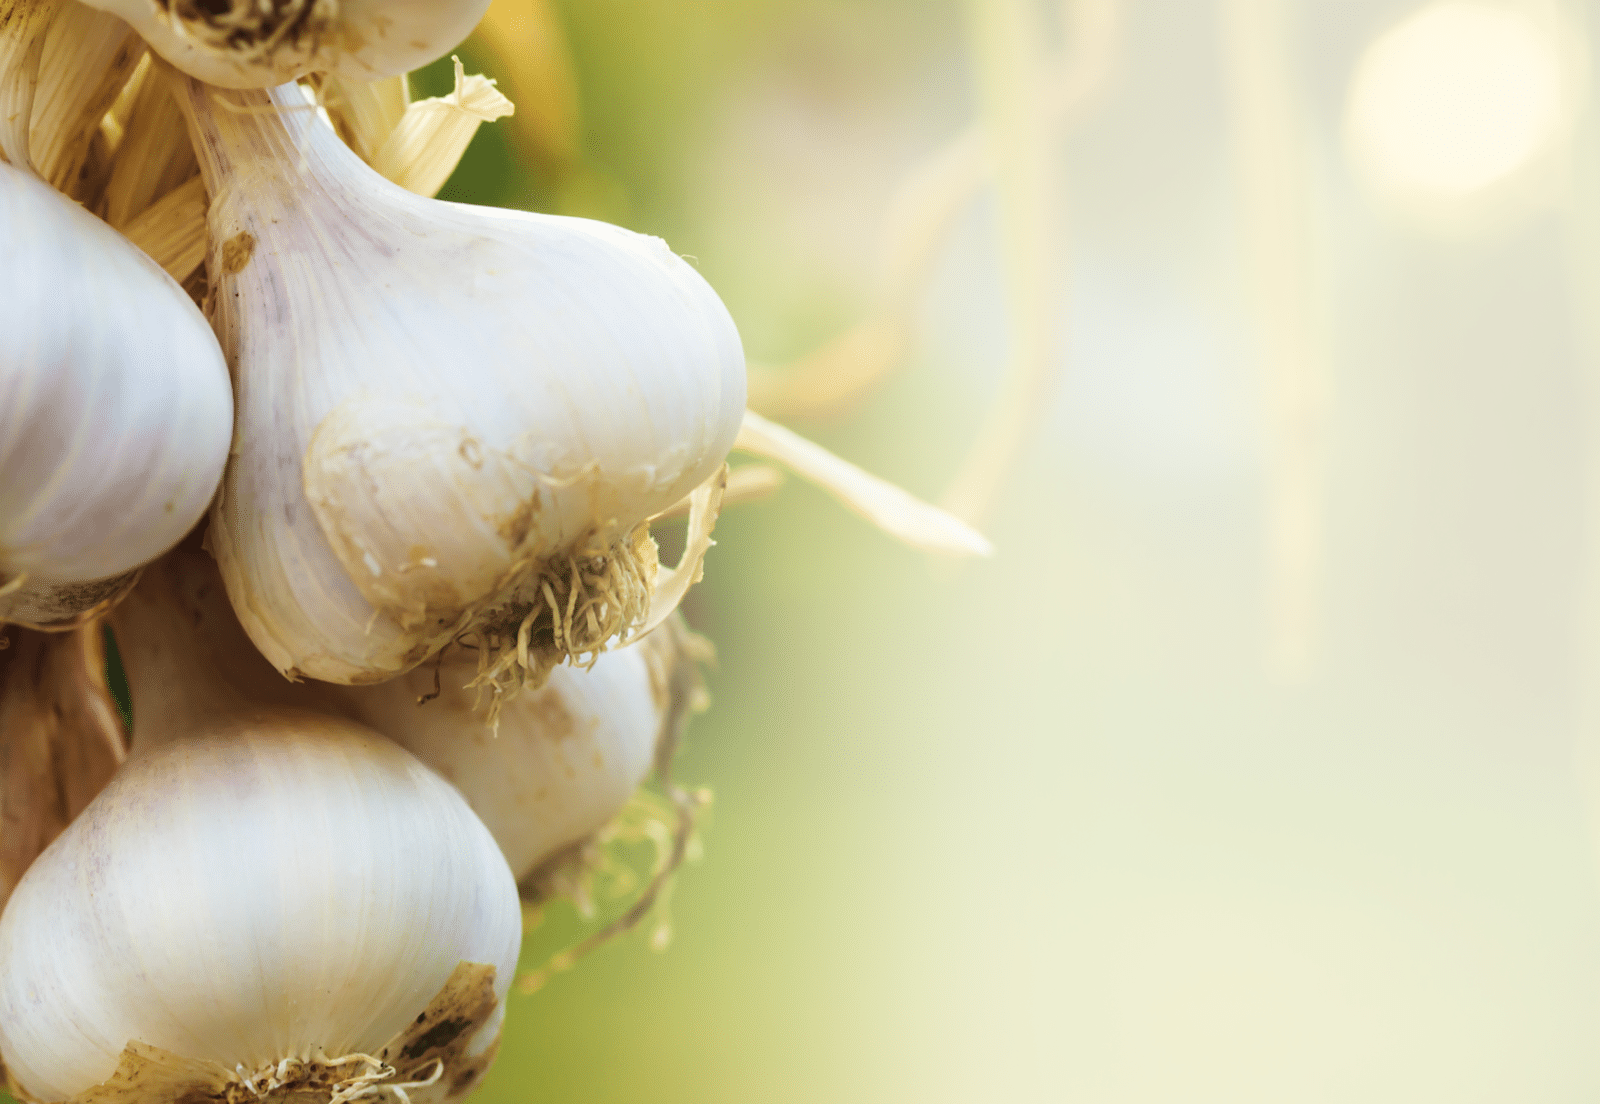
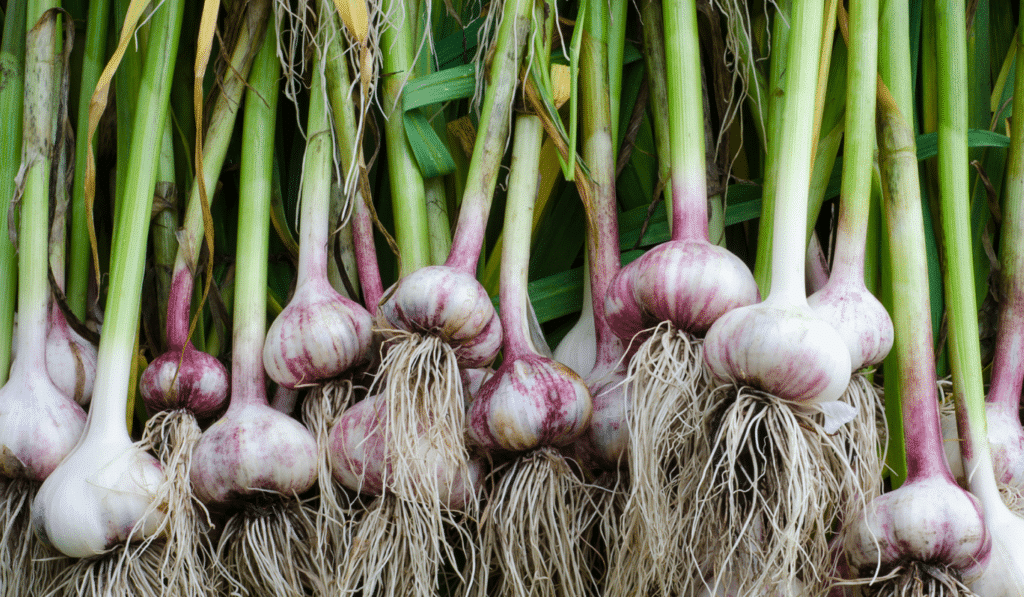
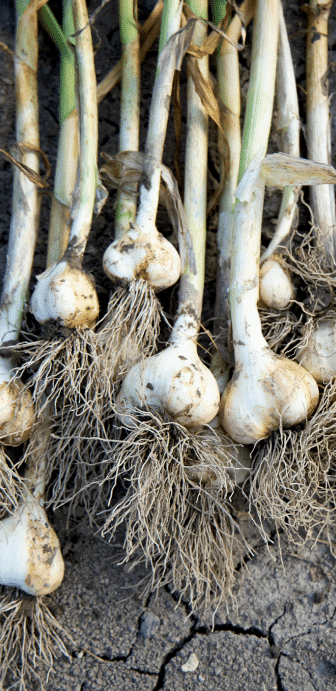
garlic
aka allium sativum
Garlic is one of the most commonly used vegetables in cooking. It offers a variety of health benefits and can be consumed in a myriad of ways including cooked, preserved in oil or even eaten raw.
variations
There are about 11 different types of garlic. They are classified as “hard neck” or “soft neck” variations.
light
full sun
Plant in a place where they can get 6 – 8 hours of sun
water + feeding
not too thirsty
It’s best to water deep, but garlic only requires between a half to a full inch of water per week.
toxic
yes and no
Garlic is toxic for cats and dogs, but delicious for humans
size
small-ish
Average garlic bulbs have about 6-10 cloves, but their foliage can reach up to 2ft in height.
pro tip
plant in the fall
Plant your garlic 4 – 6 weeks prior to first frost
fun fact
keeps more than vampires away
Garlic is known as one of the healthiest foods, containing healing properties such as: anti blood coagulation, antioxidant, antiviral, antimicrobial, lowers cholesterol, reduces blood pressure, anticancer properties and can be used to help fight off colds.
beyond the basics
-
soil + planting
Plant garlic cloves 4 to 8 inches apart, and about 2 inches deep. Be sure you plant the cloves with the root side pointing down. Your garlic needs well-draining soil, such as Miracle-Gro® All Purpose Garden Soil. Add a little compost to bump up the nutrients of soil.
-
companion planting
Garlic can be planted next to other veggies such as beets, celery, lettuce, potatoes, strawberries or even tomatoes. It’s best to avoid planting near peas or beans.
-
harvesting
Once your garlic has sprouted some leaves, and a few of the lower leaves have turned brown, your garlic is ready to pick. The only way to tell is to pick a few bulbs as a test. If the cloves have filled the skin, they’re ready to harvest. Be sure not to let them wait too long once you notice the lower leaves browning, otherwise the protective layers around the cloves will be too thin. This means the garlic won’t store well.
-
pest control
White rot is a common disease that can wipe out an entire garlic crop. This is identified by little poppy seed sized bumps on the stem, and white fuzzy growth on the bottom of the bulb. If left untreated it can remain in the soil for many years. Keep an eye out for symptoms from mid-summer to autumn. If you’re noticing this has been a problem where you’re planting, apply a fungicide. For best results, apply the fungicide in a 6 inch band over the planting trench. This should happen immediately before planting.

troubleshooting
-
why is my garlic drooping and brown?
Could be time to harvest. When garlic is ready to be harvested, a few of the bottom leaves will turn brown and droop. The easiest way to tell if your garlic is ready to harvest is to count back. Garlic needs about 240 days to mature.
-
no, really why is my garlic drooping?
Nutrient problems. Your soil could be lacking in some key nutrients like nitrogen, potassium, calcium, and magnesium. Consider using a plant food like, Miracle-Gro® Shake ‘N Feed® Tomato, Fruits & Vegetables Plant Food.
-
why is my garlic not sprouting?
Extreme weather conditions. Sometimes after a particularly harsh winter, garlic crops can come out a bit crumpled or very small. One way to prevent this is to water and mulch immediately after planting. Be sure not to add too much mulch though! Too much mulch applied too late in the season will insulate the ground and delay it from going dormant. This can cause root rot once the real cold weather sets in.

kale
aka brassica oleracea var. sabellica
Kale is a cold-hardy and resilient green veggie.
variations
Red Russian, Lacinato, True Siberian, Vates Blue Curled, Winterbor
light
just a little
Kale only needs about 3 hours of sunlight to grow
water + feeding
keep it watered.
Kale needs consistent watering. Your kale needs about 2 inches of water a week.
toxic
okay for humans
But could cause kidney and bladder stones for dogs.
size
small-ish
Can grow between 1 – 2 ft
pro tip
sweetened by frost.
Kale can be harvested until it’s 20°F/-7°C outside. In fact, the first nips of frost can make your kale taste better.
fun fact
technically a biennia
It’s a 2-year plant that produces leaves in the first year and a flower stalk in its second year.


beyond the basics
-
companion planting
Kale works well when planted by artichokes, beets, celery, cucumber, lettuce, onion, peas, potatoes. Avoid other brassicas being planted alongside kale. These include broccoli, kohlrabi, cauliflower, brussels sprouts, and Swiss chard.
-
Harvesting
When your kale’s leaves are about the size of your hand, it’s ready to harvest. Be sure not to pick more than a third of your plant’s leaves at a time.
-
pest control
What are these little white flies? They are literally Whiteflies. They drink sap and excrete a sticky ‘honeydew’ which also encourages mould. Use sticky traps or Ortho® Bug B Gon® ECO Insecticidal Soap to keep your plants healthy.

troubleshooting
-
why are my leaves full of holes?
Cabbageworms. You can use companion plants to help naturally combat these pests. Quickly hand pick your kale, and don’t forget to use row covers to help keep your kale safe.
-
what are these weird yellow V-shape on leaves and rotting stems on my kale?
Probably black rot. This is a fungus that leave yellow v-shapes on your kale’s leaf edges. To prevent this, make sure to rotate your crops and remove debris from your garden. Don’t forget to make sure your garden has good drainage.
-
why are my kale’s leaves misshapen?
Could be aphids. To prevent aphids from infesting your kale plants be sure not to water the foliage. If aphids persist, you can use an insecticide like Ortho® Bug B Gon® ECO Insecticide Ready-to-Use.
.
elephant ear
aka colocasia esculenta
Always the centre of attention, these big beauties make a statement indoors and out. They can grow to an impressive height with leaves that mimic hearts, or the shape of elephant ears.
variations
alocasias and colocasias
light
full sun
Even dappled shade will work
water + feeding
thirsty
Keep the soil moist. In summer months you may have to water your potted plant almost every day.
toxic
toxic to people and animals
Ingesting stems or leaves can cause a burning sensation or cause swelling. In some cases touching the plant can cause a skin irritation.
location
flexible
Elephant ears do well on patios and indoors. Keep your plant in indirect light to avoid it getting sunburnt.
humidity
love it
Elephant ears are tropical plants that thrive in warm, humid environments.
size
large friend
Can grow to 3 – 5 ft
pro tip
Leave lots of room
Elephant ears need a big pot to grow to their fullest potential.
fun fact
A tropical bulb
Elephant ears have tuberous roots that are often referred to as bulbs. Unlike common garden bulbs, these ones are not cold hardy so you’ll need over-winter the bulbs inside.

beyond the basics
-
soil + potting
Consider elevating your elephant ear slightly by adding a layer of rocks and pebbles between the planter and its saucer. This helps increase the humidity and prevents root rot. Use a well-draining soil for your elephant ear. Consider using Miracle-Gro Cactus, Palm & Succulent Potting Mix or Miracle-Gro Moisture Control Potting Mix for a happy plant.
-
when to repot
The best time to repot your elephant ear is during the spring months. When repotting your elephant ear, make sure to use a well-draining soil. Consider using a soil like Miracle-Gro Cactus, Palm & Succulent Potting Mix or Miracle-Gro Moisture Control Potting Mix to help refresh the soil.
-
propagation
While you can’t propagate an elephant ear with a cutting, you can divide tubers of a healthy adult plant. The tubers have a texture similar to that of a potato. You can easily cut through it with a sharp knife. Plant the divided tuber immediately into your potting soil and keep it moderately wet.
-
pest control
Common pests for elephant ears are aphids, spidermites and mealybugs. Use a gentle insecticide like Ortho® Bug B Gon® ECO Insecticide Ready-to-Use and make sure the leaves of your plant are treated as well.

troubleshooting
-
why is my elephant ear turning yellow?
Too much sunlight or overwatering. You can cut the dying leaves close to the base of the stem. This should prevent more leaves from yellowing. Then adjust your watering schedule or move it away from direct sunlight.
-
why are my leaves crying?
Usually due to overwatering. The leaves of an elephant ear are long and heart-shaped, which naturally draws water to the tip of the leaf. If there aren’t other signs of overwatering, like soft stems or yellow leaves, you can likely hold off on watering for a few days.
-
why are my plant’s leaves turning brown?
It’s a sunburn. Your plant is too close to bright, direct light. Elephant ears tend to thrive in bright, indirect light. Scorched leaves won’t kill your plant, it just doesn’t look pretty.
-
Why does my plant’s leaves have spots?
Fungal leaf blight. If this fungus isn’t caught early, it will cause the whole leaf to collapse and travel to the rest of the plant. To prevent this, make sure you’re using high-quality, well-draining soil.