Good soil is crucial for healthy vegetables to grow and flourish. You may procure a soil testing kit from your home improvement store or if the service is offered, they can do a test with a soil sample you provide. Compost or gardening soil like Miracle-Gro® Organics Garden Mix For Vegetables & Herbs will give that added boost of nutrients for a robust harvest. Layer your soil as per your veggie type and use a hoe or a tiller to get rid of rocks and weeds. Another secret soil tip: you can assess how good your soil drainage is by looking at what happens after it rains. If puddles appear, raised garden beds are a more viable option.
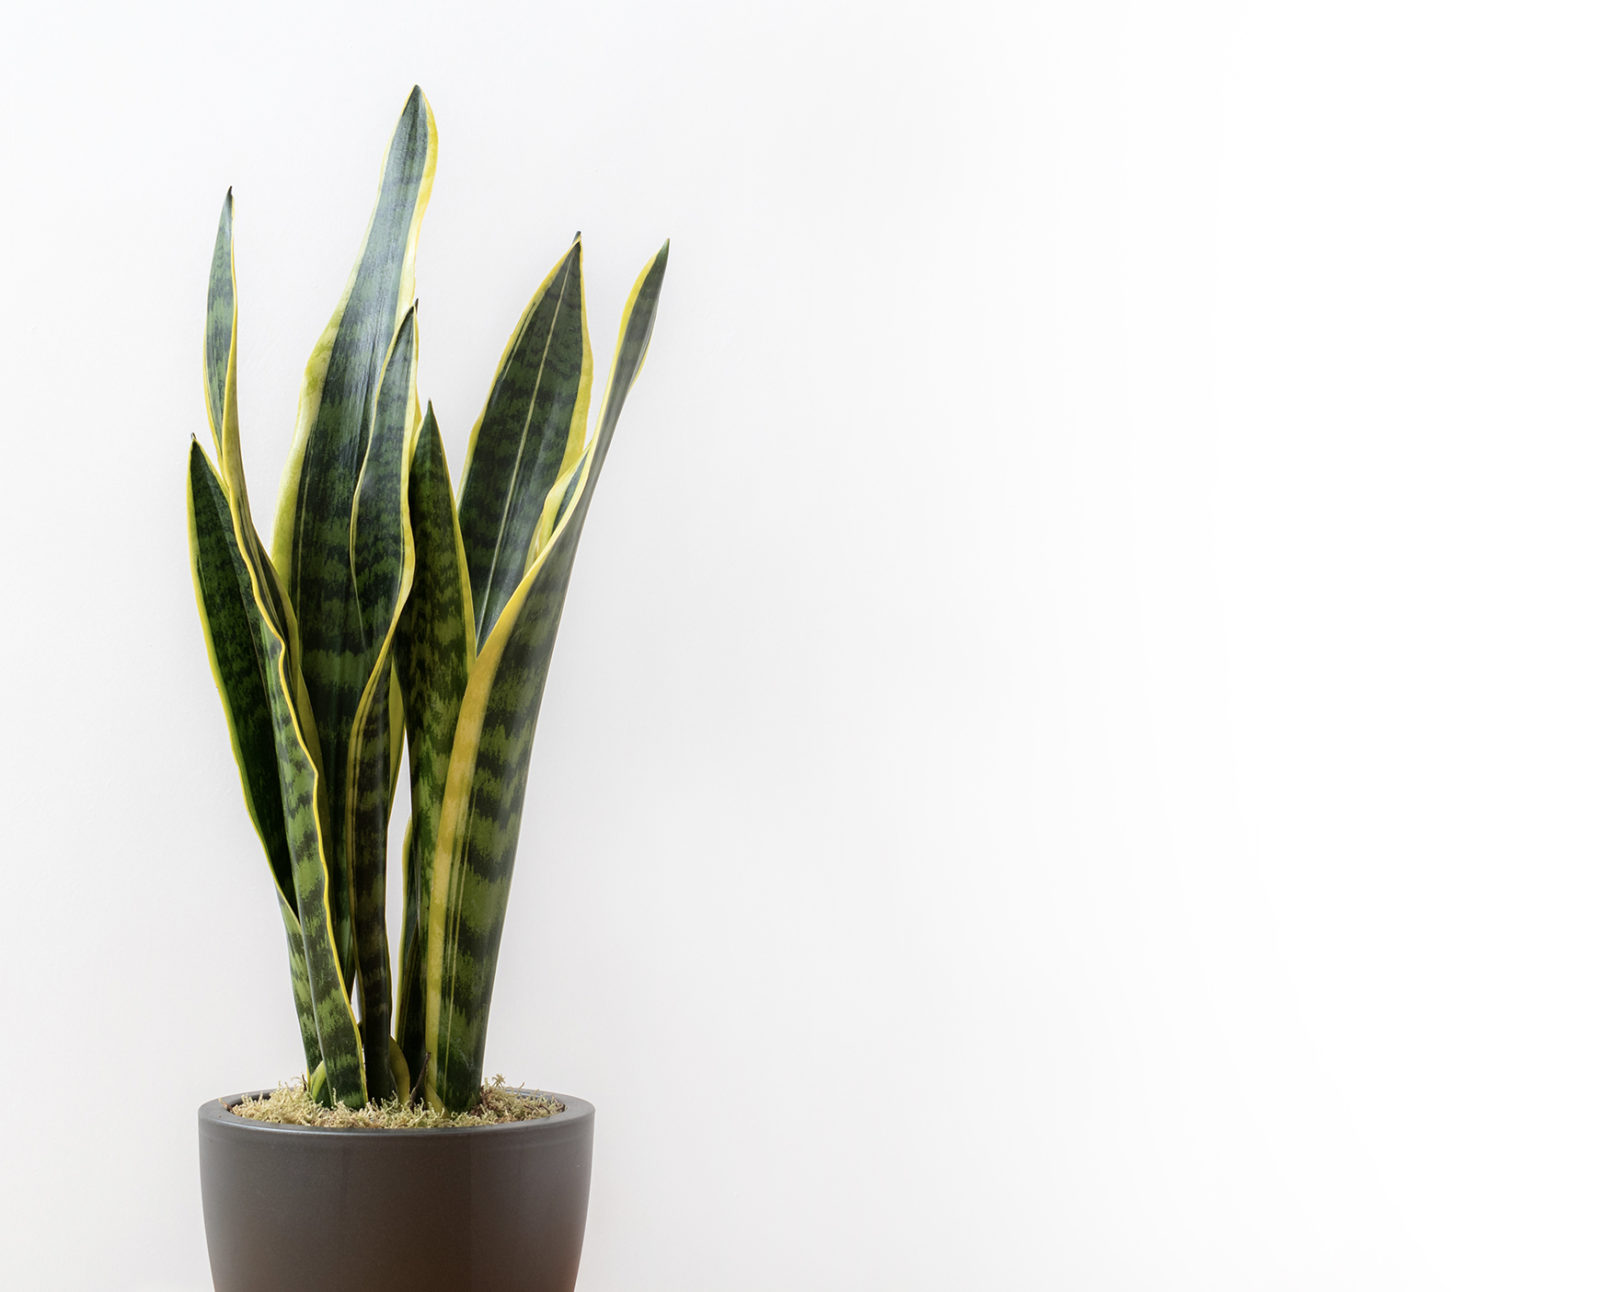
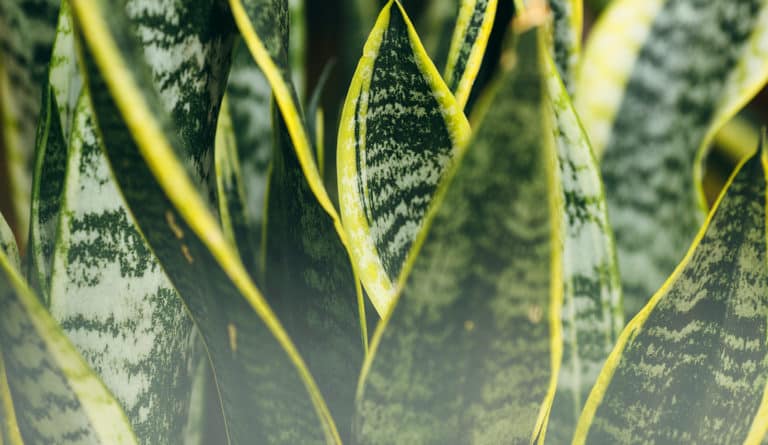
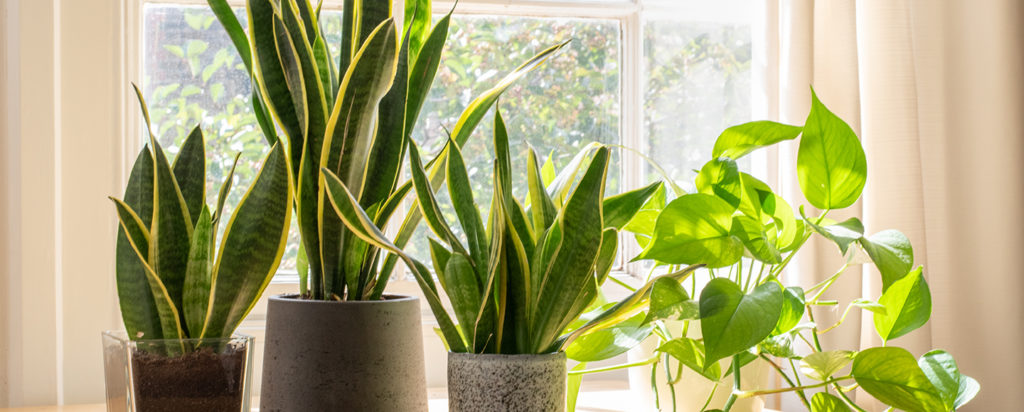
snake plant
aka sansevieria trifasciata, dracaena trifasciata, mother-in-law’s tongue, tigers tail
Nobody should be afraid of this snake! They’re bright, cheery and so easy to care for that many indoor gardeners describe them as “unkillable”. Let’s explore this Canada-wide favourite. Description: stiff, swordlike leaves / virtually indestructible / west Africa / tropical savannah / Recently learned to not be a part of the sansevieria family but in fact part of the dracaena family.
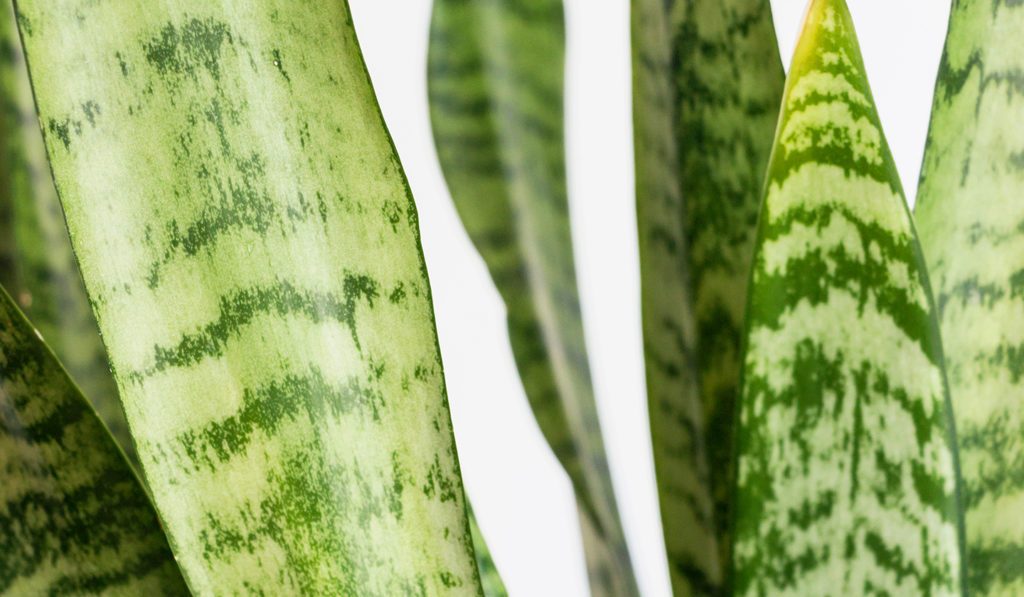
variations
There are something like 70 types of snake plant varieties, some are colour variations, others are different shapes and sizes. Some variations trfaciata black gold, robusta, elensis, zeylanca, Shark fin, whale fin, black coral, whitney, white owl, birds nest, rhino grass, cylinder snake plant as well as many others.

light
flexible
Snake plants adapt to most light conditions. These desert plants love bright light and even some direct sun. But they can also deal with low light. Leaf colours may change according to light conditions.

water + feeding
allow soil to dry between watering
Allow the top inch or two to dry out completely before watering again. Do not overwater. Feed once a month during spring and summer.

toxic
mildly toxic to humans and pets
Ingestion can cause mouth, stomach irritation and possible vomiting. Possible skin irritation when handling sap.

location
flexible
This tough plant thrives almost everywhere. It likes heat put can handle most temperatures, even drafts or dry air.

humidity
again, flexible
Snake plants do like the occasional misting, but they are so tough and cool that it’s not necessary.

size
small to medium
Some species stay desktop size, around a foot tall, and some are more floor models that grow over 3 feet tall. Check with your plant shop to confirm how big a snake you’re buying.

pro tip
use a heavier planter
Snake plants shoot their sword-like leaves skyward. This makes them top heavy as they grow. A heavier pot with a broad base will help prevent tipping.

fun fact
the night purifier
Most plants release oxygen during the day. The Snake’s desert lineage makes it one of the rare plants that makes oxygen at night. It’s also recognized as a top air cleaning plant.
beyond the basics
-
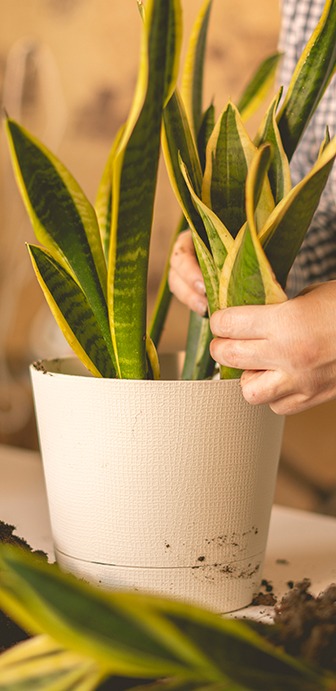
soil & potting
It’s a desert plant, so use a light, well-draining potting soil like Miracle-Gro Cactus, Palm and Succulent Potting Mix. Or, use regular potting soil and add some potting sand or perlite. A layer of sand on the top will help prevent rot. Ensure the pot has good drainage. Snakes should never sit in water. Empty drainage trays if you see water collecting.
-
when to repot
Every 2 to 3 years in the Spring, especially in the earlier years. Increase the pot size by 2 inches each repotting. In later years you can replace the top couple inches of soil instead of completely repotting. Snake growing too fast? Slow the growth by trimming the roots.
-
propagation
Grab a sharp knife or scissors, find one of the healthiest leaves, and cut it off at the base of the plant. Then cut the leaf into multiple horizontal strips (about 3 inches each). Let the ends dry for two days then put them in water to stimulate root growth. This step could take 2 to 3 weeks. When you’ve got roots, you’re ready to pot.
-
pest control
Mealybugs are most common. When you do your regular dusting, inspect the leaves. Check out our Pest control section in Plant 101 for how to identify and deal with pests on your plant!
troubleshooting
-
why are the leaves falling sideways?
Multiple possibilities. All easily fixed. Firstly, this may not be a problem at all. Overly mature leaves naturally fall away to make room new growth. But if many leaves are falling over before their time, it’s probably over or under watering. If the soil is bone dry, add a moderate amount of water for a few days in a row. Then be more diligent with your watering routine. If the soil is soaked, check your drainage and let the soil fully dry before starting a better routine. Light issues: Snake plants do well in low light but if they’re getting no light leaves may start to keel over. Move into some nice, bright, indirect light. Other causes? Maybe your Snake plant has outgrown its pot. This can cause it to become root-bound. It’s time to repot in something at least 2 inches wider.
-
why do I have yellowing leaves?
Probably overwatering. Are the leaves also a bit mushy? These are signs of root rot. Not to worry, when caught early this is easily fixable. Reduce watering and ensure the soil dries out before watering. Check your pot’s drainage. Does it have a hole that allows excess water to escape? Help things dry by poking holes in the soil. This will get oxygen to the roots. You can also put the pot (with drainage holes) in a tray that’s lined with a layer of dry soil. It acts like a sponge to draw out extra moisture. Now, let’s check for root rot. Dig down and cut out any that look affected. If things are really bad, consider repotting entirely with new soil. For more information check out our Plant 101 section.
-
why does this snake have wrinkled leaves?
Under-watering. Check the soil. It’s probably bone dry. Instead of dousing it all at once. Give your Snake plant a medium amount of water three days in a row. Nice and easy. Make sure it’s never sitting in pools of water. Those droopy leaves should rebound by day three.
snake plant
aka sansevieria trifasciata, dracaena trifasciata, mother-in-law’s tongue, tigers tail
Nobody should be afraid of this snake! They’re bright, cheery and so easy to care for that many indoor gardeners describe them as “unkillable”. Let’s explore this Canada-wide favourite. Description: stiff, swordlike leaves / virtually indestructible / west Africa / tropical savannah / Recently learned to not be a part of the sansevieria family but in fact part of the dracaena family.
variations
There are something like 70 types of snake plant varieties, some are colour variations, others are different shapes and sizes. Some variations trfaciata black gold, robusta, elensis, zeylanca, Shark fin, whale fin, black coral, whitney, white owl, birds nest, rhino grass, cylinder snake plant as well as many others.
light
flexible
Snake plants adapt to most light conditions. These desert plants love bright light and even some direct sun. But they can also deal with low light. Leaf colours may change according to light conditions.
water + feeding
allow soil to dry between watering
Allow the top inch or two to dry out completely before watering again. Do not overwater. Feed once a month during spring and summer.
toxic
mildly toxic to humans and pets
Ingestion can cause mouth, stomach irritation and possible vomiting. Possible skin irritation when handling sap.
location
flexible
This tough plant thrives almost everywhere. It likes heat put can handle most temperatures, even drafts or dry air.
humidity
again, flexible
Snake plants do like the occasional misting, but they are so tough and cool that it’s not necessary.
size
small to medium
Some species stay desktop size, around a foot tall, and some are more floor models that grow over 3 feet tall. Check with your plant shop to confirm how big a snake you’re buying.
pro tip
use a heavier planter
Snake plants shoot their sword-like leaves skyward. This makes them top heavy as they grow. A heavier pot with a broad base will help prevent tipping.
fun fact
the night purifier
Most plants release oxygen during the day. The Snake’s desert lineage makes it one of the rare plants that makes oxygen at night. It’s also recognized as a top air cleaning plant.
beyond the basics
-
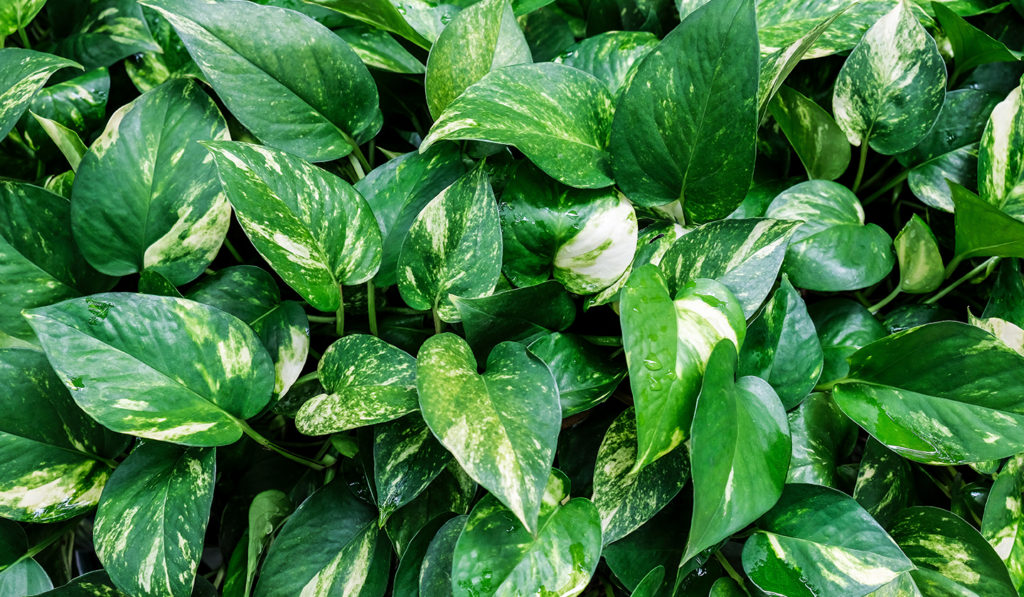
soil + potting
Use a rich, well-draining, indoor potting soil, like Miracle-Gro® Indoor Potting Mix. Ensure your pot has good drainage. Don’t let it sit in water and if you notice water pooling in the drainage tray, empty it.
-
when to repot
Repot every 2 to 3 years in the Spring, especially with younger plants. Increase pot by 2 inches every time. When Pothos is more mature and fully grown, you can just replace the top few inches of soil.
-
propagation
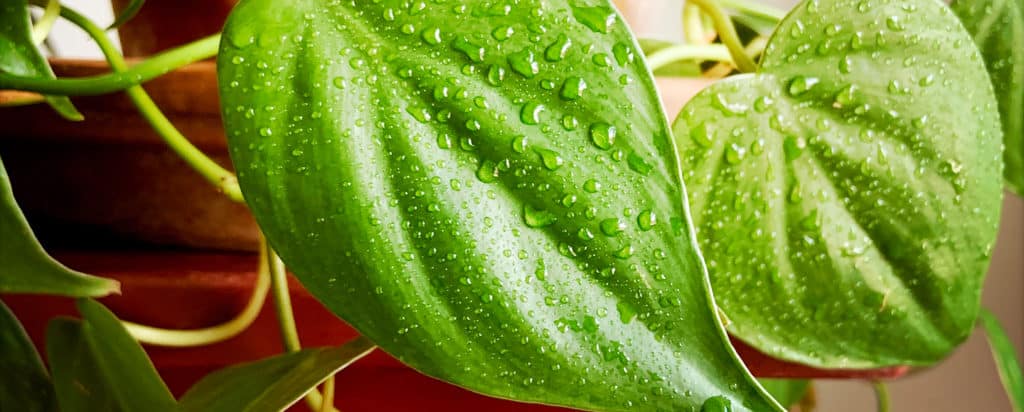
Very easy with Pothos. Find a node or aerial root, cut just below the node and remove the lower leaves. Cutting can be put back in the soil, or in water. Cuttings will happily live in water for as long as you keep the jar topped up. This is a great way to add some green to darker, out-of-the-way places that are too small or awkward for a pot. For more information on propagation check out our propagation project page!
-
pest control
Prone to mealybugs and scale. During your routine leaf cleaning, inspect the underside. Check out our Pest control section in Plant 101 for how to identify and deal with pests on your plant!

troubleshooting
-
why is my pothos ‘crying’?
Could be normal “guttation”, or signs of over watering. Pothos have a natural tendency to ‘cry’. This expulsion of water from leaf pores is called “guttation” and it’s usually nothing to worry about. Review your watering routine. If you’re allowing the top 1 to 2 inches of soil to completely dry between watering, you’re good. If you’re overwatering and letting your Pothos sit in water, just drain the standing water, let the soil dry out and water less in the future.
-
drooping or wilting leaves?
Needs water. Does your Pothos look wilted and droopy? Do those normally perky heart-shaeped leaves feel thinner? Your poor Pothos is crying out for a drink. Instead of doing one giant dump of water, water a little once per day for three days. You want the soil pleasantly moist, not super soggy. Your Pothos should bounce back in just a few days.
-
brown spots or patchy?
Leaf spot disease due to overwatering. Overly damp conditions make most plants susceptible to disease, even the mighty Pothos. Isolate your Pothos to avoid spreading to other plants. This may be the hardest part because those vines may run all over the house. Cut off all the affected leaves and any debris that’s fallen into the pot. If you’ve been misting, stop. If there’s another source of humidity like a humidifier, or it’s next to your shower, move the plant away until those spots are gone. Treat with a fungicide.
-
long parts of your trail leggy and without leaves?
Inconsistent care. Pothos’ vines travel far and wide! Often they venture into low light areas, where leaves tend to fall off. That means your Pothos is wasting energy to support empty vines that can’t grow leaves. The solution is simple. Cut the vine where healthy clusters of leaves generally stop. If your cutting has leaves at the end, you can trim it so there’s at least two nodes below the leaves, then propagate.
snake plant
aka sansevieria trifasciata, dracaena trifasciata, mother-in-law’s tongue, tigers tail
Nobody should be afraid of this snake! They’re bright, cheery and so easy to care for that many indoor gardeners describe them as “unkillable”. Let’s explore this Canada-wide favourite. Description: stiff, swordlike leaves / virtually indestructible / west Africa / tropical savannah / Recently learned to not be a part of the sansevieria family but in fact part of the dracaena family.
variations
There are something like 70 types of snake plant varieties, some are colour variations, others are different shapes and sizes. Some variations trfaciata black gold, robusta, elensis, zeylanca, Shark fin, whale fin, black coral, whitney, white owl, birds nest, rhino grass, cylinder snake plant as well as many others.
light
flexible
Snake plants adapt to most light conditions. These desert plants love bright light and even some direct sun. But they can also deal with low light. Leaf colours may change according to light conditions.
water + feeding
allow soil to dry between watering
Allow the top inch or two to dry out completely before watering again. Do not overwater. Feed once a month during spring and summer.
toxic
mildly toxic to humans and pets
Ingestion can cause mouth, stomach irritation and possible vomiting. Possible skin irritation when handling sap.
location
flexible
This tough plant thrives almost everywhere. It likes heat put can handle most temperatures, even drafts or dry air.
humidity
again, flexible
Snake plants do like the occasional misting, but they are so tough and cool that it’s not necessary.
size
small to medium
Some species stay desktop size, around a foot tall, and some are more floor models that grow over 3 feet tall. Check with your plant shop to confirm how big a snake you’re buying.
pro tip
use a heavier planter
Snake plants shoot their sword-like leaves skyward. This makes them top heavy as they grow. A heavier pot with a broad base will help prevent tipping.
fun fact
the night purifier
Most plants release oxygen during the day. The Snake’s desert lineage makes it one of the rare plants that makes oxygen at night. It’s also recognized as a top air cleaning plant.
beyond the basics
-
soil & potting
Use a rich, well-draining, indoor potting soil, like Miracle-Gro® Indoor Potting Mix. Ensure your pot has good drainage. If you notice water pooling in the drainage tray, empty it.
-
when to repot
Repot every 2 years in the spring, especially with younger plants. Increase pot by 2 inches every time. If dealing with a more mature, fully grown plant you can just replace the top few inches of soil.
-
propogation
If you have a node or aerial root this plant is very easy to propagate. Cut just below the node and remove the lower leaves. Put in water and watch the roots grow in just a few short weeks! For more information on propagation check out our propagation project page!
-
pest control
Prone to mealybugs. Check the underside of leaves regularly when cleaning. Check out our Pest control section in Plant 101 for how to identify and deal with pests on your plant!
troubleshooting
-
yellowing lower leaves?
Low temperatures or drafts are probably the cause. Try moving your plant to a new location where it is clear of any drafts. Philodendrons like it warm, between 60 and 75 F (16 and 24C) It could also be underwatering or under fertilizing. Ensure you’re watering regularly when the top inch of soil becomes dry.
-
leaves dropping?
Probably a cold draft. Move to warm location that’s clear of any drafty windows or the air conditioning vent. It’s a hardy plant but still likes temps between 60 and 75 F (16 and 24C)
-
brown edges on the leaves?
Various. The soil could be too dry. Water regularly when the top inch of soil gets dry. Water until the soil is moist, but not soggy. If the air feels dry and the temp is over 75F (24C,) mist the leaves regularly. Consider a humidifier, or put the pot on a pebble-filled tray of water (making sure the pot is not touching the water). Philodendrons don’t like cold drafts, so this could also be the problem. Move away from cold windows or AC vents.
snake plant
aka sansevieria trifasciata, dracaena trifasciata, mother-in-law’s tongue, tigers tail
Nobody should be afraid of this snake! They’re bright, cheery and so easy to care for that many indoor gardeners describe them as “unkillable”. Let’s explore this Canada-wide favourite. Description: stiff, swordlike leaves / virtually indestructible / west Africa / tropical savannah / Recently learned to not be a part of the sansevieria family but in fact part of the dracaena family.
variations
There are something like 70 types of snake plant varieties, some are colour variations, others are different shapes and sizes. Some variations trfaciata black gold, robusta, elensis, zeylanca, Shark fin, whale fin, black coral, whitney, white owl, birds nest, rhino grass, cylinder snake plant as well as many others.
light
flexible
Snake plants adapt to most light conditions. These desert plants love bright light and even some direct sun. But they can also deal with low light. Leaf colours may change according to light conditions.
water + feeding
allow soil to dry between watering
Allow the top inch or two to dry out completely before watering again. Do not overwater. Feed once a month during spring and summer.
toxic
mildly toxic to humans and pets
Ingestion can cause mouth, stomach irritation and possible vomiting. Possible skin irritation when handling sap.
location
flexible
This tough plant thrives almost everywhere. It likes heat put can handle most temperatures, even drafts or dry air.
humidity
again, flexible
Snake plants do like the occasional misting, but they are so tough and cool that it’s not necessary.
size
small to medium
Some species stay desktop size, around a foot tall, and some are more floor models that grow over 3 feet tall. Check with your plant shop to confirm how big a snake you’re buying.
pro tip
use a heavier planter
Snake plants shoot their sword-like leaves skyward. This makes them top heavy as they grow. A heavier pot with a broad base will help prevent tipping.
fun fact
the night purifier
Most plants release oxygen during the day. The Snake’s desert lineage makes it one of the rare plants that makes oxygen at night. It’s also recognized as a top air cleaning plant.
beyond the basics
-
soil & potting
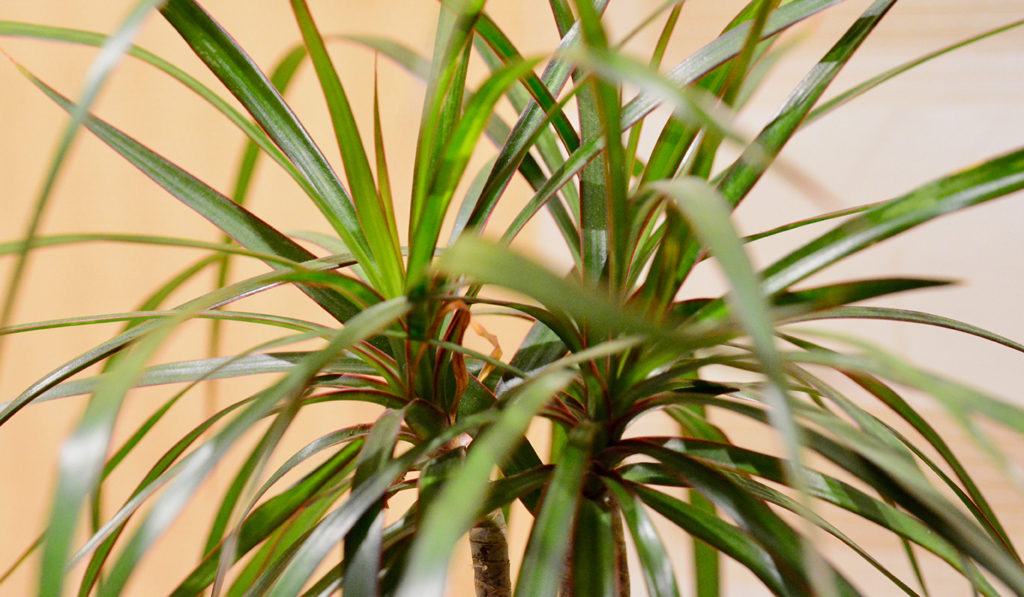
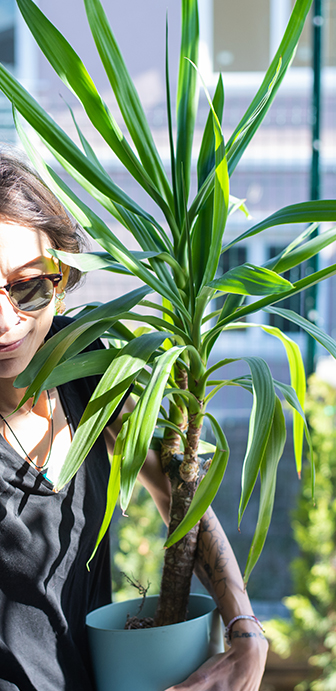
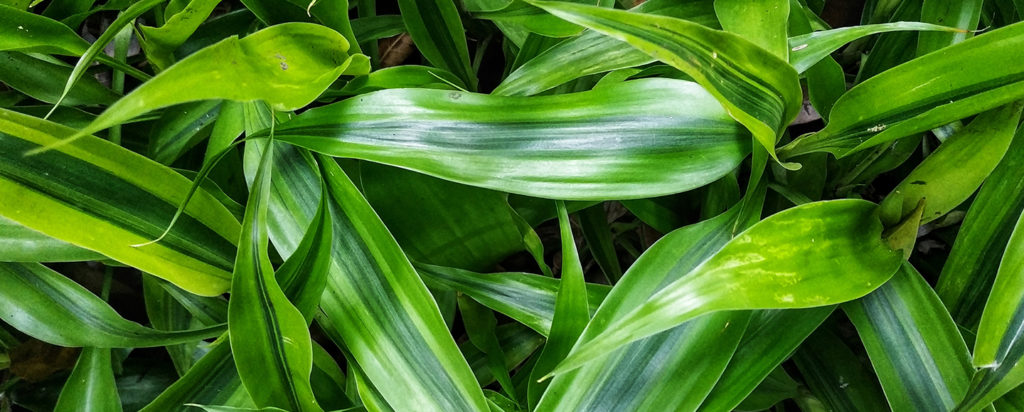
This plant likes a light, well-draining soil like Miracle-Gro Cactus, Palm and Succulent Potting Mix. Or add some potting sand or perlite to regular potting soil. A layer of sand on the top will also help prevent rot. You pot must have good drainage and don’t let Dracaena sit in water. If you see water collecting in the drainage tray, dump it.
-
when to repot
Every 2-3 years in the Spring, especially in the earlier years. Increase the pot size by 2 inches each repotting. When your Dracaena is all grown up, you can get away with just replacing the top few inches of soil.
-
propagation
Cut a stem off the plant, and remove the lower leaves. Put the cutting in water to stimulate root growth. Then cut a 2 to 4 inch stub off the bottom of a stem and insert it halfway into a dry potting mix like Miracle-Gro Cactus, Palm and Succulent Potting Mix.
-
pest control
Most common pests are scale insects and mealybugs. Check under leaves when you’re dusting. See our Pest control section in Plant 101 for how to identify and deal with pests on your plant!
troubleshooting
-
brown tips on leaves?
Not enough water, or dry air. Most common in winter when furnaces are running.
Check soil more often and water when mostly dry. Add a humidifier to the room. Mist regularly. Put the pot on a pebble-filled tray of water. Consider moving to a room with more humidity like bathroom or kitchen.
-
yellowing leaves at the base?
Not really a problem! This is natural. That’s how Dracaenas grow. Older leaves fall off to allow for new ones. You can also gently pull off yellowed leaves. If new leaves are growing, everything is fine.
-
wilting leaves?
Overwatering or possible root rot. Wait until soil is medium dry between watering and ensure the pot has good drainage. If the wilt is bad, allow the soil to completely dry before watering. If the problem persists, check for root rot and remove any affected roots. Other moisture control techniques: Poke holes in soil to let oxygen at the roots. Put the pot (with drainage holes) in a tray lined with dry soil. Or go for a total do-over, and repot with a soil that’s formulated for drainage like Miracle-Gro Cactus, Palm and Succulent Potting Mix. For more information check out our Plant 101 section.
-
soft discoloured stems?
Overwatering causing root and stem rot. Cut back any soft, rotting stems. Remove your Dracaena from the pot and cut away any black, mushy roots. Get a sterilised new pot and start over. If the roots are all mush, you can still save your plant baby! Propagate from the top of the plant.
-
plant not growing?
Not enough light. Dracaena is cool hanging out in low light corners of your house, but it takes brighter (indirect) light to make it grow. This gives you the power to control the height of your plant! When you’re at the right height, move to a shadier spot.

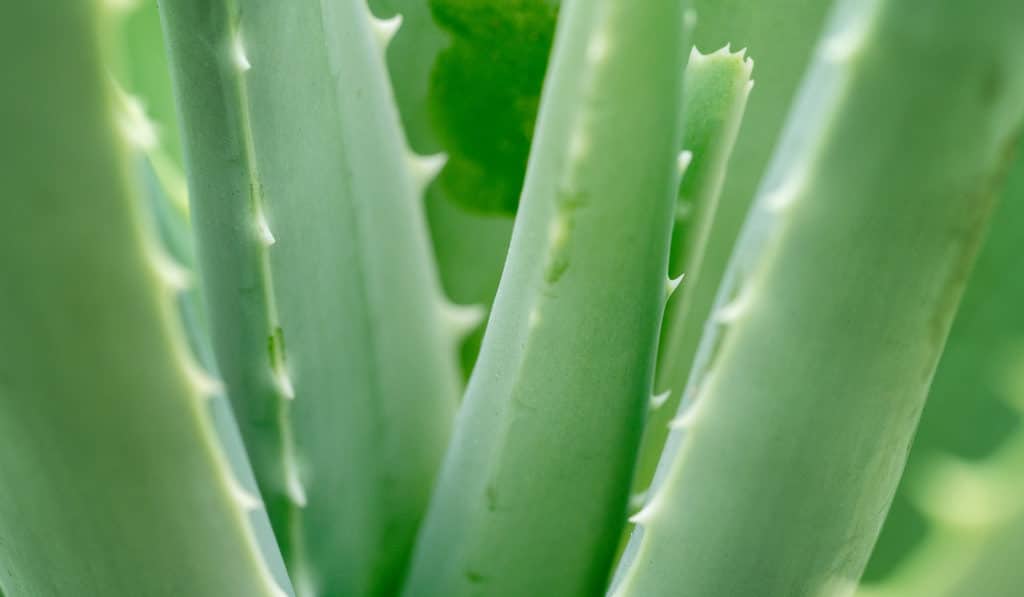
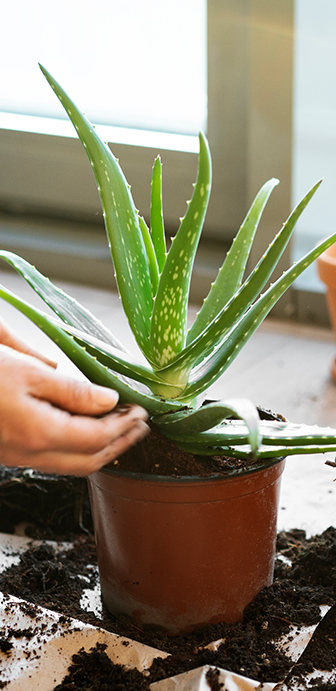
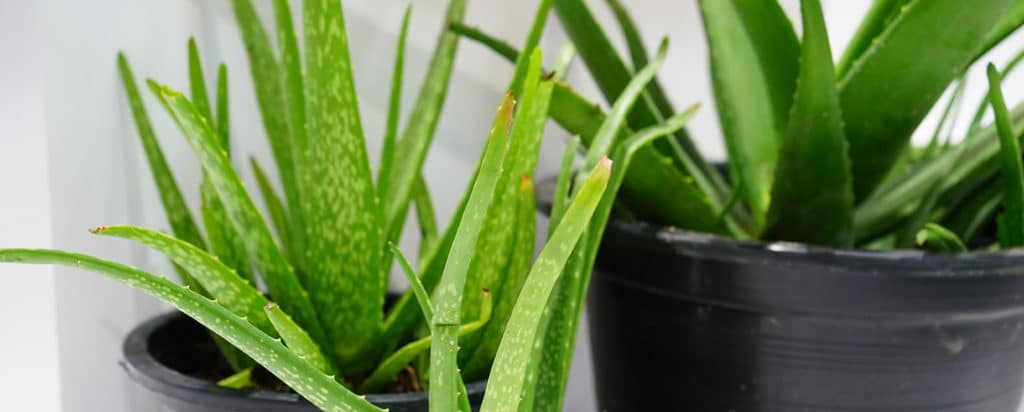
aloe vera
aka aloe barbadensis
Say “Ola” to this easy to grow succulent. Often touted as a “miracle” plant for its skin soothing gel, but the real miracle is how cute they look. An all-around great plant for rookies and exerts alike. Description: easy to grow succulent / soothes burns and skin irritations / southeast Arabian Peninsula / tropical
variations
Aloe Vera has a whopping 250 varieties. So many wonderful little differences to mix and match.
light
bright, indirect light
Find a spot with plenty of indirect light, and ideally a few hours of direct light.
water + feeding
allow to mostly dry out between watering
The top inch should be dry before watering again. Don’t overwater! It’s a desert plant. Feed once in spring, and once in summer.
toxic
safe on skin post likely toxic to ingest
Aloe gel is safe and soothing on the skin. You can even eat some varieties, but note! Most can cause indigestion, vomiting and airway irritation if eaten. Unless you’re 100% sure, keep away from kids and pets.
location
adaptable
Comfy with average indoor temperatures. Prefers things on the warmer side and doesn’t like drafts.
humidity
not an issue
Appreciates an occasional misting to control dust. Humidity levels aren’t a concern for this hearty little fella.
size
small to medium
Usually bought small and can to about 2 feet.
pro tip
water at soil level
Aloe doesn’t like water pooling in the creases between its leaves. That can cause leaf rot.
fun fact
it’s a super soother
Those thick, juicy leaves contain a soothing green gel that can be applied directly to burns (especially sun burns) and bug bites. External use only! It’s toxic to ingest.
beyond the basics
-
soil & potting
Use a light, well-draining potting soil like Miracle-Gro Cactus, Palm and Succulent Potting Mix. Or, use regular potting soil and add some potting sand or perlite. A layer of sand on the top will help prevent rot. Ensure the pot has good drainage and aloe should never sit in water. Empty drainage trays if you see water collecting.
-
when to repot
Every 3-4 years in the spring. Especially when they’re small and growing. Increase pot diameter by 2 inches each time, and refresh the top few inches of soil. Growing too fast? You can slow the growth by trimming the roots.
-
propagation
Aloe self-propagates. It will make baby offshoots (also called ‘pups’). Leave pups on the main plant or, pot as a separate plant! Wait until the pup is at least 2” tall, then dig under the pup and find the roots at the base. Gently tug or trim the roots, they are key to the pup’s survival. You now have a new plant baby! See Soil + Potting above for planting instructions.
-
pest control
Aloe is prone to scale insects on the leaves. See our Pest control section in Plant 101 for how to identify and deal with pests on your plant!
troubleshooting
-
leaves turning brown, red or reddish brown?
Variety of reasons. It could be too much summer sun, overwatering, or roots damage.
First, try moving your plant to a spot with less direct sunlight (but still bright). Reduce watering. If your little aloe buddy doesn’t recover check the roots for damage.
-
dark spots? brown or mushy leaves?
Probably overwatering. Caught early, this problem is easily corrected. Water at soil level and avoid spilling water on the leaves, cuz the pooling water can cause rot. Two inches of sand on top of the soil will help with drainage. Reduce watering and allow plant to dry out completely between watering. Ensure your pot has a drainage hole to let excess water out.
Other tricks: Poke holes in soil to get oxygen to the roots. Put a damp pot (with drainage holes) in a tray or dry soil, to suck up that extra moisture. Check the roots and remove any that have root rot. Consider repotting with new soil if things are a damp mess. For more information check out our Plant 101 section.
-
pale or yellowing leaves?
Overwatering or not enough light. Is the entire plant turning pale or yellow? It needs more light. Move to a brighter spot, watch out for soil dampness and avoid over watering.
-
shrunken, wrinkled leaves?
Your plant needs a drink. But don’t overdo it! Give it a small amount and also mist the leaves. Do this three days in a row. The leaves should rebound, getting nice and plump.
-
aloe not growing?
Not enough light. If your aloe isn’t growing, or the new growth is pale in colour, it’s crying out for more light. Most houseplants don’t like direct sun, but this desert-born baby likes it! A little direct sun every day is good, especially in darker winter months. Find a brighter spot and get growing.
snake plant
aka sansevieria trifasciata, dracaena trifasciata, mother-in-law’s tongue, tigers tail
Nobody should be afraid of this snake! They’re bright, cheery and so easy to care for that many indoor gardeners describe them as “unkillable”. Let’s explore this Canada-wide favourite. Description: stiff, swordlike leaves / virtually indestructible / west Africa / tropical savannah / Recently learned to not be a part of the sansevieria family but in fact part of the dracaena family.
variations
There are something like 70 types of snake plant varieties, some are colour variations, others are different shapes and sizes. Some variations trfaciata black gold, robusta, elensis, zeylanca, Shark fin, whale fin, black coral, whitney, white owl, birds nest, rhino grass, cylinder snake plant as well as many others.
light
flexible
Snake plants adapt to most light conditions. These desert plants love bright light and even some direct sun. But they can also deal with low light. Leaf colours may change according to light conditions.
water + feeding
allow soil to dry between watering
Allow the top inch or two to dry out completely before watering again. Do not overwater. Feed once a month during spring and summer.
toxic
mildly toxic to humans and pets
Ingestion can cause mouth, stomach irritation and possible vomiting. Possible skin irritation when handling sap.
location
flexible
This tough plant thrives almost everywhere. It likes heat put can handle most temperatures, even drafts or dry air.
humidity
again, flexible
Snake plants do like the occasional misting, but they are so tough and cool that it’s not necessary.
size
small to medium
Some species stay desktop size, around a foot tall, and some are more floor models that grow over 3 feet tall. Check with your plant shop to confirm how big a snake you’re buying.
pro tip
use a heavier planter
Snake plants shoot their sword-like leaves skyward. This makes them top heavy as they grow. A heavier pot with a broad base will help prevent tipping.
fun fact
the night purifier
Most plants release oxygen during the day. The Snake’s desert lineage makes it one of the rare plants that makes oxygen at night. It’s also recognized as a top air cleaning plant.
beyond the basics
-
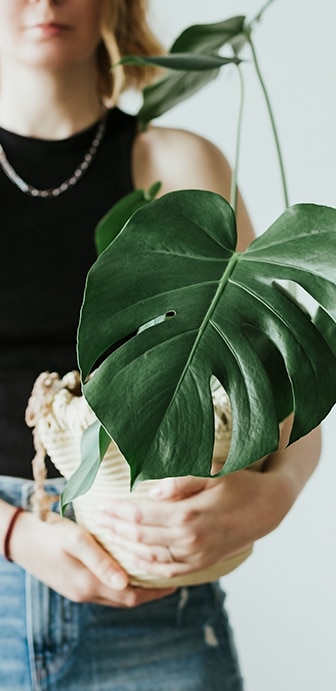
soil & potting
Use a rich, well-draining, indoor potting soil, like Miracle-Gro® Indoor Potting Mix. Ensure your pot has good drainage. If you notice water pooling in the drainage tray, empty it.
-
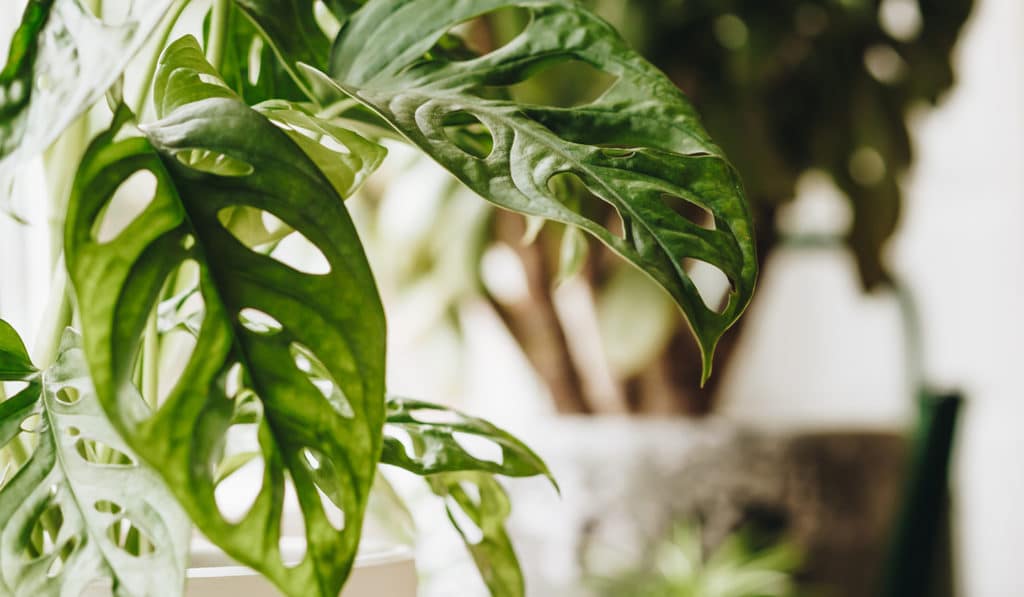
when to repot
Monstera grows fast, filling the pot with roots, and can quickly become rootbound. Repot in the Spring every 1 to 2 years, especially with younger plants. Increase your pot by 2 inches. When your Monstera is more mature, you can get away with just replacing the top few inches of soil.
-
propagation
Monstera is easy to propagate, especially If you have a node or aerial roots. Make your cut just below the node , then remove the lower leaves. Place your cutting in a glass jar with water and roots will grow within a couple weeks. For more information on propagation check out our propagation project page!
-
pest control
The most common pest is mealybugs. Look under those leaves when doing your regular cleaning. Check out our Pest control section in Plant 101 for how to identify and deal with pests on your plant!

troubleshooting
-
yellow leaves?
You’re probably overwatering. Are the leaves are also wilting? It’s almost certainly too much water, but this problem is easy to solve if caught early. Let your Monstera dry out completely. Make sure your plant pot has a drainage hole to allow excess water to escape.
If you’ve caught it early you should be able to fix this rather easily. Try poking holes in soil to allow for oxygen to get to the roots, or place pot (with drainage holes) in a tray or container with dry soil. This will soak up excess moisture. Finally check for root rot, remove any roots that seem affected, you may want to repot with fresh dry soil. For more information check out our Plant 101 section.
-
leaf tips and edges turning brown?
Could be a variety of reasons. Dry air, dry potting mix, too low of temperatures, or outgrowing pot size. If the room this plant is in is over 75 F/24 C and the air feels dry try a humidifier or placing plant on a pebble filled try of water. Mist leaves regularly. If near a heat vent move it away. If the room is too cold, or near a cold window move somewhere warmer.
Check if roots are bound or sneaking out the bottom drainage hole. Repot if necessary.
-
plant ‘crying’?
Too much water. Monstera leaves can drip if their potting mix is too wet. Slow down on the watering. Make sure the top two inches of potting mix get fully dry between waterings.
-
no holes in the leaves?
Probably not a problem! Young plants don’t have them. But if you have a mature plant that’s stopped producing holes with leaves, something is wrong. Check your location, watering and feeding routine.
-
mold on the surface soil?
Overwatering, too little time between watering. Mold (and even mushrooms) growing on your soil is not a direct threat. But it IS a sign of overwatering. Root rot can follow if not addressed. Water less frequently and make sure you let the top two inches of soil fully dry before watering. Ensure you have proper drainage. If things look really moldy, you can remove the top inch or so of soil.
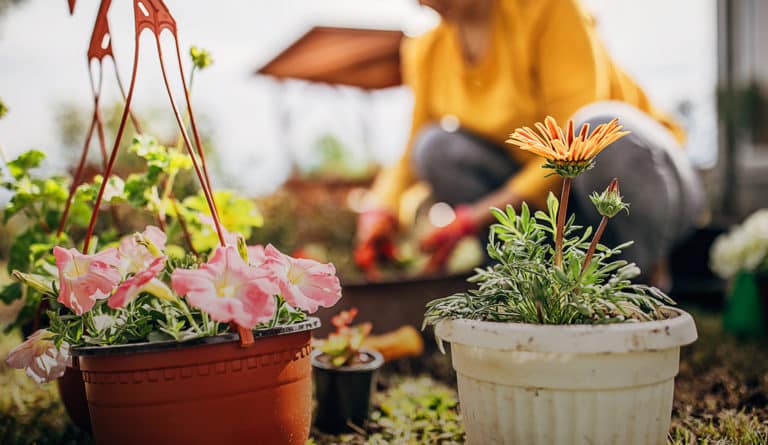
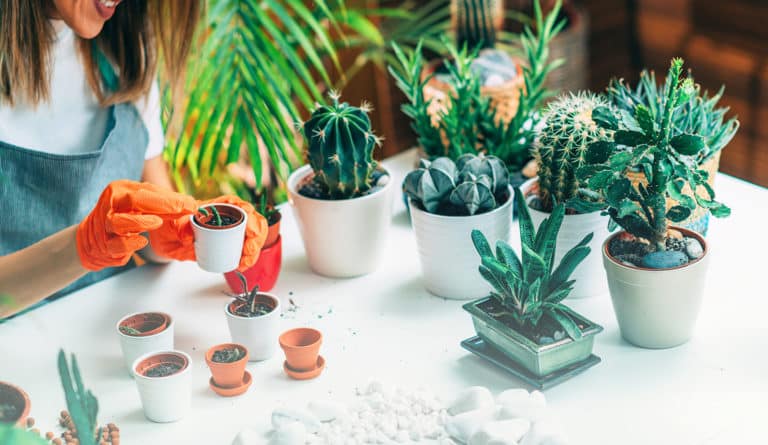
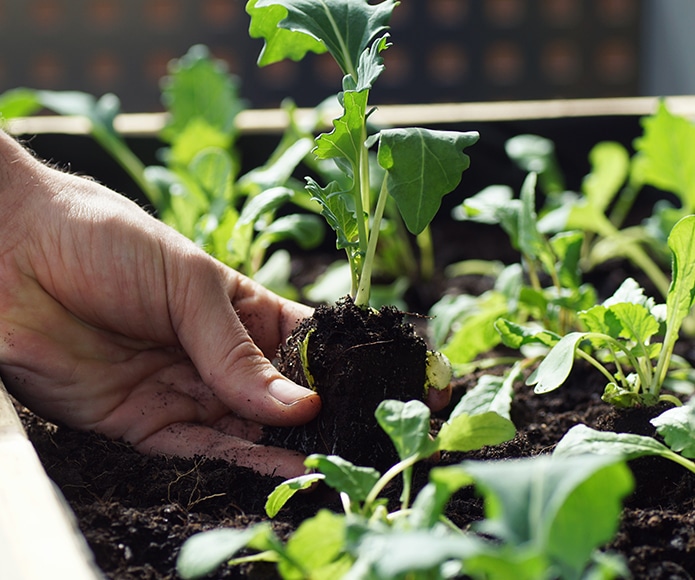
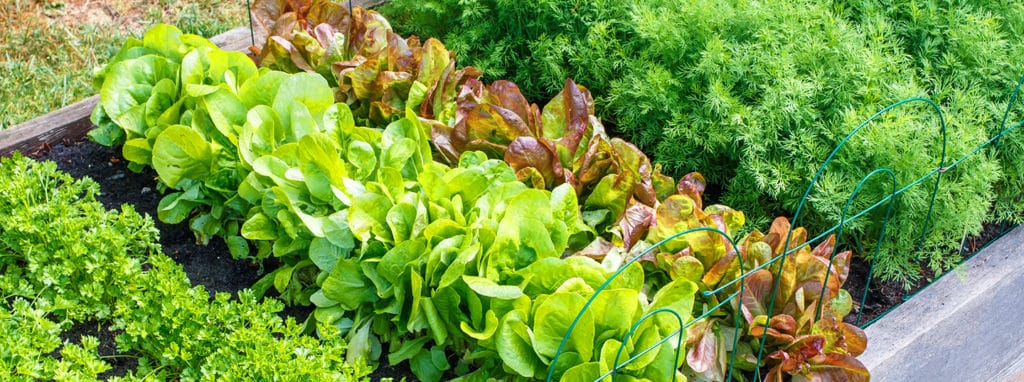
From reduced pandemic life activities to increased grocery prices, more and more people are embracing the art of growing your own vegetables.
Whether you’re totally green or a seasoned sprouter, here are our tips for starting and growing your own vegetable garden.
vegetable gardening 101
Decide how much time you wish to put into your garden and the types of veggies you wish to sow and grow. Aim for a minimum of 6 hours of daily sunlight. Choose which veggies need to be grown in the ground, raised garden beds, or containers (and which ones are ok with a combination of those).
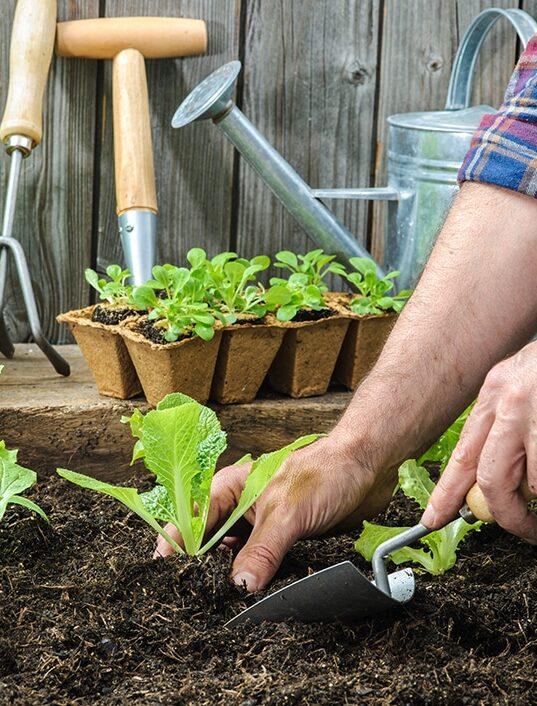
timing is everything
Vegetable harvests vary so that means your gardening timing will too. Some veggies prefer cooler weather, like carrots, peas, broccoli, lettuce, and spinach, so springtime is good for planting, before the last frost. They can often be re-planted for a later harvest that same year.
Once the frost is over and the soil has warmed, get ready to plant vegetables like corn, tomatoes, cucumbers, and peppers, who like sun-kissed warmth.

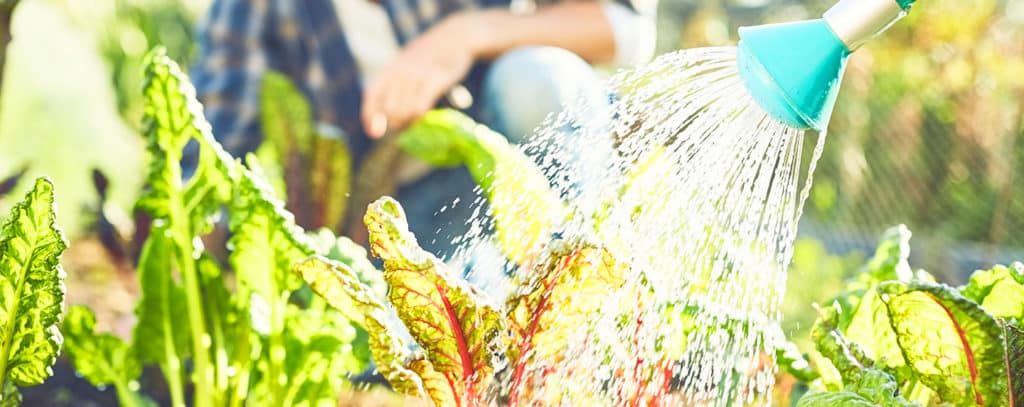
feed the seeds
Now that you’ve planted your veggie garden, you can water it, preferably in the morning. This prevents disease, as the plants will be drier by nightfall. The amount of food and water a vegetable needs depends on its type (for instance, eggplants require more than lettuce.) A month after planting, you may introduce water-soluble plant food, like Miracle-Gro®Organics Plant Food for Vegetables and Herbs , adding it every week.
weeds be gone with mulch
Mulch is an effective and attractive way to prevent destructive weeds from growing by blocking their sunlight. Simply apply about an 8cm / 3-inch blanket of mulch like Scotts® Nature Scapes® Mulch around your veggie planter or garden. Mulch also keeps the soil moist and cool.
#easypeasy
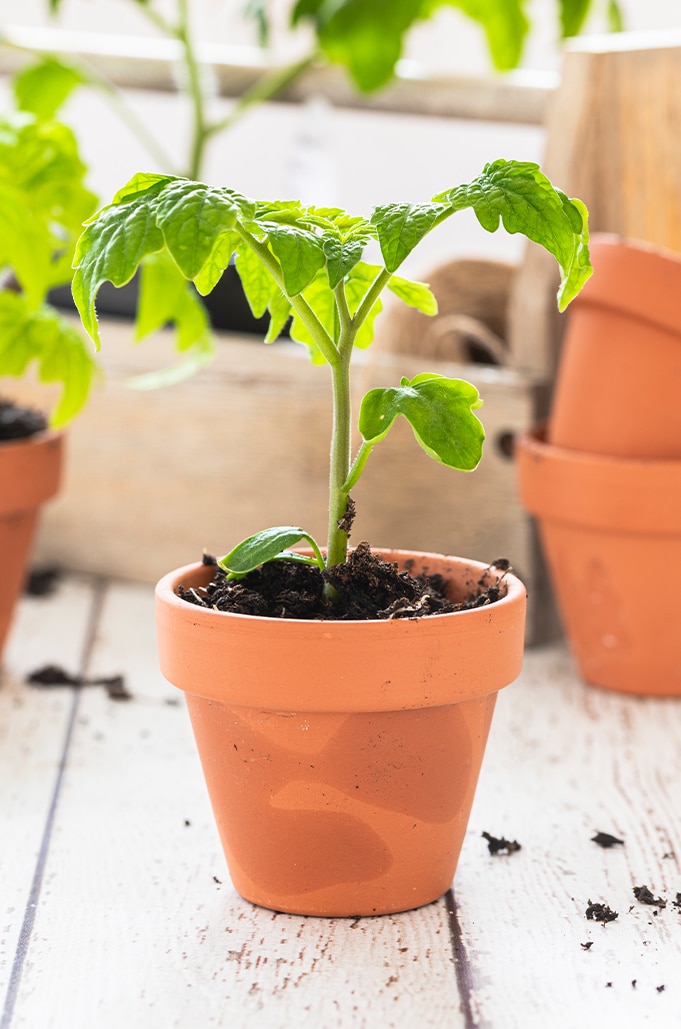
Why wait for tomato plants at the garden centre? Take your tomato game to the next level and sprout your own seeds indoors.

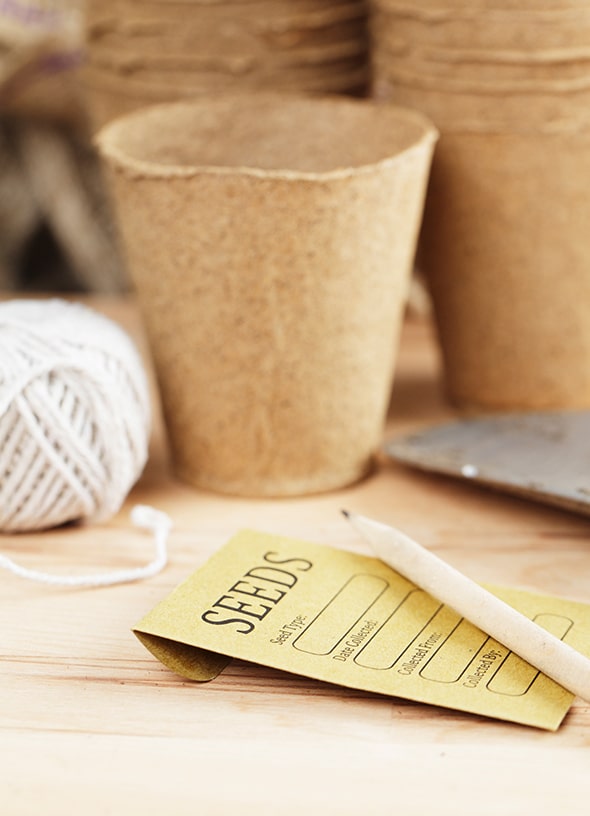
here’s what you need to get started:
- Tomato seeds (opt for ones that are less than one year old)
- Miracle–Gro® Seed Starting Potting Mix
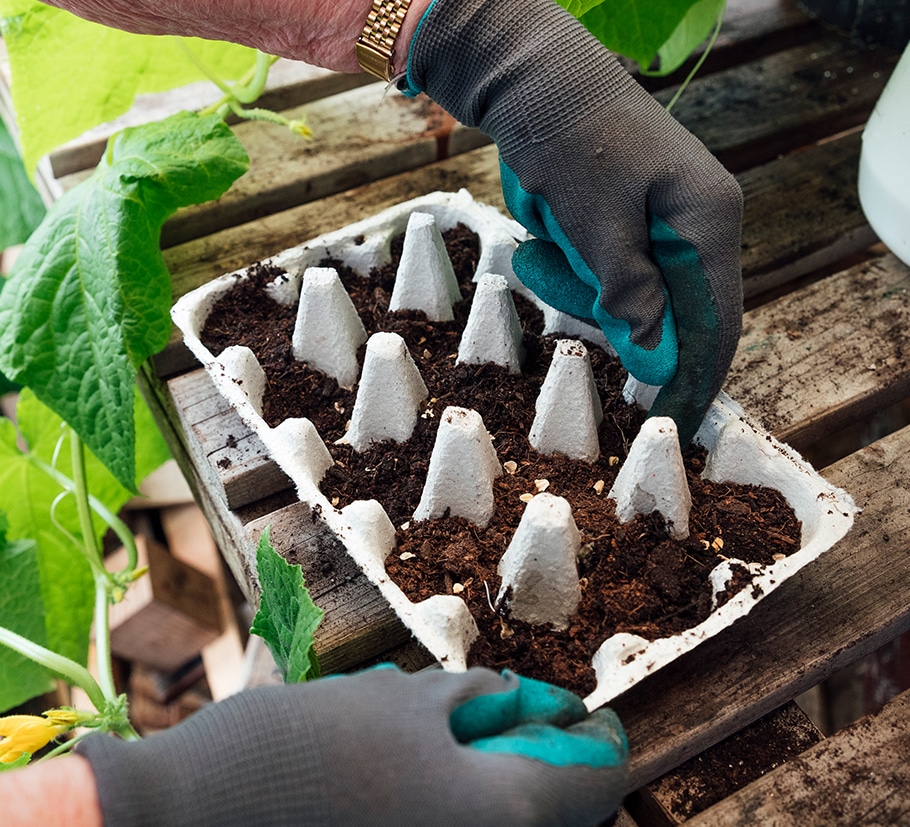
- Seed-starting pots (we recommend recycling egg cartons as an eco-friendly option, but you can also purchase pots.)
- Water bottle for misting
- Plastic wrap
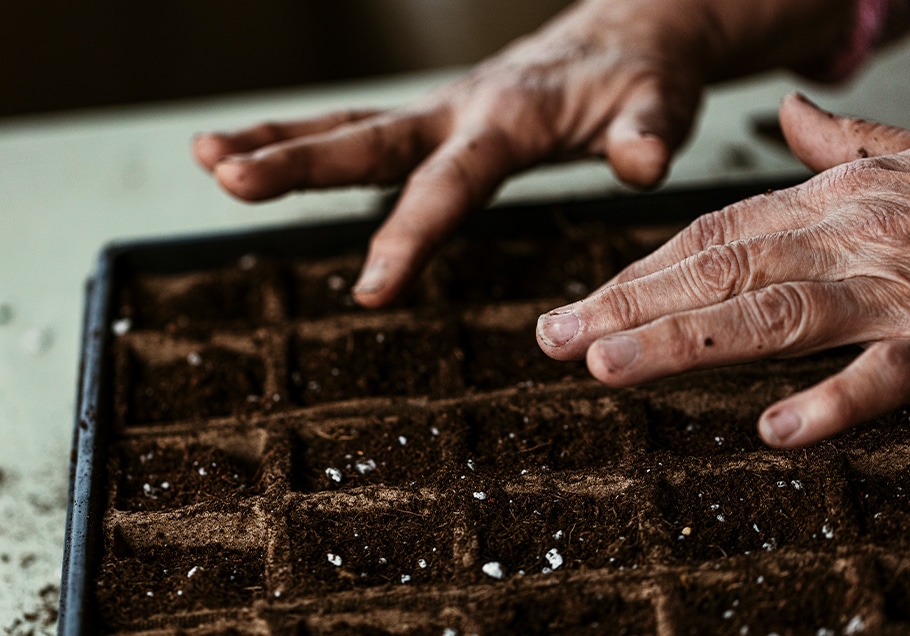
step one.
Add Miracle-Gro® Seed Starting Potting Mix to the seed pot, about a quarter of the way filled. Gently pat it down but do not make it too compact.
step two.
Place 2 to 3 seeds in each pot, covering with a small amount of additional mix.
step three.
Moisten the top layer (enough to cover the seeds) with your spray bottle.
step four.
Find a warm, dark place to keep your seed babies. Don’t forget to cover them in plastic wrap.
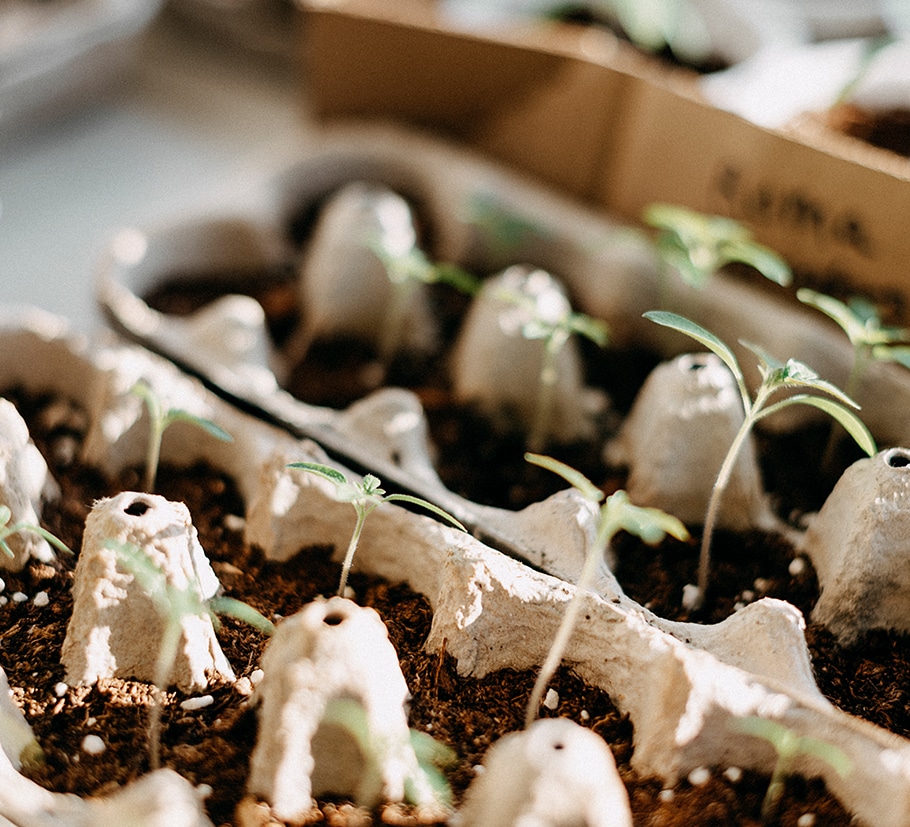
step five.
Checking in on your seed babies daily, ensure the soil is always wet but not soaked.
step six.
When you see sprouts emerge, move them to a sunlit window or use an indoor growing light.
#easypeasy
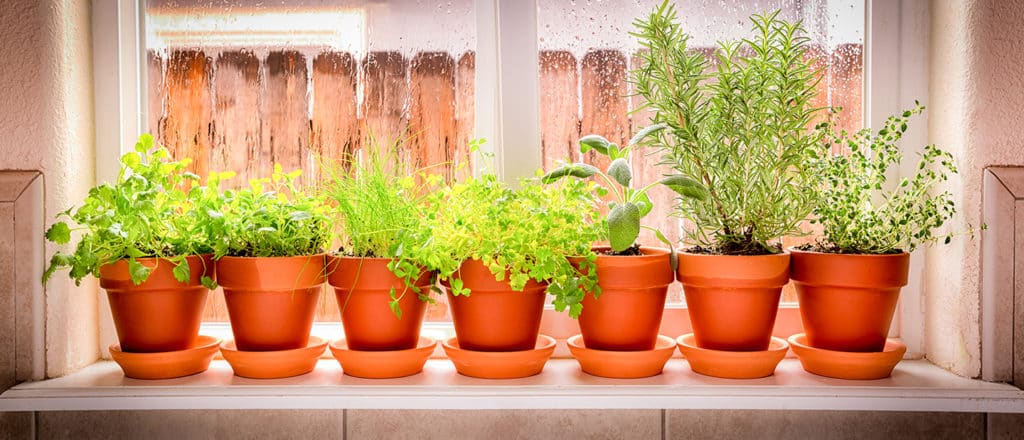
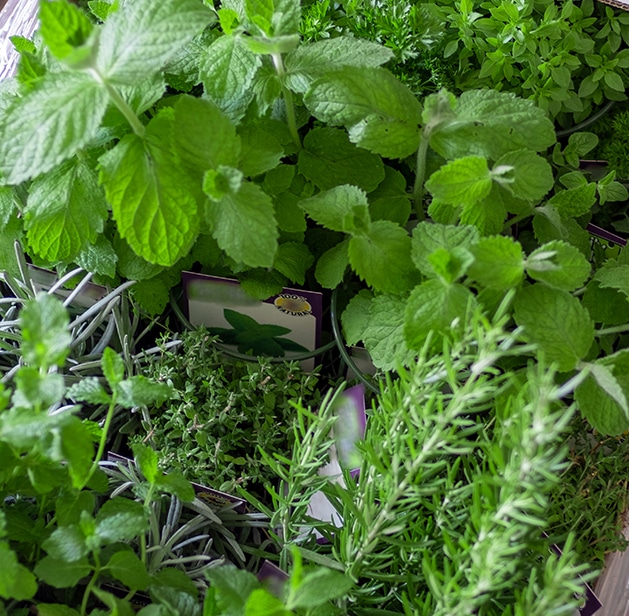
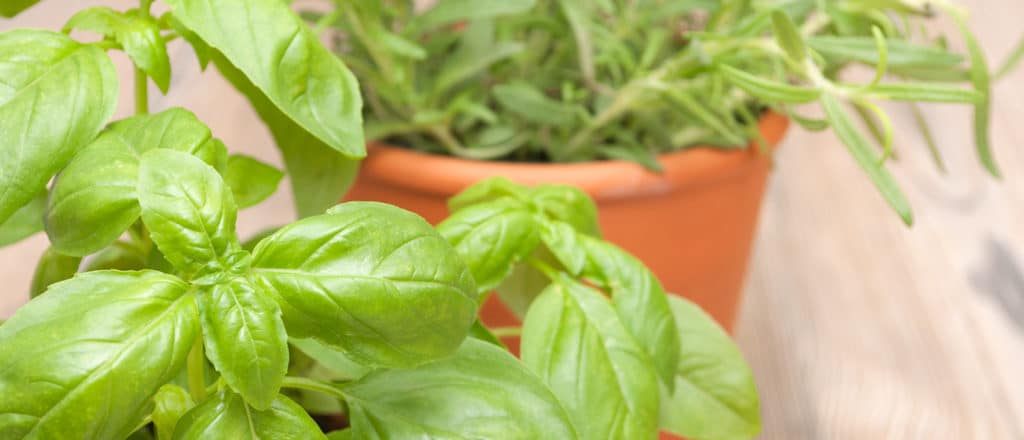
Say goodbye to dried herbs and swap them for their fresh counterparts. More flavourful and healthy, you can even enjoy fresh herbs in winter by growing them indoors. We show you how.
quality soil produces quality herbs
Just as we require fresh food for optimal health (but you already knew that, since you’re here to grow your own fresh herbs!) plants require quality soil.Call us biased but the best results come from using Miracle-Gro® Potting Mix, designed for proper nutrient absorption and drainage.
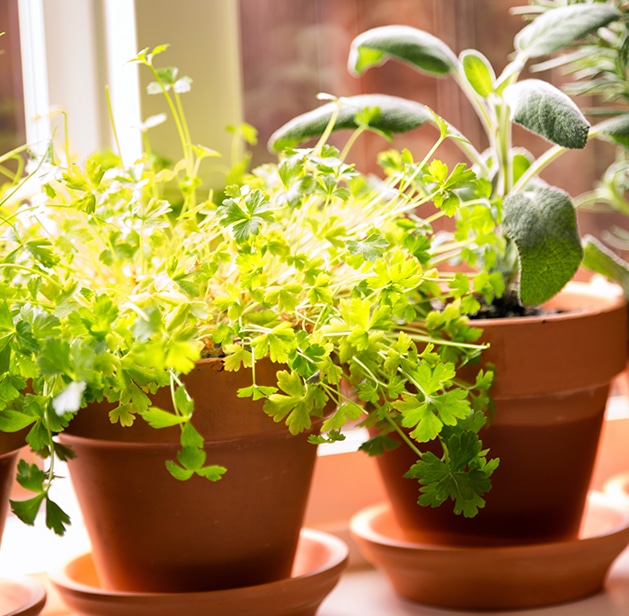
sunny side up
Put it this way, the more sunshine your herb babies get, the more they’ll grow up healthy and abundant. Choose a south-facing window to place your indoor herb garden, avoiding a north-facing windowsill, although east- or west-facing windows are alright, too.
seedy side of the sill
Just as sunlight makes a world of difference, so do the seeds you choose. Small containers work best with denser, smaller seeds. Using a seed starting mix like Miracle-Gro® Seed Starting Potting Mix, sprinkle your herb seeds over the soil and cover not too tightly, or plant your herb seeds an inch or so deep.
talkin’ ‘bout my germination
After you plant the seeds, cover the container with a loose-fitting item like a plastic bag or dome-shaped vessel. Place them in a warm damp spot away from direct sunlight which will allow the seeds to germinate. Once they do, you can remove them and place them in a sunnier spot.
TLC for transplanted herb plants
Your herb babies can undergo shock from dramatic light changes, so adjust them slowly. This means it’s best not to take them directly from a sunny area to a dim one. Allow them to acclimatize by gradually exposing them to lower light conditions. For example, start them in a spot that receives indirect sunlight for two weeks, then to a shadier area for another week or two, until finally moving them to their new indoor home.
water, but not too much
Your potting mix should dry a bit before the next watering. The best way to check is simply sticking your index finger into the soil and if it’s dry, gently water. Liberal waterings can be a recipe for disaster so avoid over-watering your herbs. A good method is to see water coming out of the bottom of the container but not flooding. Check out the Miracle-Gro®’s line of herb feeding products for a healthy herb harvest.
keeping herbs happy
Like most plants, regular pruning of your herbs enables them to stay compact and grow new leaves and shoots. Herbs are easy to prune since you are likely gently pulling them to add to your cooking or salads. Pruning can even extend your herbs’ growth periods. Flowers might look pretty but they affect flavour and tenderness of the herbs, so be sure to prune them below the bud immediately.
#easypeasy
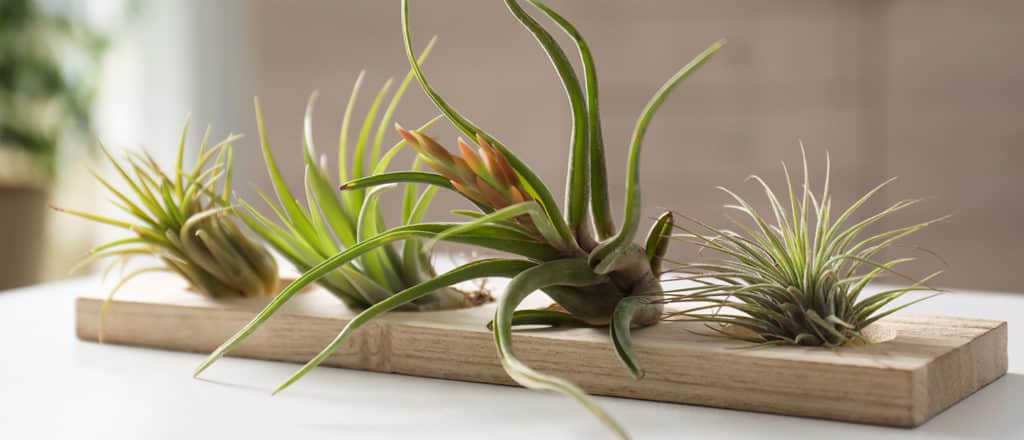
If you haven’t got on board with the air garden trend, it’s time for you to turn a new leaf. Easy to care for and uniquely beautiful, air plants are a way to brighten your home with green, no soil required.
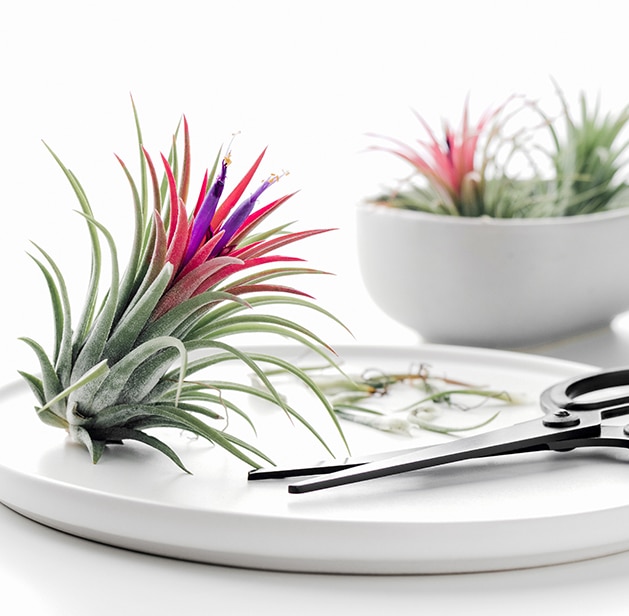
about air plants
Air plants usually grow on other plants, creating intriguing patterns and visual interest. They look wonderful on their own or grouped together! We love seeing them displayed in things like terrariums, wall planters, and driftwood.
flowering air plants?
Their rosette style of growth, meaning new growth stems from the middle of the plant, make these plants fascinating to watch grow and even flower.
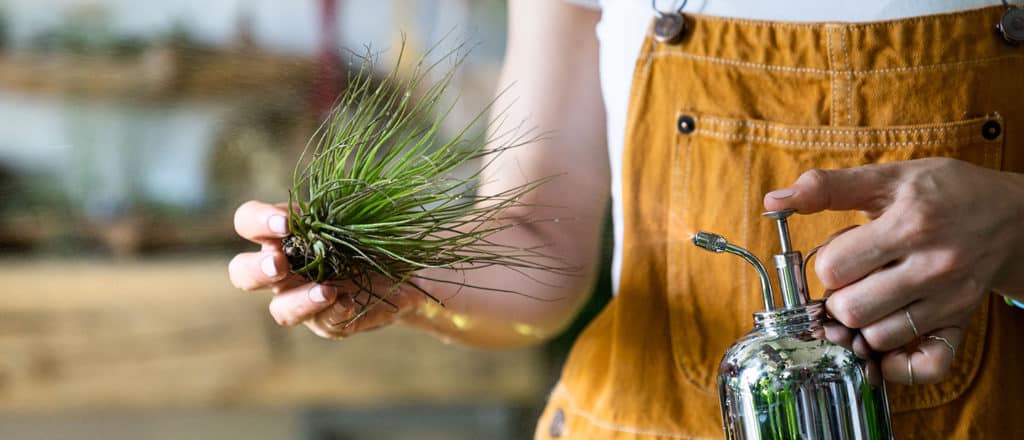
caring for your air plants
As easy as air gardens are to care for, your air plants require the right amount of light and room temperature. Bright, indirect sunlight is best. Since they originate from warmer clients, your air plant babies like a cozy home, so keep the thermostat at least 8 ℃ (46℉) so they don’t get cold. Unlike other houseplants, air plants do not have roots. This means you should soak them at least one a week in a jar for about 30 minutes, then turn upside down gently to drain.
all set!
They can be placed in terrariums or attached to anything from magnets to driftwood for creating your own interesting displays—just use a bit of hot glue or translucent fishing line to create a floating look!