- Pine
- Cedar
- Fir
- Oregonia
- Birch Poles
- Ilex Berries
- Curly Willow
- Miracle-Gro Potting Soil
- Pot liners/ Container
- Fairy Lights
- Accents & Decor
- Jumbo Christmas Lights
- Pine cones
- Wooden dowl
- Floral Tape
- Floral Wire
- Diagonal cutters/ tin snips/ needle nose clippers/ or flower sheers
how-to with once upon a bungalow: Outdoor Holiday Arrangements (With a Vintage Christmas Flare!)
Hello Everyone! My name is Shavonne, and you can find me anywhere on social media under the name Once Upon a Bungalow. Plant Project Canada has graciously asked me back to give you some tips on creating outdoor holiday arrangements. Now, I’ll be honest with you, this was my first time making an outdoor arrangement. I’m not claiming to be an expert. I am, however, going to show you everything I learned, along with the materials I used to make these as quirky and unique as possible – a common theme in our bungalow. Be sure to check out this holiday outdoor arrangement reel on Instagram, Facebook, or Tiktok!
Alright, let’s go!
First things first: If you don’t know how to do something, ask someone who does! That’s precisely how I started this project, asking our local expert so that I could give you the best “how-to” article possible. I’d love to give a HUGE shout-out to Jacqueline Williams of Just a Girl in her Garden, a local greenhouse and flower shop. She took the time out of her busy holiday schedule to give me a course on how to create a long-lasting and gorgeous arrangement for our cold Saskatchewan winters. Check out Just a Girl in Her Garden’s webpage here.


step 1.
Select you greens: I used three main foliage types for the arrangements (photographed above in order): Pine, Cedar, and Fir. Using different kinds of foliage gives the arrangement different colours, textures, and dimensions. I purchased an equal amount of each of these varieties, and I recommend you source your foliage from your local greenhouse to ensure the quality of the product. If you already have a garden full of these greens, you can also just cut off your own!


For accents, I used Oregonia, birch poles, and Ilex berries. These are more of an investment; however, you only need a few of them, and they add so much flair and personality to your arrangement. Later in this article, I’ll also show you the curly willow that is incorporated into the final design.


step 2.
Select you soil, pot, and decide on a layout: There are many options that can be used as a basis for the arrangement. Some prefer sand, and some prefer floral foam; however, in the harsh Saskatchewan climate that fluctuates regularly and sees extremely cold temperatures, our local garden expert, Jacqueline, recommended starting with the soil. I chose to use Miracle-Gro Potting Mix, which is ideal for outdoor and indoor containers. This will also help us prevent the branches from rotting and ensure we have a long-lasting holiday arrangement. This potting mix facilitates soil aeration that ensures oxygen reaches the plant branches, which is an essential factor in promoting overall arrangement health.
Your pot selection depends on the size of your arrangement and whether or not you would like to use a liner in your main pot. These three arrangements were going to be featured in our outdoor privacy wall planter, so I knew just the pot liner would work well for this project. You can also choose to build your arrangement directly into your main pot; a liner is unnecessary.
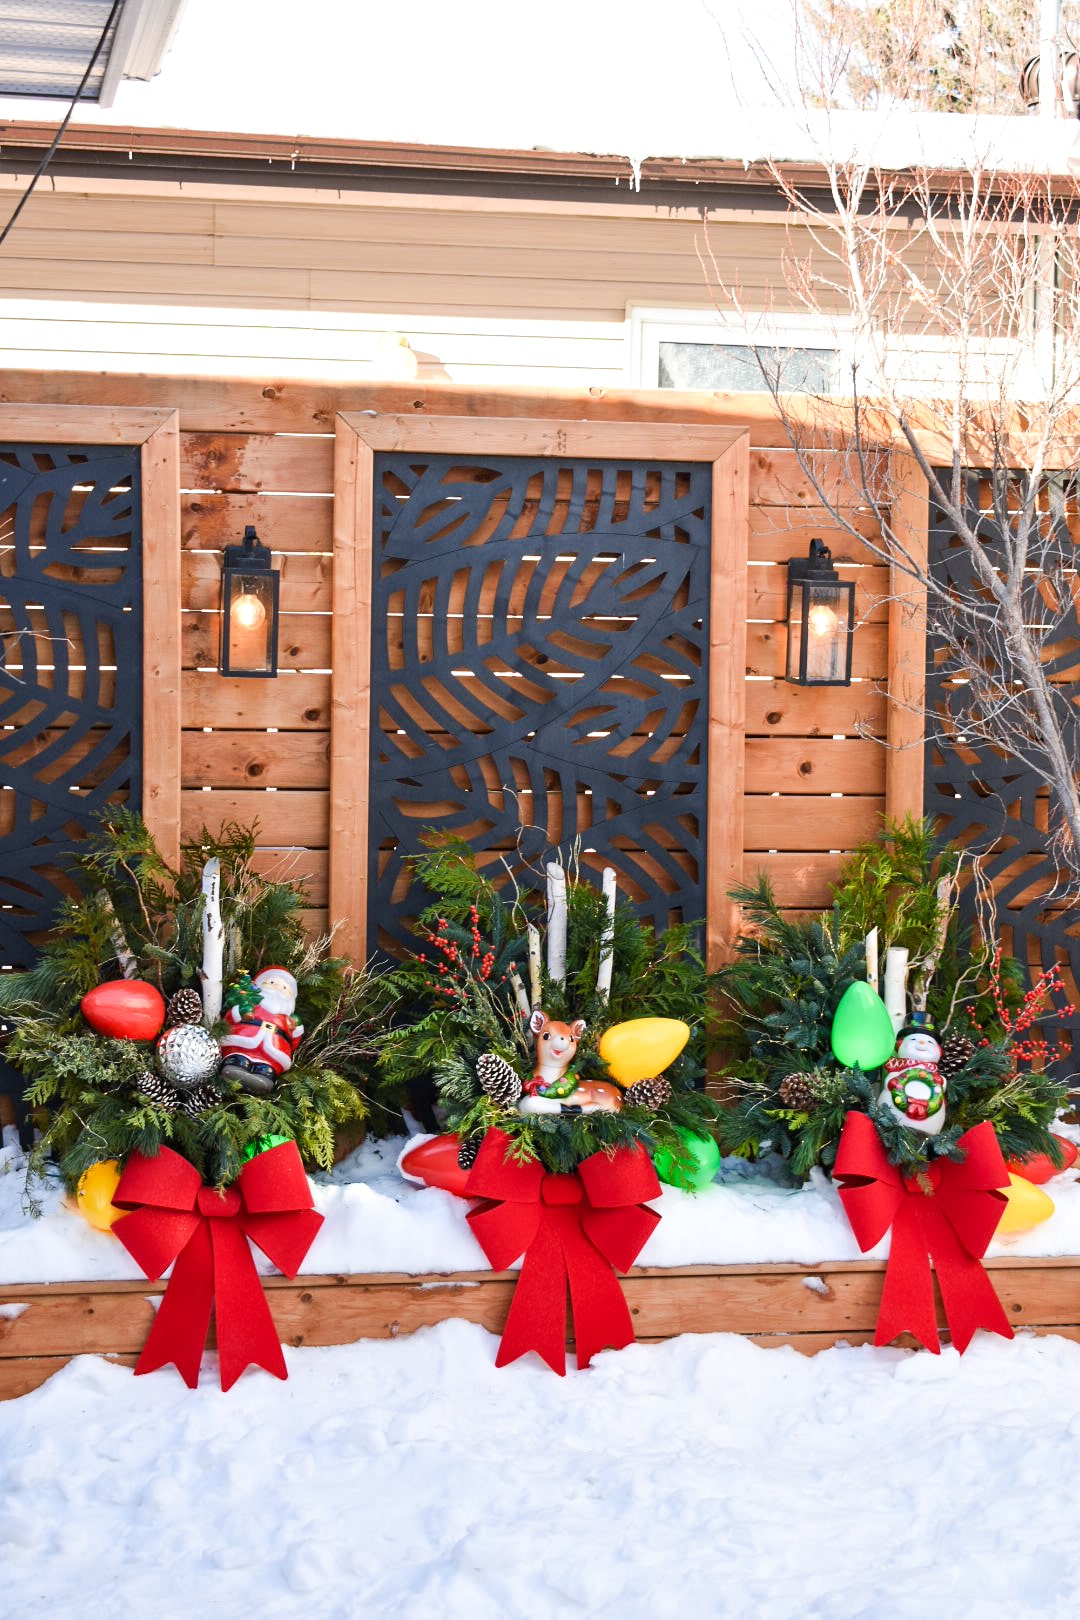
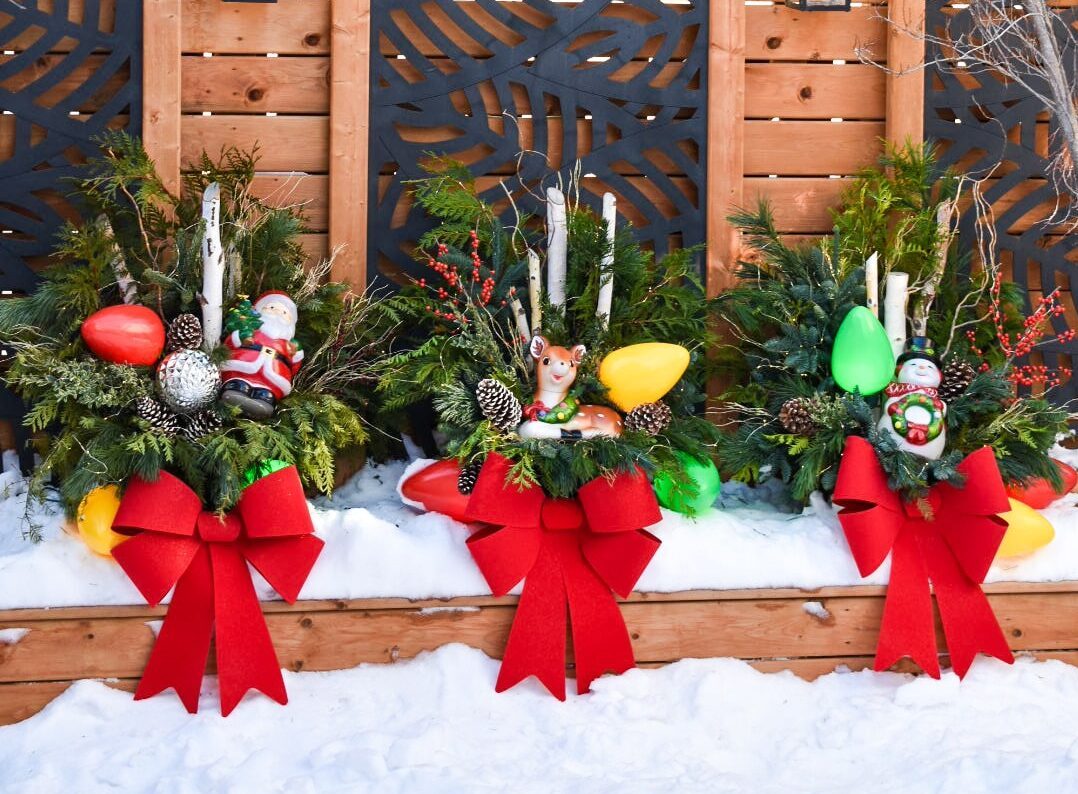
Deciding on your arrangement layout depends on how you want people to view it. Where is your arrangement going? Will it be seen by all the sides? Or will it only be seen from the front? Asking yourself these questions will determine how you build your design. For my vintage holiday arrangements, I knew there would be a backside that would rest against the privacy wall in our backyard. Instead of a “mound” style that is beautiful from all angles, I went for a forward-facing arrangement that will be primarily viewed from the front. Knowing my design direction, the back of my arrangement didn’t have to look good, and I could create height at the back of the pot instead of the middle. Tip: Explore Pinterest for inspiration before beginning.


step 3.
Start with the poles: Start with your birch poles. I used three as I like an odd number, but you can use as many as you like! This creates a central focus for your arrangement, and you can start building the rest from there. Stagger the poles to create different heights and vary the angles at which they are added to the pot. Remember, if you are building a mound arrangement (an arrangement that will be viewed from all angles), you will want to place these in the center. However, these were placed more toward the back because I am building a forward-facing arrangement.


step 4.
Add the greens: One of the biggest things I learned from my class at Just a Girl in Her Garden was to make sure that you take off the lower branches, needles, and leaves from the base of your foliage to ensure that the plant does not rot within the soil. Before placing it in the pot, ensure the bottom 3-4 inches are clear of all needles, leaves, and branches. Some you can remove with your hands, and others can use either tin snips, floral sheers, diagonal cutters, or needle nose clippers.


step 5.
Add the accents: Take into consideration what you want in the center of your arrangement. I knew that I wanted the vintage Santa, reindeer, and snowman as my focal point, so I included parts of the shorter greenery facing downwards in the front to create a resting spot for these elements. After putting all the fir, pine, and cedar in place, I added some curly willow, glitter branches and pine cones. To attach your accent items and focal point items, use floral wire and wrap the wire around the item you would like to secure, and then anchor the wire to a birch pole, or another strong point of your foliage. This keeps everything secure and in place.


step 6.
Add the lighting: Next, I added the Ilex berries, jumbo-size Christmas lights and fairy lights. The lights do make all the difference! These fairy lights were battery operated, but I recommend getting plug-in lighting or solar lighting that you can set to come on when it gets dark out at night – it’s just less hassle.


step 7.
Water your arrangement: After completing all these steps, ensure you water your arrangement well; however, do not overwater. If you accidentally put too much water in the soil (like I did), drain it out before putting it outside to freeze. If you fail to do this and have too much water in the pot, the plastic can burst open with the expansion of the frozen water! Remember, if temperatures go above zero, you must water these arrangements often! They do drink quite a bit. If temperatures stay below zero, they should remain lovely, lush, and green, and you won’t have to worry about watering.
ta-da! you’re done!
Honestly, I was pretty worried about messing up before I started making these! As it would turn out, you really can’t mess up! Have fun with it, get creative and add finishing touches that make your arrangement represent what makes you happy and brings you joy. I went for an over-the-top, vintage, quirky Christmas, and I’m so glad I did. I hope you guys enjoyed this tutorial! Happy Holidays from my family to yours! – Shavonne
Follow Shavonne on Instagram and TikTok


