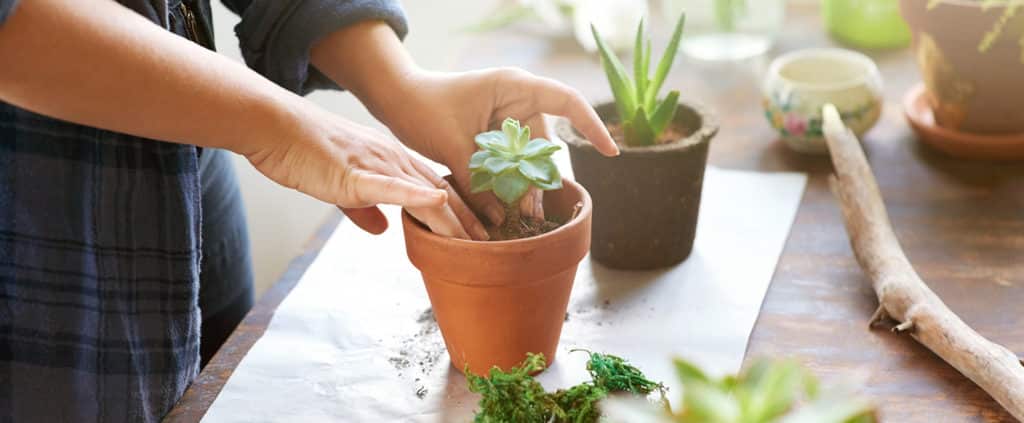
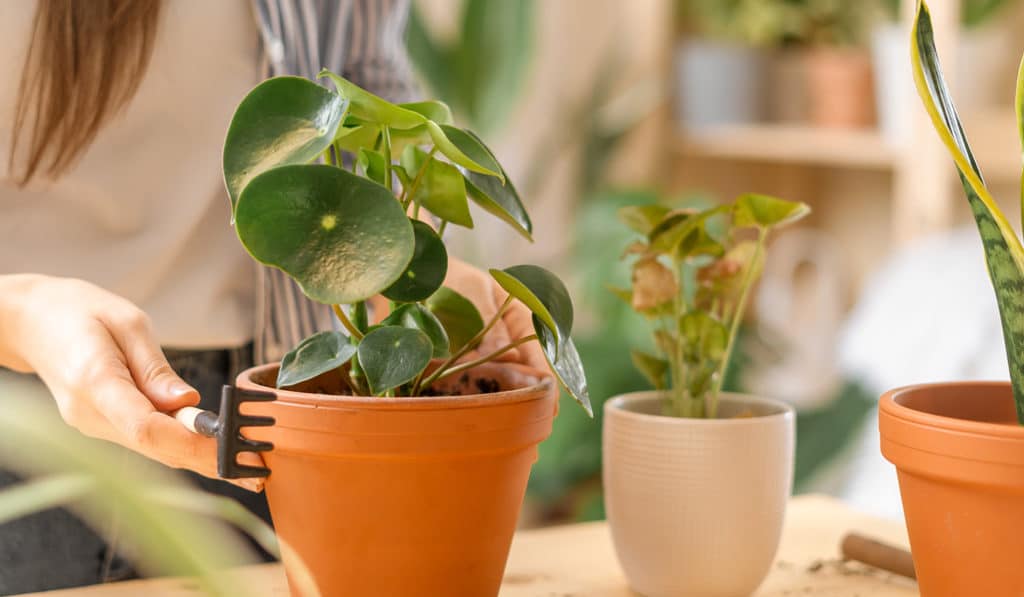
When your plant is happy and healthy, you’re going to eventually need to give it a bigger home to let it stretch out its roots! When the plant looks “rootbound”, when almost all of the soil and space in the container is roots, it’s time to go up in size. You may even see visible roots at the top of the container, growing out the bottom, or that you need to water your plant more because it has less soil to hold on to water.
We’re telling all the secrets here, keeping your plant healthy – and alive – all you need to do is picture it’s homeland, and do what you can to replicate those conditions.
Your plants might have spent their formative first few months in a greenhouse but their species has spent a long time adapting to their native territory. Give them an environment that meets their needs, it will reduce the work and fussing you have to put in to keep your plant looking fabulous.
the finger test & weight test
An effective and lo-fi way to feel for moisture in your plant is to Poke your finger into the soil. This method is so simple you can’t go wrong! Poke a finger into the soil and stop when you feel moisture. Water your plant when you poke the soil and it’s dry up to your first knuckle.
Go by weight. Water is heavy, and your dry container will be a whole lot lighter than a well-watered one. Get familiar with how much your plant weighs when thirsty and quenched and use that as a guide. Use both methods at the same time for extra confidence.
ahh sunshine and light
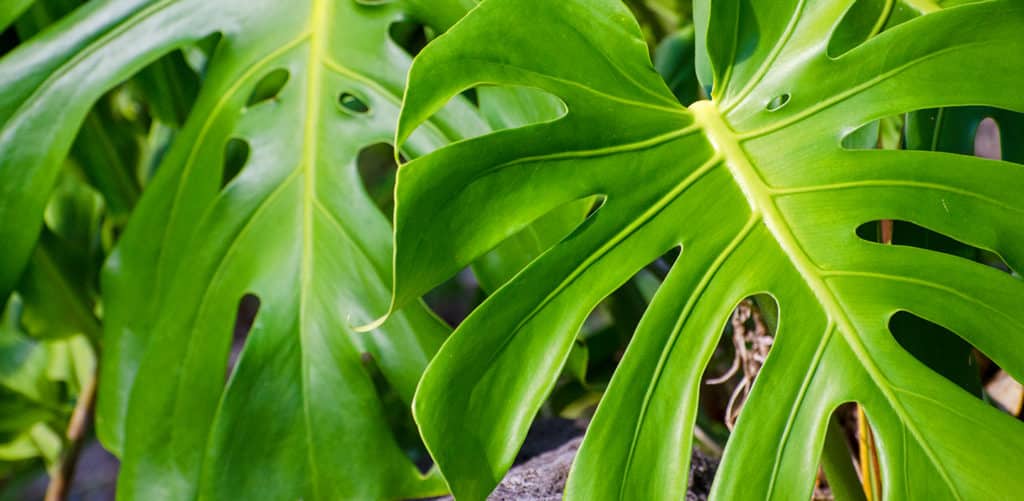
Plants from different areas of the world have different requirements, light isn’t a one-size-fits-all thing. Tropicals love to soak up the sun, but aren’t used to getting direct rays and can even be prone to sunburns. Check the tag on your plant to get an idea of its unique needs and find a spot in your home that best suits it – while plants don’t like being moved around too much, you can always give it a new POV if you need to.
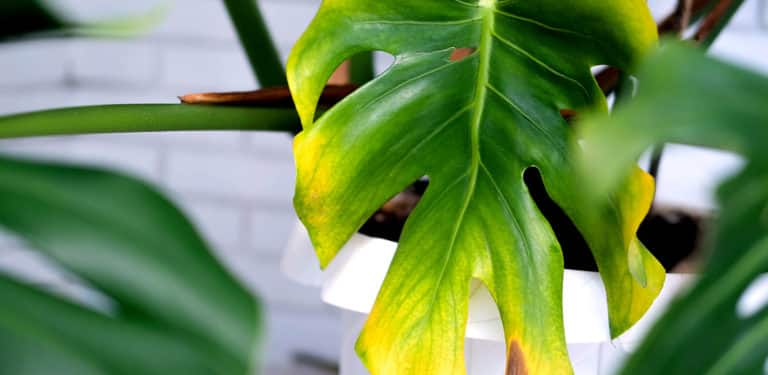
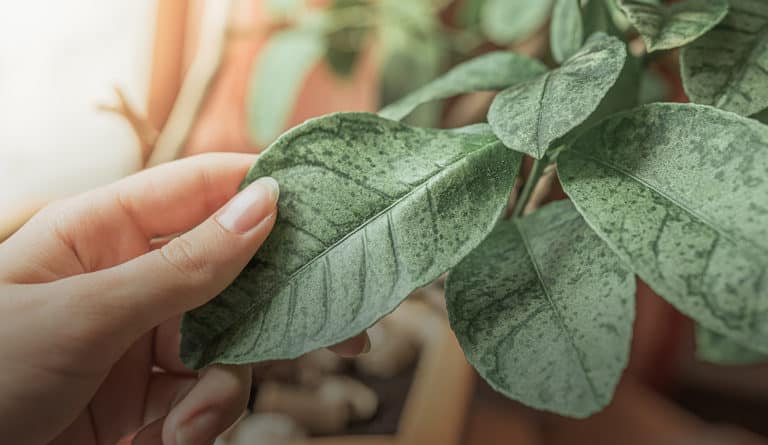
Your beautiful tropical can’t talk to you, but in it’s own way it does communicate. You can see signs of what it needs. Look out for pale or yellowing leaves, or a “stretching” plant that seems lanky – these are signs your tropical needs a little more sun. Brown spots on the leaves could be a sign of burning from too much direct light.

get the size right
Right sizing is as easy as getting a larger container and repotting. No moving van required. It’s simple, but it can get messy. Here are some of our tips for sizing up a healthy, growing tropical:
Start by only going one or two sizes bigger. You might be tempted to go larger but the proportions of your chic living decoration can be off and the excess soil will hold too much moisture and may invite rot into your container.
Buy Choose a container with good drainage. No matter the size, water needs to get in and then get out the bottom. It happens sometimes we fall in love with a decorative pot without drainage, never fear! You can DIY by drilling holes yourself or cheat by planting your beautiful tropical in a container with drainage, and simply hiding that well-draining container inside your decorative one.
Buy potting soil suited to your tropical beauty. When you use tropical-focused soil it will give you both the drainage and nutrition your plant’s needs. Planting from a sterile bag instead of taking soil from outside helps to keep pests out of your home and away from your plant.
#easypeasy
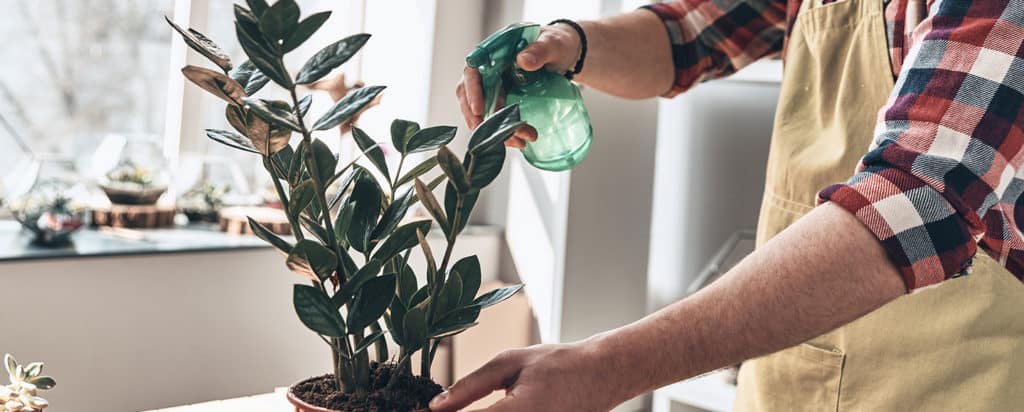
Knowing when and how to water your potted plants is an easy way to ensure your house plants are happy and thrive in your home. Here are a few simple dos and don’ts to keep in mind when it comes to watering your botanical buddy.
DO
pick a pot that is the right size for your plant and has good drainage holes.
DO
understand the unique needs of your plants. Succulents are desert plants and like to be kept on the drier side. They are susceptible to rot if over watered. Tropicals like to be kept moist. Some other types like to dry out between watering sessions. It’s all very personal.
DO
consider seasonality. Plants tend to take it easy in the winter, as a result they require less water. Spring and summer is a whole new ball game, that’s when your plant uses all its energy to grow.
DON’T
let water sit. Dump out any excess water. To prevent rot, water thoroughly and let the water run fully out of the pot, then discard the excess water to avoid soggy soil.
DON’T
water the leaves. We’ve said this a million times. When you’re watering your plant, avoid watering from overhead. Aim that watering can below the leaves and at the soil. This helps prevent bacterial and fungal infections.
DON’T
favour one side of the plant. Your plant may have it’s good side but to keep your plant friend full and lush, evenly water around the whole pot.
QUICK TIP
House plants love music! A bopping playlist also encourages growth.
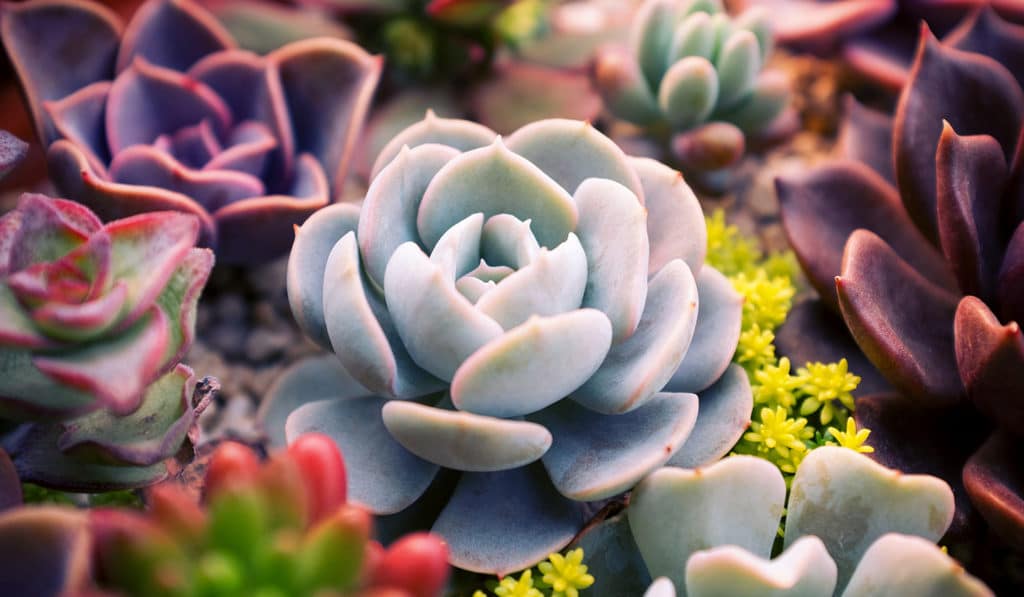
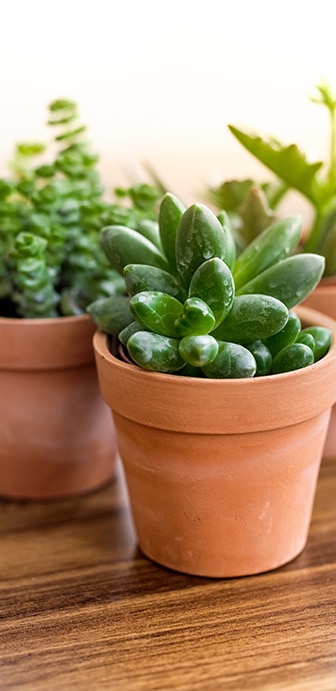
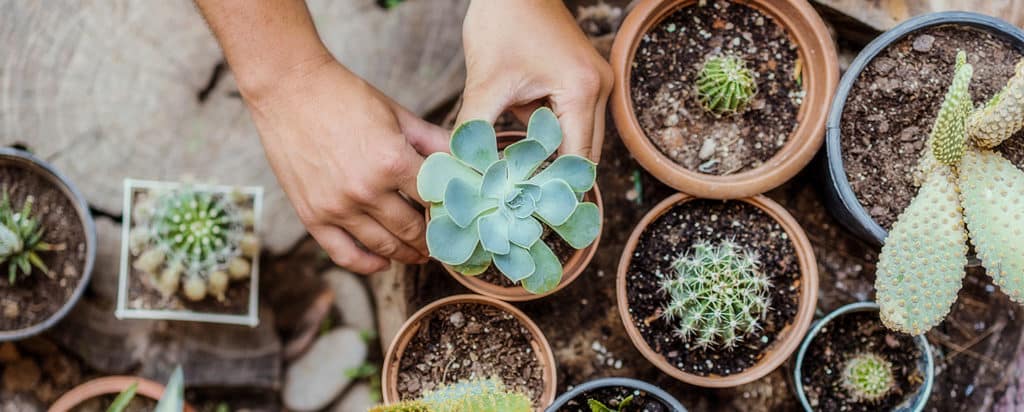
People rave about succulents as one of the best plants for beginners. Is it because they’re generally thought to be drought resistant or because they’re not too fussy. Here are a few tips for happy succulents.
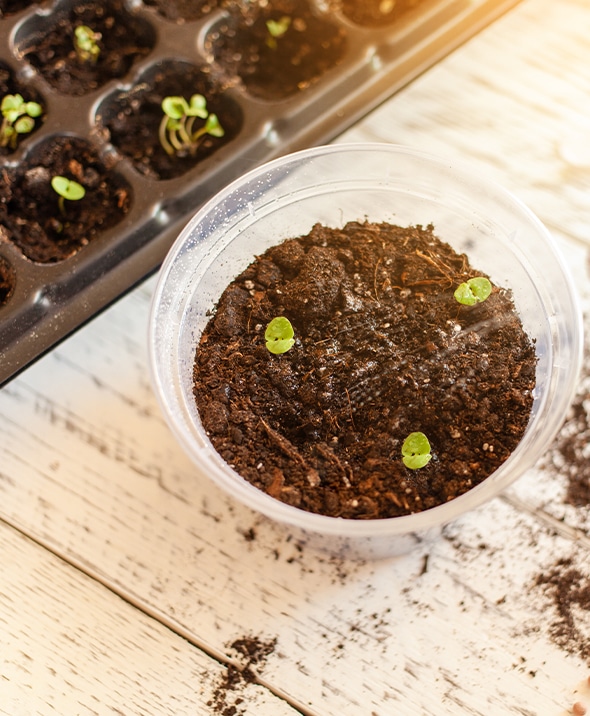
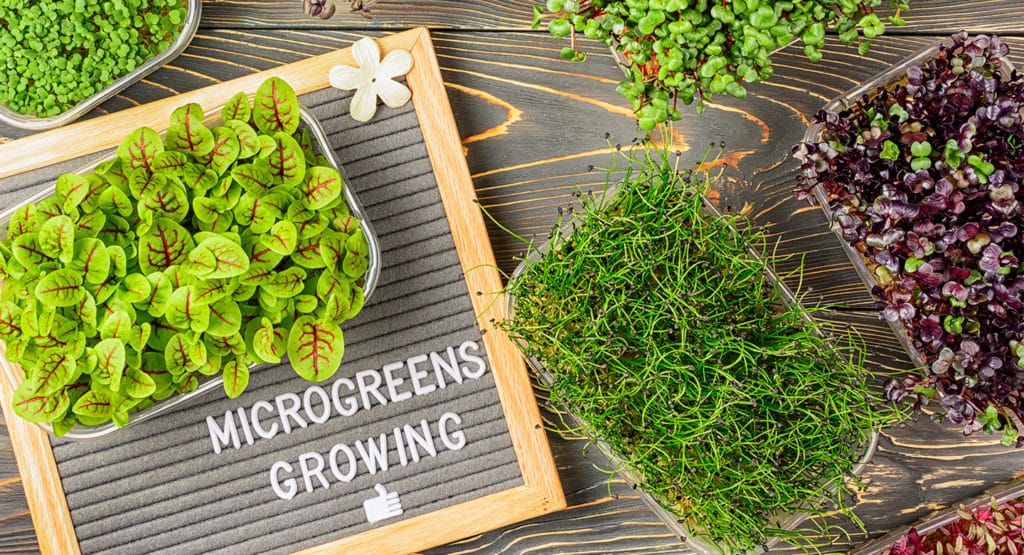
small but mighty nutritious, make growing your own microgreens your next micro gardening project.
From fringe, to fad, to being favoured by many, microgreens have experienced quite the publicity journey. Packed with vitamins and with versatile uses, microgreens have become mainstream for health enthusiasts and home gardeners alike.
how microgreens differ from sprouts
Microgreens and sprouts may seem similar but are indeed different. With fully developed leaves, microgreens are in fact just miniature versions of your favorite large leafy greens. Sprouts and shoots on the other hand, although also nutritious, are not mature and do not require soil like microgreens do.
here’s what you need to get started:
- Microgreen seeds. From kale, spinach, radish, broccoli, beets and wheatgrass, when it comes to microgreens, the sky (and soil!) is the limit
- Misting bottle filled with water
- Upcycled plastic or aluminum take-out container or plate
- Miracle-Gro® Seed Starting Potting Mix
- Plastic wrap
here’s how to grow microgreens
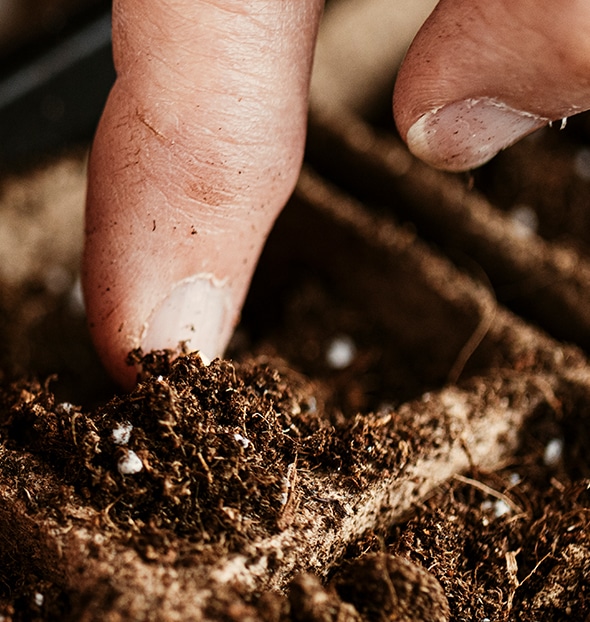
1. At the bottom of your container, evenly spread 1” of seed starting mix, making sure it’s not too compacted.
2. Sprinkle the seeds over the starting mix evenly, using your fingers or a small piece of cardboard to gently press them in.
3. Pour a small amount of water over the seeds– you only want the surface to be damp.
4. Take the plastic wrap and cover the container, then place in a sunlit window.
5. Be sure the microgreens get 4 hours of sunshine daily.
6. Use the water bottle to spritz the soil every day to keep it moist. Expect seedlings to appear in a week or less.
7. Once the seedlings sprout, remove the cover and keep misting daily. When the sprouts are about 3” tall, it’s harvest time.
#easypeasy
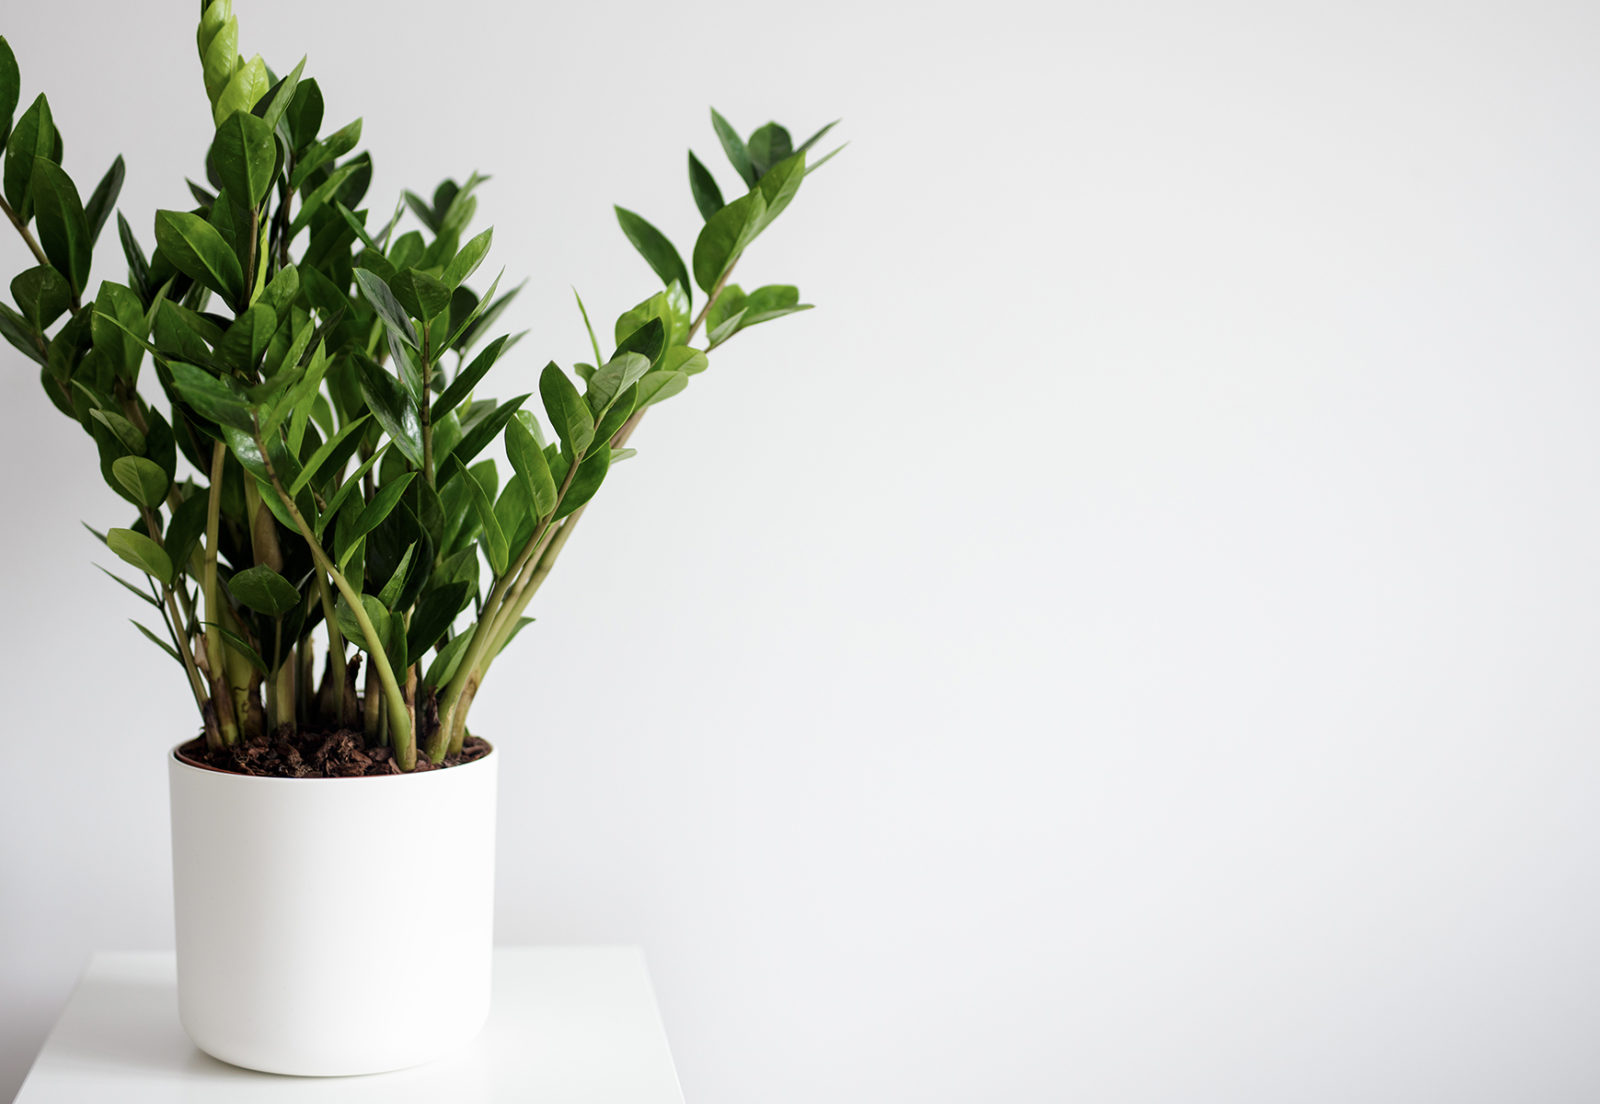
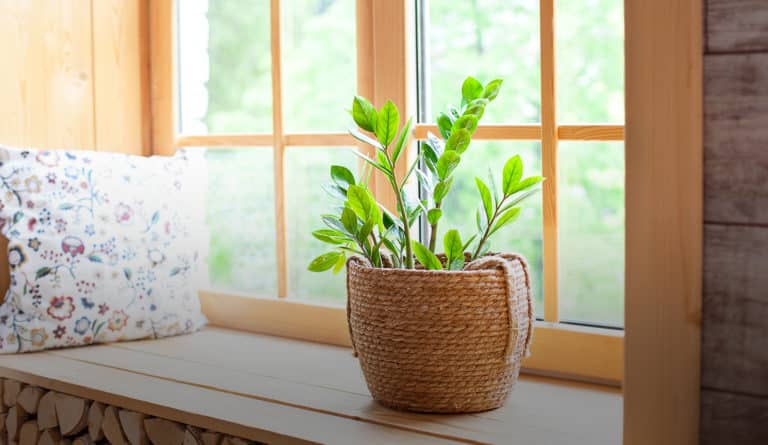
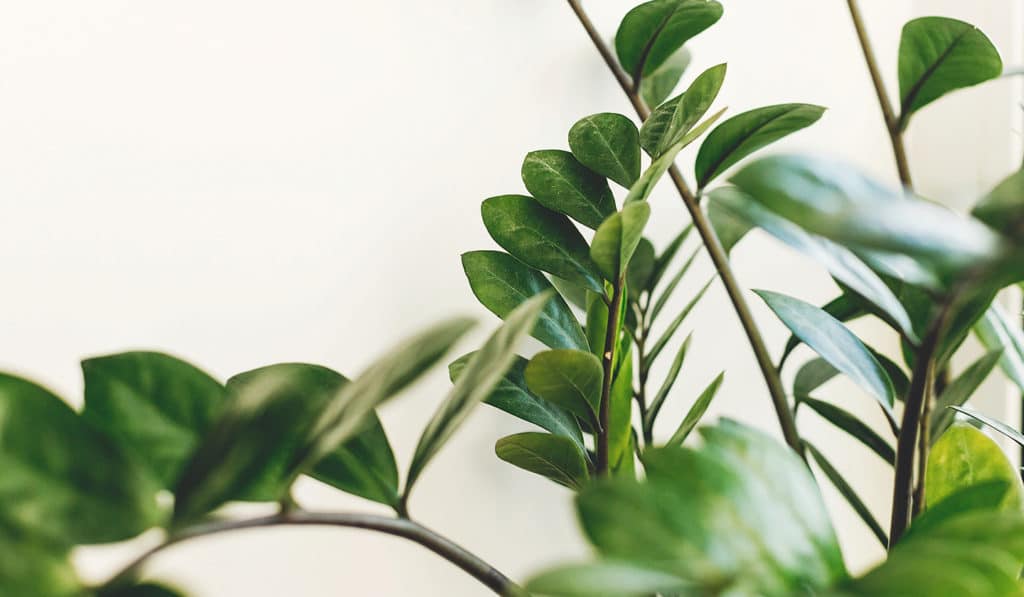
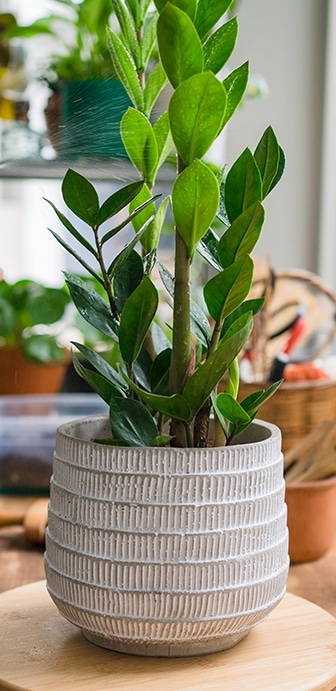
zz plant
aka zamioculcas zamiifolia, zuzu, emerald palm, zanzibar, zanzibar gem, eternity plant
ZZ has such impossibly gorgeous and glossy foliage that many people mistake them as fake. So glossy, so exotic and so low maintenance. In fact this sturdy stunner is sometimes mistaken as a fake plant. It may look too perfect be real, but it is! Meet to the Gem of Zanzibar, ZZ. Description: leaves so glossy and bright looks fake / thrives on neglect / easter and southern Africa / subtropical savannah / easy to grow / beginner plant
variations
There are a few varieties of ZZ, the Raven ZZ with black leaves, the Zenzi with curly bunched up leaves, the Dwarf ZZ or Zamicro which looks the same as a common ZZ but will never grow larger than 2 feet, and the Lucky classic which had more rounded leaves. You can also get variegated leaves on a ZZ.

light
flexible
Happiest in bright, indirect light. One of the few houseplants that can handle some hours of direct sun. But this easy-going beauty is also good in low light. So adaptable.

water + feeding
get dry between watering
Perhaps the only way to kill a ZZ is overwatering. It’s thick waxy coating and water-storing roots mean this plant does well with much less water than other plants. Make sure the top 1 to 2 inches are completely dry before rewatering. It also doesn’t need much feeding. Feed once a month max, in Spring and Summer. Even then, you can dilute the nutrients.

toxic
mildly toxic to humans and pets
Ingestion will cause mouth, stomach irritation and possible vomiting. ZZ’s sap may also cause skin irritation.

location
not fussy
ZZ can thrive almost anywhere. It truly is one of the easiest plants. It’s from Zanzibar, so it prefers the warmth.

humidity
flexible
Dry air is not a problem. It can handle humidity also. You can mist occasionally, but ZZ does well with no special treatment.

size
large friend
This plant can grow up to 5ft tall with a 3 to 4 foot spread.

pro tip
drought tolerant
ZZ plants have thick succulent roots and can live for months with little to no water. They much prefer to live on less water than too much.

fun fact
eternity plant
ZZ earned this nickname because it looks like ancient plants that predate the dinosaurs. Another reason may be its borderline miraculous resilience.
beyond the basics
-
soil & potting
ZZ prefers a light, well-draining potting soil like Miracle-Gro Cactus, Palm and Succulent Potting Mix. Or, use regular potting soil and add some potting sand or perlite. Ensure the pot has good drainage and avoid standing water. Empty drainage trays if you see water collecting.
-
when to repot
In the right light, ZZ grows quickly. Amazingly, they actually enjoy being a little rootbound, so you don’t need to repot as often as other plants. Repot every 3 to 4 years in the Spring, especially with younger plants. Increase pot by 2 inches every time. If you want to slow down growth, do some root trimming. In later years you can replace the top couple inches of soil instead of completely repotting.
-
propagation
Even propagation is easy with ZZ. Dig up the thick root ball and cut it in half. You can technically propagate your ZZ via stem and leaf cuttings, but it’s so much harder than cutting the root ball that we don’t recommend it.
-
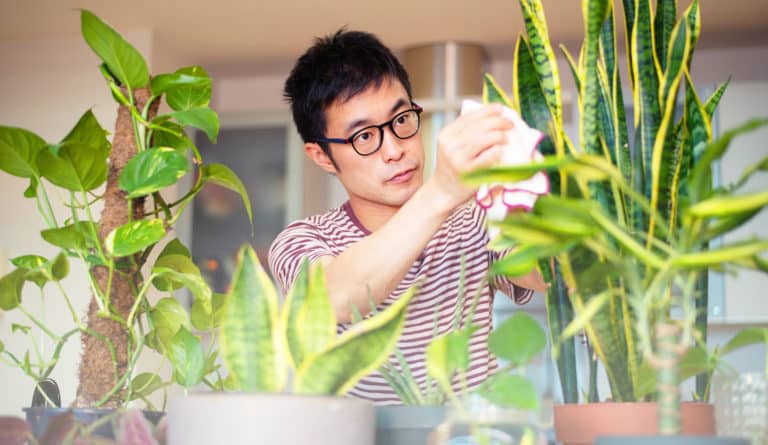
pest control
Can get mealybugs and spider mites. When you’re dusting those glossy leaves, inspect the undersides. Check out our Pest control section in Plant 101 for how to identify and deal with pests on your plant!
troubleshooting
-
why the yellowing leaves?
Overwatering. By far the most common problem with ZZ. Especially in Winter when it doesn’t need (or want) much water at all. If the plant has been sitting in water, it may have root rot. This problem is no big deal if you catch it early. First, stop watering! Let’s dry out that soil. Check your pot’s drainage. Does it have a hole that allows excess water to escape? Help things dry by poking holes in the soil. This will get oxygen to the roots. You can also put the pot (with drainage holes) in a tray that’s lined with a layer of dry soil. It acts like a sponge to draw out extra moisture. Now, let’s check for root rot. Dig down and cut out any that look affected. If things are really bad, consider repotting entirely with new soil. Moving forward, allow ZZ’s soil to dry between watering. The top couple inches should be dry to the touch. For more information check out our Plant 101 section.
-
why do I have many dropping leaves?
Probably stressed. ZZ is tough but not invincible. If you’ve moved it recently that may have stressed it out. Did you just bring it home from the nursery? That’s a big change. Leaf drop is most common when ZZ was in shade and suddenly put in full sun. Ease you plant to new area when you can. If you haven’t moved it recently, check for wet or totally bone-dry soil. See above for proper watering regimen.
-
what’s with the brown patches on leaves?
Sunburn. It can handle some direct sun, but long Summer exposure can burn even the mighty ZZ. Try moving your plant somewhere that’s still bright, but with indirect light.
-
why isn’t it growing?
Not enough light. ZZ survives well in low light, but it takes bright light for ZZ to thrive and grow. If you’re happy with the size, keep it shady. If you want to see ZZ’s impressive growth in action, move it somewhere with plenty of bright and mostly indirect light. Make this change gradually if you can. Increase your watering (but just a bit) to suit the increased light.
-
why the soft or drooping stems?
Again, overwatering. This is stem rot, spreading up from root rot. Remove all those mushy stems or trim away anything that looks like rot. Now let’s dry the soil and check the roots. Check your pot’s drainage. Does it have a hole that allows excess water to escape? Help things dry by poking holes in the soil. This will get oxygen to the roots. You can also put the pot (with drainage holes) in a tray that’s lined with a layer of dry soil. It acts like a sponge to draw out extra moisture. Now, let’s check for root rot. Dig down and cut out any that look affected. If things are really bad, consider repotting entirely with new soil. Moving forward, allow ZZ’s soil to dry between watering. The top couple inches should be dry to the touch. For more information check out our Plant 101 section.
zz plant
aka zamioculcas zamiifolia, zuzu, emerald palm, zanzibar, zanzibar gem, eternity plant
ZZ has such impossibly gorgeous and glossy foliage that many people mistake them as fake. So glossy, so exotic and so low maintenance. In fact this sturdy stunner is sometimes mistaken as a fake plant. It may look too perfect be real, but it is! Meet to the Gem of Zanzibar, ZZ. Description: leaves so glossy and bright looks fake / thrives on neglect / easter and southern Africa / subtropical savannah / easy to grow / beginner plant
variations
There are a few varieties of ZZ, the Raven ZZ with black leaves, the Zenzi with curly bunched up leaves, the Dwarf ZZ or Zamicro which looks the same as a common ZZ but will never grow larger than 2 feet, and the Lucky classic which had more rounded leaves. You can also get variegated leaves on a ZZ.
light
flexible
Happiest in bright, indirect light. One of the few houseplants that can handle some hours of direct sun. But this easy-going beauty is also good in low light. So adaptable.
water + feeding
get dry between watering
Perhaps the only way to kill a ZZ is overwatering. It’s thick waxy coating and water-storing roots mean this plant does well with much less water than other plants. Make sure the top 1 to 2 inches are completely dry before rewatering. It also doesn’t need much feeding. Feed once a month max, in Spring and Summer. Even then, you can dilute the nutrients.
toxic
mildly toxic to humans and pets
Ingestion will cause mouth, stomach irritation and possible vomiting. ZZ’s sap may also cause skin irritation.
location
not fussy
ZZ can thrive almost anywhere. It truly is one of the easiest plants. It’s from Zanzibar, so it prefers the warmth.
humidity
flexible
Dry air is not a problem. It can handle humidity also. You can mist occasionally, but ZZ does well with no special treatment.
size
large friend
This plant can grow up to 5ft tall with a 3 to 4 foot spread.
pro tip
drought tolerant
ZZ plants have thick succulent roots and can live for months with little to no water. They much prefer to live on less water than too much.
fun fact
eternity plant
ZZ earned this nickname because it looks like ancient plants that predate the dinosaurs. Another reason may be its borderline miraculous resilience.
beyond the basics
-
soil & potting
These desert dwellers prefer a light, well-draining potting soil like Miracle-Gro Cactus, Palm and Succulent Potting Mix. Or, use regular potting soil and add some potting sand or perlite. A layer of sand on the top will help prevent rot. Ensure the pot has good drainage and aloe should never sit in water. Empty drainage trays if you see water collecting.
-
when to repot
Repot every 1 to 2 years in the Spring, especially with younger plants. Increase pot diameter by 2 inches every time. Want them to stay cute and little? You can stunt the growth by root trimming. In later years you can replace the top couple inches of soil instead of completely repotting.
-
propagation
Making new succulent plant babies is easy. In fact many propagate on their own. You will notice little mini versions starting grow. These “pups” can be gently separated potted as a new plant. If you’re not getting pups, remove a leaf, let it dry for a couple of days and place it on some moist soil. It should sprout roots, and voila! You have an ultra mini plant.
-
pest control
Succulents don’t typically suffer from pests, but they can sometimes get bugs. Gnats are most likely. Inspect those juicy little leaves regularly. Check out our Pest control section in Plant 101 for how to identify and deal with pests on your plant!
troubleshooting
-
why are the eaves turning brown, red or reddish brown?
A couple of possibilities. Maybe too much direct summer sun. Or possibly overwatering or root damage. First, moving your plant to a still-bright but less sun-blasted spot. Reduce the watering and follow our watering instructions above. If your succulent buddy still doesn’t bounce back, check for root damage.
-
what’s causing these dark spots? brown or mushy leaves?
Almost certainly too much water. This problem is no big deal if you catch it early. First, stop watering! Let’s dry out that soil. Check your pot’s drainage. Does it have a hole that allows excess water to escape? Help things dry by poking holes in the soil. This will get oxygen to the roots. You can also put the pot (with drainage holes) in a tray that’s lined with a layer of dry soil. It acts like a sponge to draw out extra moisture. Now, let’s check for root rot. Dig down and cut out any that look affected. If things are really bad, consider repotting entirely with new soil. Moving forward, water only when the soil is totally dry and make sure you water the soil, not the leaves. Water can collect between the leaves at its base, and start to rot. A thin layer of sand on top of the soil can reduce pooling water up top.
For more information check out our Plant 101 section.
-
pale or yellowing leaves?
Not enough light and/or overwatering. If the whole plant has yellowed or gone pale, it definitely needs more light. Move your friend to a brighter spot and resist the urge to overwater. Let the top two inches of soil get dry before watering again.
-
ew, what’s with the shrunken, wrinkled leaves?
Your plant needs a drink. Underwatering a succulent is hard to do, but it does happen. Give small amounts of water for three days in a row. Make sure you do this at soil level, not poured on the leaves. This is the ONE TIME it’s okay to do a little misting. A little does a lot. Resist the urge to water all at once! Your friend will plump up in a few days.
-
why isn’t my succulent growing?
Not enough light. It takes a lot of bright (mostly indirect) light to get succulents growing. If you’re not noticing any growth, or the new growth looks pale, it’s time to move to brighter spot. You may need slightly more frequent watering after the move. Note, succulents grow in slow motion at the best of times, so a little patience goes a long way.
zz plant
aka zamioculcas zamiifolia, zuzu, emerald palm, zanzibar, zanzibar gem, eternity plant
ZZ has such impossibly gorgeous and glossy foliage that many people mistake them as fake. So glossy, so exotic and so low maintenance. In fact this sturdy stunner is sometimes mistaken as a fake plant. It may look too perfect be real, but it is! Meet to the Gem of Zanzibar, ZZ. Description: leaves so glossy and bright looks fake / thrives on neglect / easter and southern Africa / subtropical savannah / easy to grow / beginner plant
variations
There are a few varieties of ZZ, the Raven ZZ with black leaves, the Zenzi with curly bunched up leaves, the Dwarf ZZ or Zamicro which looks the same as a common ZZ but will never grow larger than 2 feet, and the Lucky classic which had more rounded leaves. You can also get variegated leaves on a ZZ.
light
flexible
Happiest in bright, indirect light. One of the few houseplants that can handle some hours of direct sun. But this easy-going beauty is also good in low light. So adaptable.
water + feeding
get dry between watering
Perhaps the only way to kill a ZZ is overwatering. It’s thick waxy coating and water-storing roots mean this plant does well with much less water than other plants. Make sure the top 1 to 2 inches are completely dry before rewatering. It also doesn’t need much feeding. Feed once a month max, in Spring and Summer. Even then, you can dilute the nutrients.
toxic
mildly toxic to humans and pets
Ingestion will cause mouth, stomach irritation and possible vomiting. ZZ’s sap may also cause skin irritation.
location
not fussy
ZZ can thrive almost anywhere. It truly is one of the easiest plants. It’s from Zanzibar, so it prefers the warmth.
humidity
flexible
Dry air is not a problem. It can handle humidity also. You can mist occasionally, but ZZ does well with no special treatment.
size
large friend
This plant can grow up to 5ft tall with a 3 to 4 foot spread.
pro tip
drought tolerant
ZZ plants have thick succulent roots and can live for months with little to no water. They much prefer to live on less water than too much.
fun fact
eternity plant
ZZ earned this nickname because it looks like ancient plants that predate the dinosaurs. Another reason may be its borderline miraculous resilience.
beyond the basics
-
soil & potting
It’s a desert plant, so use a light, well-draining potting soil like Miracle-Gro Cactus, Palm and Succulent Potting Mix. Or, use regular potting soil and add some potting sand or perlite. A layer of sand on the top will help prevent rot. Ensure the pot has good drainage. Snakes should never sit in water. Empty drainage trays if you see water collecting.
-
when to repot
Every 2 to 3 years in the Spring, especially in the earlier years. Increase the pot size by 2 inches each repotting. In later years you can replace the top couple inches of soil instead of completely repotting. Snake growing too fast? Slow the growth by trimming the roots.
-
propagation
Grab a sharp knife or scissors, find one of the healthiest leaves, and cut it off at the base of the plant. Then cut the leaf into multiple horizontal strips (about 3 inches each). Let the ends dry for two days then put them in water to stimulate root growth. This step could take 2 to 3 weeks. When you’ve got roots, you’re ready to pot.
-
pest control
Mealybugs are most common. When you do your regular dusting, inspect the leaves. Check out our Pest control section in Plant 101 for how to identify and deal with pests on your plant!
troubleshooting
-
why are the leaves falling sideways?
Multiple possibilities. All easily fixed. Firstly, this may not be a problem at all. Overly mature leaves naturally fall away to make room new growth. But if many leaves are falling over before their time, it’s probably over or under watering. If the soil is bone dry, add a moderate amount of water for a few days in a row. Then be more diligent with your watering routine. If the soil is soaked, check your drainage and let the soil fully dry before starting a better routine. Light issues: Snake plants do well in low light but if they’re getting no light leaves may start to keel over. Move into some nice, bright, indirect light. Other causes? Maybe your Snake plant has outgrown its pot. This can cause it to become root-bound. It’s time to repot in something at least 2 inches wider.
-
why do I have yellowing leaves?
Probably overwatering. Are the leaves also a bit mushy? These are signs of root rot. Not to worry, when caught early this is easily fixable. Reduce watering and ensure the soil dries out before watering. Check your pot’s drainage. Does it have a hole that allows excess water to escape? Help things dry by poking holes in the soil. This will get oxygen to the roots. You can also put the pot (with drainage holes) in a tray that’s lined with a layer of dry soil. It acts like a sponge to draw out extra moisture. Now, let’s check for root rot. Dig down and cut out any that look affected. If things are really bad, consider repotting entirely with new soil. For more information check out our Plant 101 section.
-
why does this snake have wrinkled leaves?
Under-watering. Check the soil. It’s probably bone dry. Instead of dousing it all at once. Give your Snake plant a medium amount of water three days in a row. Nice and easy. Make sure it’s never sitting in pools of water. Those droopy leaves should rebound by day three.
zz plant
aka zamioculcas zamiifolia, zuzu, emerald palm, zanzibar, zanzibar gem, eternity plant
ZZ has such impossibly gorgeous and glossy foliage that many people mistake them as fake. So glossy, so exotic and so low maintenance. In fact this sturdy stunner is sometimes mistaken as a fake plant. It may look too perfect be real, but it is! Meet to the Gem of Zanzibar, ZZ. Description: leaves so glossy and bright looks fake / thrives on neglect / easter and southern Africa / subtropical savannah / easy to grow / beginner plant
variations
There are a few varieties of ZZ, the Raven ZZ with black leaves, the Zenzi with curly bunched up leaves, the Dwarf ZZ or Zamicro which looks the same as a common ZZ but will never grow larger than 2 feet, and the Lucky classic which had more rounded leaves. You can also get variegated leaves on a ZZ.
light
flexible
Happiest in bright, indirect light. One of the few houseplants that can handle some hours of direct sun. But this easy-going beauty is also good in low light. So adaptable.
water + feeding
get dry between watering
Perhaps the only way to kill a ZZ is overwatering. It’s thick waxy coating and water-storing roots mean this plant does well with much less water than other plants. Make sure the top 1 to 2 inches are completely dry before rewatering. It also doesn’t need much feeding. Feed once a month max, in Spring and Summer. Even then, you can dilute the nutrients.
toxic
mildly toxic to humans and pets
Ingestion will cause mouth, stomach irritation and possible vomiting. ZZ’s sap may also cause skin irritation.
location
not fussy
ZZ can thrive almost anywhere. It truly is one of the easiest plants. It’s from Zanzibar, so it prefers the warmth.
humidity
flexible
Dry air is not a problem. It can handle humidity also. You can mist occasionally, but ZZ does well with no special treatment.
size
large friend
This plant can grow up to 5ft tall with a 3 to 4 foot spread.
pro tip
drought tolerant
ZZ plants have thick succulent roots and can live for months with little to no water. They much prefer to live on less water than too much.
fun fact
eternity plant
ZZ earned this nickname because it looks like ancient plants that predate the dinosaurs. Another reason may be its borderline miraculous resilience.
beyond the basics
-
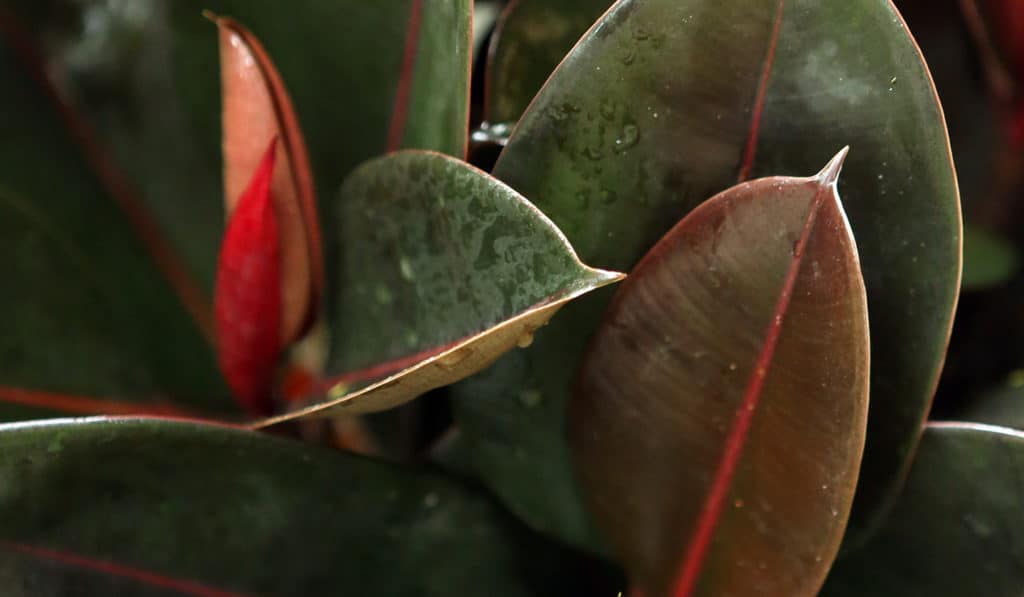
soil & potting
Use a rich, well-draining, indoor potting soil, like Miracle-Gro® Indoor Potting Mix. Ensure your pot has good drainage. Don’t let it sit in water and if you notice water pooling in the drainage tray, empty it.
-
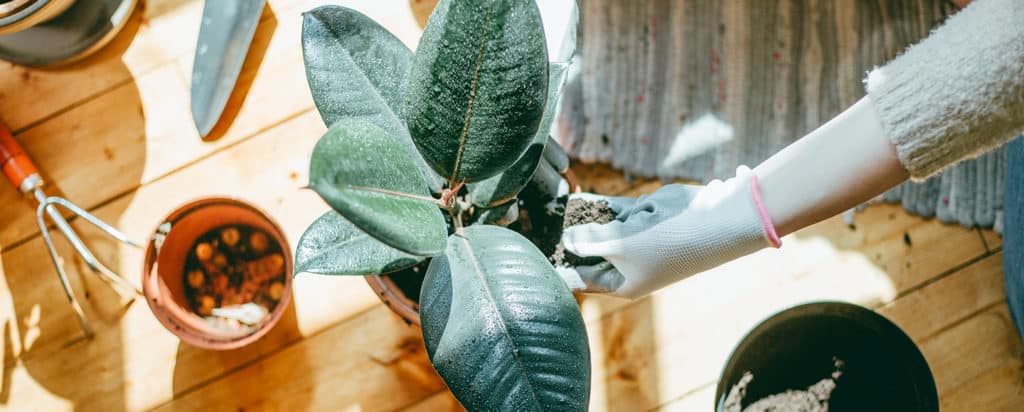
when to repot
Repot every 1 to 2 years in the Spring, especially with younger plants. Increase pot by 2 inches every time. When your Rubber plant is older and becomes a big fella, repotting gets hard! So you can just replace the top few inches of soil.
-
propagation
Be careful what you start, because these plants get big! Pick a stem showing thick, healthy leaves and cut halfway up the stem. Milky sap will come out, and it’s an irritant you want to avoid. Remove the bottom leaves to give yourself a nice stretch of stem. It’s not the easiest propagator, so you’ll need rooting hormone to encourage roots. Dip your stem in the hormone and pot it moist soil, like Miracle-Gro® Indoor Potting Mix.
-
pest control
Look for mealybugs, scale insects, and spider mites. During your regular leaf cleaning, inspect the underside of each leaf. Check out our Pest control section in Plant 101 for how to identify and deal with pests on your plant!
troubleshooting
-
why are there patchy, pale spots on leaves?
Too much direct sunlight. Rubber plants don’t like direct sun. It’s too hot on those big, broad leave, and they’ll lose moisture, causing these patchy pale spots. Shade the window or move your plant away from this direct sun. Sadly, the spots don’t heal, so consider removing the most damaged ones.
-
what’s with all the dropping leaves?
Rubber plants get stressed out easily. Any sudden change is likely to trigger leaf drop. Blasts of air conditioning or furnace heat. Cold drafts under a door. Being taken home from the nursery is also a big change in your plant’s life! Expect droppage. If you have not moved it recently and you can’t source any sudden temp changes then it could be overly dry air, or under watering and feeding. Review your care routine and your Rubber plant should… bounce back.
-
why are there dark Patches or spots on leaves?
Possible sunburn, or worse, leaf spot. If your Rubber plant is sitting in direct sunlight, it’s probably sunburn. Especially if it’s getting hot Summer sun. Move to still-bright indirect spot. If it’s not sunburn, it could be leaf spot, a fungal disease. Overwatering, especially in the winter, is usually the cause. First, avoid spreading to other plants by separating them physically. Remove all spotty leaves and check for plant debris in the pot. If you’re misting, stop. You want the leaves to get dry. Treat with fungicide.
-
why do I have yellowing, wilting leaves?
Probably root rot from overwatering. Do you also notice mushy stems and/or slower growth? These are all signs of root rot. Not to worry, when caught early this is easily fixable. Reduce watering and ensure the soil dries out before watering. Check your pot’s drainage. Does it have a hole that allows excess water to escape? Help things dry by poking holes in the soil. This will get oxygen to the roots. You can also put the pot (with drainage holes) in a tray that’s lined with a layer of dry soil. It acts like a sponge to draw out extra moisture. Now, let’s check for root rot. Dig down and cut out any that look affected. If things are really bad, consider repotting entirely with new soil. For more information check out our Plant 101 section.
zz plant
aka zamioculcas zamiifolia, zuzu, emerald palm, zanzibar, zanzibar gem, eternity plant
ZZ has such impossibly gorgeous and glossy foliage that many people mistake them as fake. So glossy, so exotic and so low maintenance. In fact this sturdy stunner is sometimes mistaken as a fake plant. It may look too perfect be real, but it is! Meet to the Gem of Zanzibar, ZZ. Description: leaves so glossy and bright looks fake / thrives on neglect / easter and southern Africa / subtropical savannah / easy to grow / beginner plant
variations
There are a few varieties of ZZ, the Raven ZZ with black leaves, the Zenzi with curly bunched up leaves, the Dwarf ZZ or Zamicro which looks the same as a common ZZ but will never grow larger than 2 feet, and the Lucky classic which had more rounded leaves. You can also get variegated leaves on a ZZ.
light
flexible
Happiest in bright, indirect light. One of the few houseplants that can handle some hours of direct sun. But this easy-going beauty is also good in low light. So adaptable.
water + feeding
get dry between watering
Perhaps the only way to kill a ZZ is overwatering. It’s thick waxy coating and water-storing roots mean this plant does well with much less water than other plants. Make sure the top 1 to 2 inches are completely dry before rewatering. It also doesn’t need much feeding. Feed once a month max, in Spring and Summer. Even then, you can dilute the nutrients.
toxic
mildly toxic to humans and pets
Ingestion will cause mouth, stomach irritation and possible vomiting. ZZ’s sap may also cause skin irritation.
location
not fussy
ZZ can thrive almost anywhere. It truly is one of the easiest plants. It’s from Zanzibar, so it prefers the warmth.
humidity
flexible
Dry air is not a problem. It can handle humidity also. You can mist occasionally, but ZZ does well with no special treatment.
size
large friend
This plant can grow up to 5ft tall with a 3 to 4 foot spread.
pro tip
drought tolerant
ZZ plants have thick succulent roots and can live for months with little to no water. They much prefer to live on less water than too much.
fun fact
eternity plant
ZZ earned this nickname because it looks like ancient plants that predate the dinosaurs. Another reason may be its borderline miraculous resilience.
beyond the basics
-
soil + potting
Use a rich, well-draining, indoor potting soil, like Miracle-Gro® Indoor Potting Mix. Ensure your pot has good drainage. Don’t let it sit in water and if you notice water pooling in the drainage tray, empty it.
-
when to repot
Repot every 2 to 3 years in the Spring, especially with younger plants. Increase pot by 2 inches every time. When Pothos is more mature and fully grown, you can just replace the top few inches of soil.
-
propagation
Very easy with Pothos. Find a node or aerial root, cut just below the node and remove the lower leaves. Cutting can be put back in the soil, or in water. Cuttings will happily live in water for as long as you keep the jar topped up. This is a great way to add some green to darker, out-of-the-way places that are too small or awkward for a pot. For more information on propagation check out our propagation project page!
-
pest control
Prone to mealybugs and scale. During your routine leaf cleaning, inspect the underside. Check out our Pest control section in Plant 101 for how to identify and deal with pests on your plant!

troubleshooting
-
why is my pothos ‘crying’?
Could be normal “guttation”, or signs of over watering. Pothos have a natural tendency to ‘cry’. This expulsion of water from leaf pores is called “guttation” and it’s usually nothing to worry about. Review your watering routine. If you’re allowing the top 1 to 2 inches of soil to completely dry between watering, you’re good. If you’re overwatering and letting your Pothos sit in water, just drain the standing water, let the soil dry out and water less in the future.
-
drooping or wilting leaves?
Needs water. Does your Pothos look wilted and droopy? Do those normally perky heart-shaeped leaves feel thinner? Your poor Pothos is crying out for a drink. Instead of doing one giant dump of water, water a little once per day for three days. You want the soil pleasantly moist, not super soggy. Your Pothos should bounce back in just a few days.
-
brown spots or patchy?
Leaf spot disease due to overwatering. Overly damp conditions make most plants susceptible to disease, even the mighty Pothos. Isolate your Pothos to avoid spreading to other plants. This may be the hardest part because those vines may run all over the house. Cut off all the affected leaves and any debris that’s fallen into the pot. If you’ve been misting, stop. If there’s another source of humidity like a humidifier, or it’s next to your shower, move the plant away until those spots are gone. Treat with a fungicide.
-
long parts of your trail leggy and without leaves?
Inconsistent care. Pothos’ vines travel far and wide! Often they venture into low light areas, where leaves tend to fall off. That means your Pothos is wasting energy to support empty vines that can’t grow leaves. The solution is simple. Cut the vine where healthy clusters of leaves generally stop. If your cutting has leaves at the end, you can trim it so there’s at least two nodes below the leaves, then propagate.
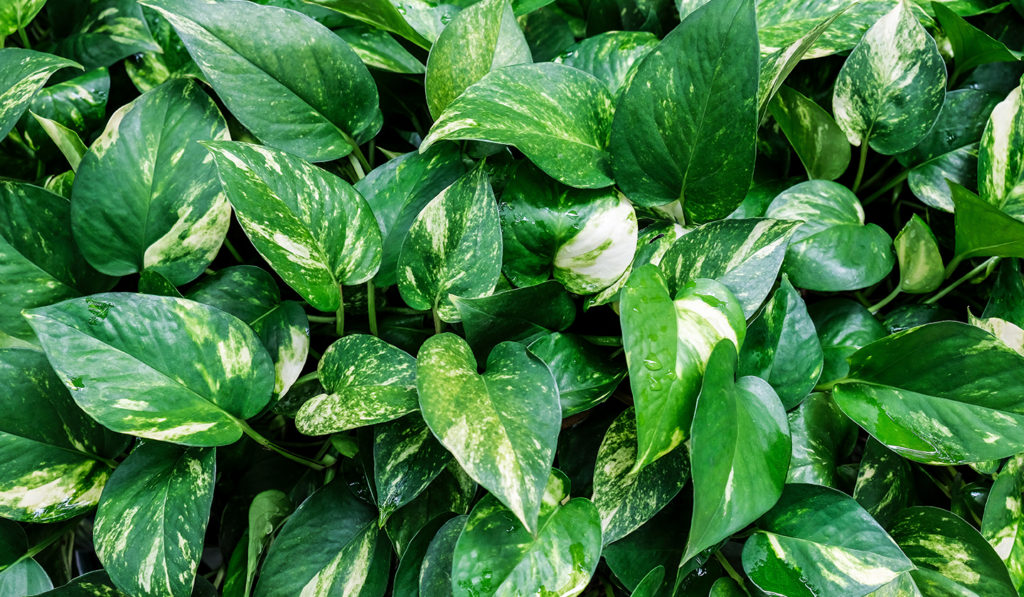
zz plant
aka zamioculcas zamiifolia, zuzu, emerald palm, zanzibar, zanzibar gem, eternity plant
ZZ has such impossibly gorgeous and glossy foliage that many people mistake them as fake. So glossy, so exotic and so low maintenance. In fact this sturdy stunner is sometimes mistaken as a fake plant. It may look too perfect be real, but it is! Meet to the Gem of Zanzibar, ZZ. Description: leaves so glossy and bright looks fake / thrives on neglect / easter and southern Africa / subtropical savannah / easy to grow / beginner plant
variations
There are a few varieties of ZZ, the Raven ZZ with black leaves, the Zenzi with curly bunched up leaves, the Dwarf ZZ or Zamicro which looks the same as a common ZZ but will never grow larger than 2 feet, and the Lucky classic which had more rounded leaves. You can also get variegated leaves on a ZZ.
light
flexible
Happiest in bright, indirect light. One of the few houseplants that can handle some hours of direct sun. But this easy-going beauty is also good in low light. So adaptable.
water + feeding
get dry between watering
Perhaps the only way to kill a ZZ is overwatering. It’s thick waxy coating and water-storing roots mean this plant does well with much less water than other plants. Make sure the top 1 to 2 inches are completely dry before rewatering. It also doesn’t need much feeding. Feed once a month max, in Spring and Summer. Even then, you can dilute the nutrients.
toxic
mildly toxic to humans and pets
Ingestion will cause mouth, stomach irritation and possible vomiting. ZZ’s sap may also cause skin irritation.
location
not fussy
ZZ can thrive almost anywhere. It truly is one of the easiest plants. It’s from Zanzibar, so it prefers the warmth.
humidity
flexible
Dry air is not a problem. It can handle humidity also. You can mist occasionally, but ZZ does well with no special treatment.
size
large friend
This plant can grow up to 5ft tall with a 3 to 4 foot spread.
pro tip
drought tolerant
ZZ plants have thick succulent roots and can live for months with little to no water. They much prefer to live on less water than too much.
fun fact
eternity plant
ZZ earned this nickname because it looks like ancient plants that predate the dinosaurs. Another reason may be its borderline miraculous resilience.
beyond the basics
-
soil & potting
This plant likes a light, well-draining soil like Miracle-Gro Cactus, Palm and Succulent Potting Mix. Or add some potting sand or perlite to regular potting soil. Your pot must have good drainage and don’t let Pilea sit in water. If you see water collecting in the drainage tray, dump it.
-
when to repot
Repot every 1 to 2 years in the Spring, especially with younger plants. Increase pot by 2 inches every time. If dealing with a more mature, fully grown plant you can just replace the top few inches of soil.
-
propagation
So easy, because Pilea is self-propagating. It creates tiny offshoots also known as ‘pups’. You can leave them on the plant, or create a new one. Wait until your Pilea pup is at least a few inches tall. Gently dig under the pup and cut (or gently pull) the plant free, ensuring you get roots. Put the pup in some water to grow stronger roots, or plant directly in soil. You have a new mini Pilea that makes a perfect gift!
-
pest control
Pileas are bug resistant, but pests are still possible. Inspect under the leaves when doing your regular dusting & cleaning. Check out our Pest control section in Plant 101 for how to identify and deal with pests on your plant!
troubleshooting
-
leaves curved in, or out?
Light and water are incorrect. If the leaves are curled inwards, your Pilea is probably dehydrated. It’s not getting enough water, or it’s getting too much sun. On the flipside, If the leaves are curled outwards it’s probably too much water or not enough light. Check your soil before watering and ensure the top two inches of soil are dry before watering. Time between watering varies by plant and how much light they’re getting.
-
leaves turning yellow or dropping off?
Where are they yellowing? If only the bottom leaves are yellowing and dropping, there’s no problem. That’s normal Pilea behaviour. But If the whole plant is yellowing, you’re probably overwatering. When doing your watering routine, make sure the top 1 to 2 inches of soil are dry before watering.
-
leaves facing in one direction?
Rotate your plant! Pilea’s love to grow towards the sun. This can cause them to become one side heavy or grow unevenly. You should remember to turn your plant every time you water to allow the plant to grow evenly.
-
mold on the surface soil?
Overwatering, too little time between watering. Mold (and even mushrooms) growing on your soil is not a direct threat. But it IS a sign of overwatering. Root rot can follow if not addressed. Water less frequently and make sure you let the top two inches of soil fully dry before watering. Ensure you have proper drainage. If things look really moldy, you can remove the top inch or so of soil.
-
powdery, white patches on leaves?
Powdery mildew. Like mold, this isn’t dangerous, but it makes your precious Pilea less pretty! So it’s got to go. Bad air circulation is usually the cause. Remove affected leaves and move your plant somewhere with better air circulation.