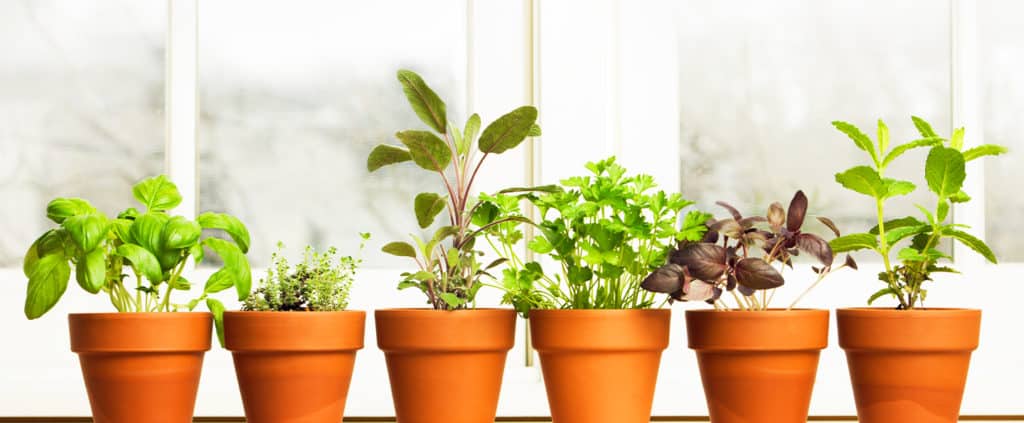
If space is a consideration, prune down your indoor herb choices with ones you use frequently. Consult your favourite recipes, take inventory of how much room you have, and observe the flavour profiles you like the most.
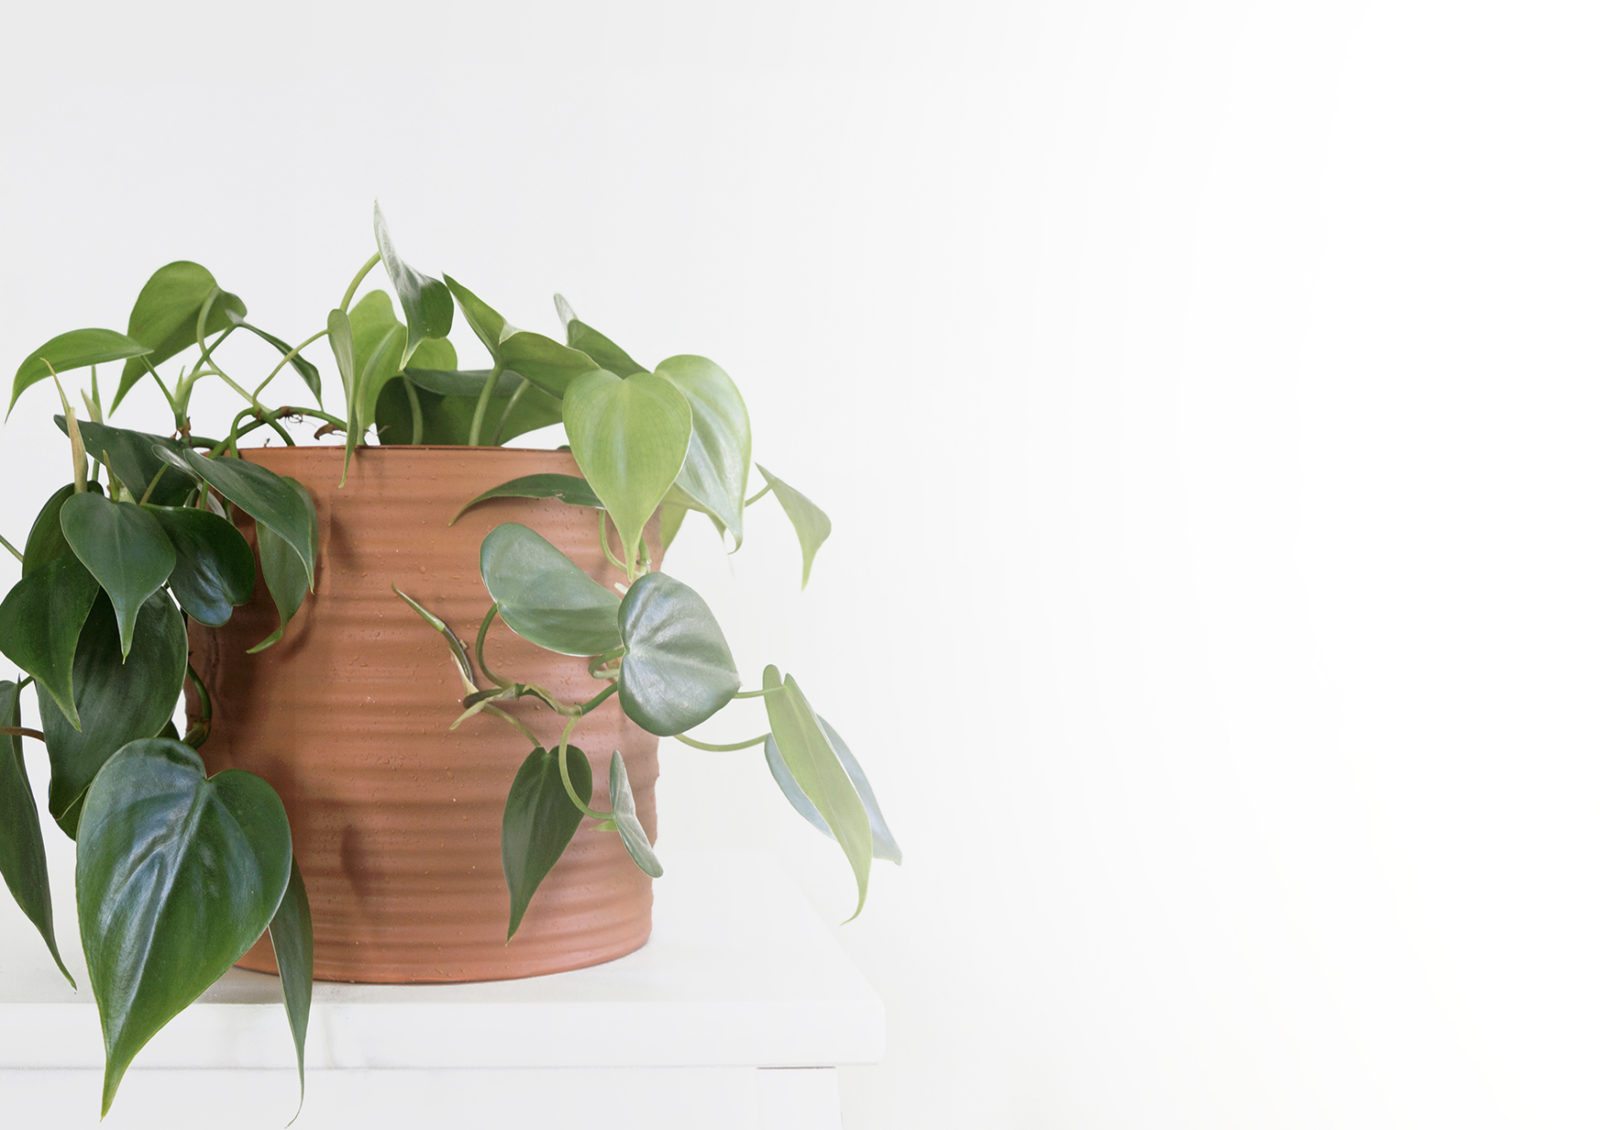
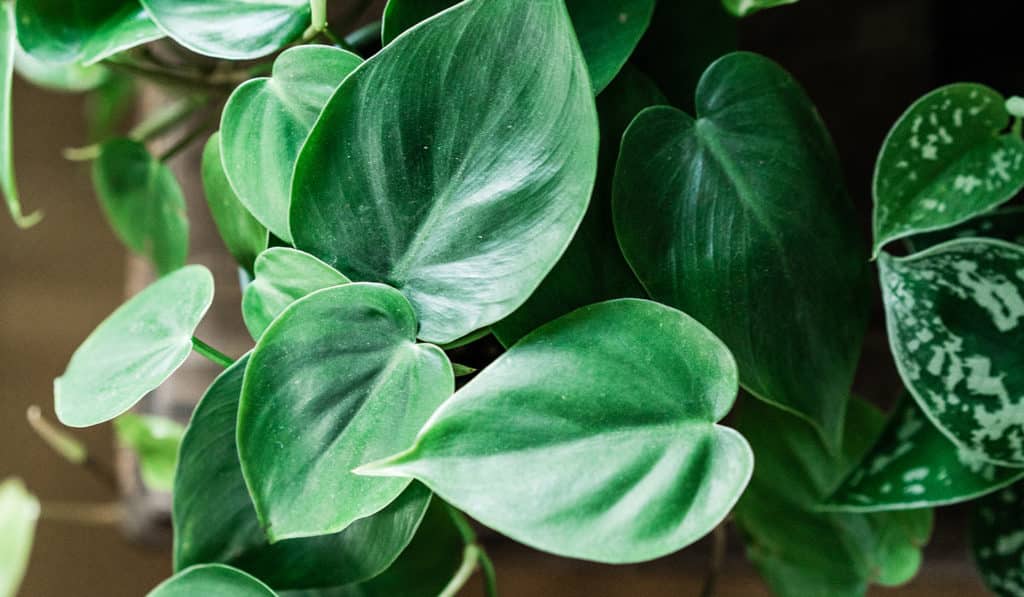
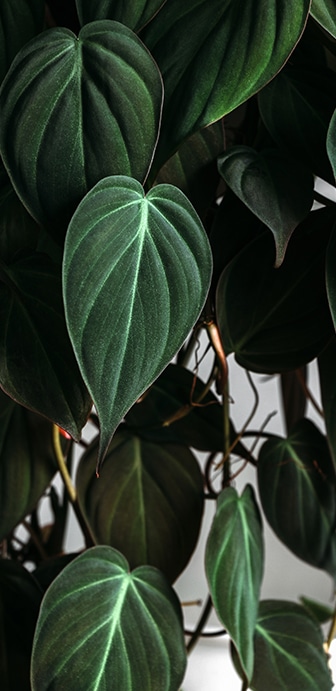
philodendron
aka heart-leaf philodendron, philodendron scandens, philo, sweetheart plant
This adaptable, easy-care plant will climb up your walls, along your shelves, and into your heart! Their leaves are even heart shaped. No wonder it’s one of the world’s most beloved houseplants. Description: Caribbean, central and south America / tropical / many varieties with similar care
variations
Philodendron Hederaceum ‘Brasil’, Philodendron Pink Princess, Philodendron Micans, Philodendron Prince of Orange, Philodendron Birkin, Philodendron Moonlight

light
very flexible
Medium to bright light, but indirect is best. They can even tolerate low light but don’t expect much growth.

water + feeding
avoid overwatering
Make sure the top inch dries out before re-watering. Water less in winter. Feed once a month year-round, especially when it’s in brighter light.

toxic
toxic to humans and pets
Ingestion can cause mouth, stomach irritation and even vomiting.

location
flexible
Settles in nicely to average indoor temperatures. Doesn’t like sudden temperature changes like cold drafts or getting blasted by heater vents.

humidity
loves it
Philodendrons are tropical plants and they appreciate higher humidity.

size
long hanging vines
And we mean long! They can grow 6 to 20 ft in length if you don’t prune them. Consider a moss or coir pole for support.

pro tip
use light to control growth
Put your Philodendron in a bright spot to let it grow. Then move it to a shady spot when you’ve reached your ideal length.

fun fact
natural climber
This “Monkey plant” is happiest when it’s climbing. Out in nature they climb trees to find moist and mossy nooks where they get water through above-ground roots.
beyond the basics
-
soil & potting
Use a rich, well-draining, indoor potting soil, like Miracle-Gro® Indoor Potting Mix. Ensure your pot has good drainage. If you notice water pooling in the drainage tray, empty it.
-
when to repot
Repot every 2 years in the spring, especially with younger plants. Increase pot by 2 inches every time. If dealing with a more mature, fully grown plant you can just replace the top few inches of soil.
-
propogation
If you have a node or aerial root this plant is very easy to propagate. Cut just below the node and remove the lower leaves. Put in water and watch the roots grow in just a few short weeks! For more information on propagation check out our propagation project page!
-
pest control
Prone to mealybugs. Check the underside of leaves regularly when cleaning. Check out our Pest control section in Plant 101 for how to identify and deal with pests on your plant!
troubleshooting
-
yellowing lower leaves?
Low temperatures or drafts are probably the cause. Try moving your plant to a new location where it is clear of any drafts. Philodendrons like it warm, between 60 and 75 F (16 and 24C) It could also be underwatering or under fertilizing. Ensure you’re watering regularly when the top inch of soil becomes dry.
-
leaves dropping?
Probably a cold draft. Move to warm location that’s clear of any drafty windows or the air conditioning vent. It’s a hardy plant but still likes temps between 60 and 75 F (16 and 24C)
-
brown edges on the leaves?
Various. The soil could be too dry. Water regularly when the top inch of soil gets dry. Water until the soil is moist, but not soggy. If the air feels dry and the temp is over 75F (24C,) mist the leaves regularly. Consider a humidifier, or put the pot on a pebble-filled tray of water (making sure the pot is not touching the water). Philodendrons don’t like cold drafts, so this could also be the problem. Move away from cold windows or AC vents.
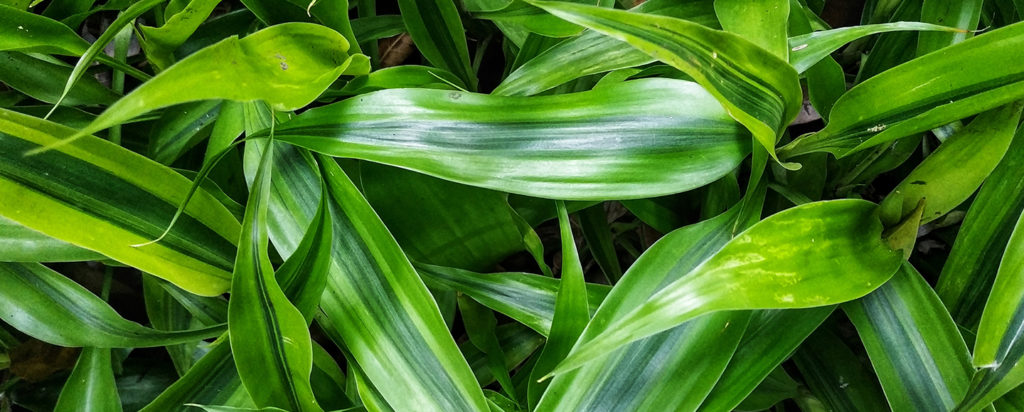
philodendron
aka heart-leaf philodendron, philodendron scandens, philo, sweetheart plant
This adaptable, easy-care plant will climb up your walls, along your shelves, and into your heart! Their leaves are even heart shaped. No wonder it’s one of the world’s most beloved houseplants. Description: Caribbean, central and south America / tropical / many varieties with similar care
variations
Philodendron Hederaceum ‘Brasil’, Philodendron Pink Princess, Philodendron Micans, Philodendron Prince of Orange, Philodendron Birkin, Philodendron Moonlight
light
very flexible
Medium to bright light, but indirect is best. They can even tolerate low light but don’t expect much growth.
water + feeding
avoid overwatering
Make sure the top inch dries out before re-watering. Water less in winter. Feed once a month year-round, especially when it’s in brighter light.
toxic
toxic to humans and pets
Ingestion can cause mouth, stomach irritation and even vomiting.
location
flexible
Settles in nicely to average indoor temperatures. Doesn’t like sudden temperature changes like cold drafts or getting blasted by heater vents.
humidity
loves it
Philodendrons are tropical plants and they appreciate higher humidity.
size
long hanging vines
And we mean long! They can grow 6 to 20 ft in length if you don’t prune them. Consider a moss or coir pole for support.
pro tip
use light to control growth
Put your Philodendron in a bright spot to let it grow. Then move it to a shady spot when you’ve reached your ideal length.
fun fact
natural climber
This “Monkey plant” is happiest when it’s climbing. Out in nature they climb trees to find moist and mossy nooks where they get water through above-ground roots.
beyond the basics
-
soil & potting
Use a rich, well-draining, indoor potting soil, like Miracle-Gro® Indoor Potting Mix. Ensure your pot has good drainage. If you notice water pooling in the drainage tray, empty it.
-
when to repot
Every 2-3 years in the Spring, especially in the earlier years. Increase the pot size by 2 inches each repotting. When your Fig is all grown up, you can get away with just replacing the top few inches of soil.
-
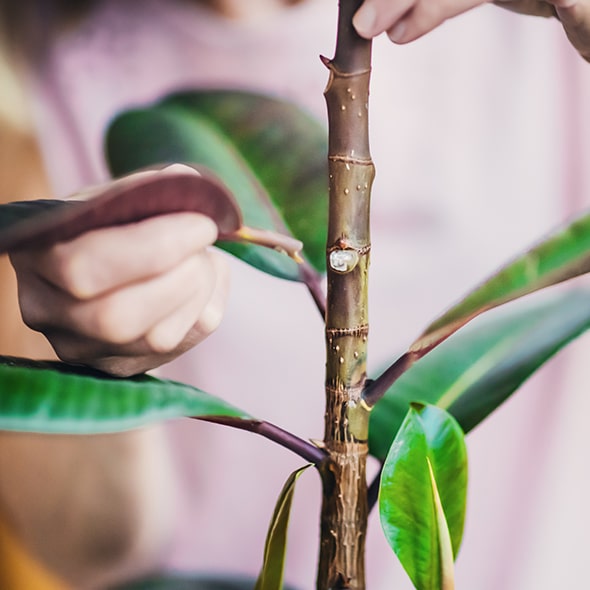
propagation
Find a stem with 3-4 leaves and cut just below the lowest leaf. Now remove the lower leaves to make room for root growth. Place your stem in a jar of water. Figs can be stubborn to root, so add some rooting hormone to the water.
-
pest control
Fiddle Figs are prone to mealybugs, scale insects, and spider mites. Make a routine of dusting and checking under the leaves. Our pest control section in Plant 101 will help you identify and deal with pesky plant pests!

troubleshooting
-
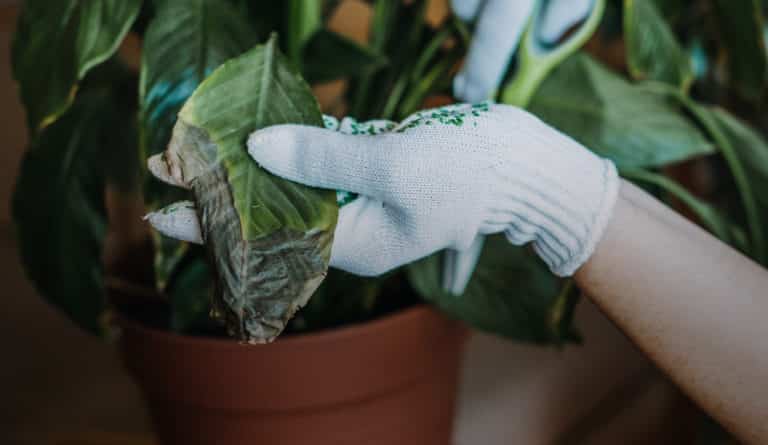
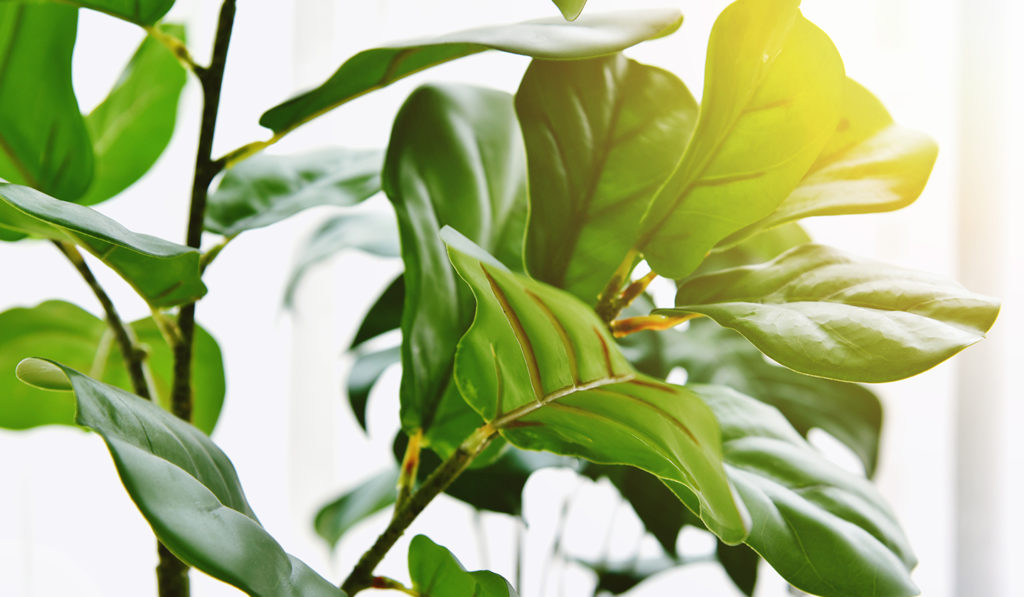
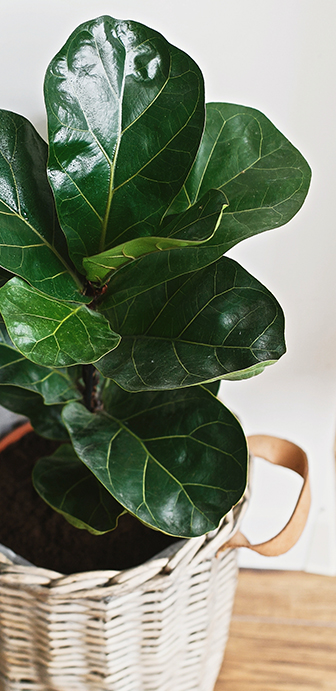
sudden leaf loss?
Your friend is stressed out. Figs don’t like sudden changes to their surroundings. Often it’s blasts of hot or cold air a nearby vent. Moving from the nursery to your home is a shock for this gentle giant. If there haven’t been any sudden changes, it could be overly dry air. It could also be too much or too little water. Or too much or too little food. This plant is not the easiest! Review your placement and care routine, and keep doing your best. The leaves should grow back.
-
dark patches or spots on leaves?
Possibly a sunburn, or maybe leaf spot. If your Fiddle Fig gets direct sunlight it’s probably sunburn. Lots of indirect light is good but direct sun is bad. If that’s not it, it could be a fungal disease called leaf spot. Overwatering or an overly damp environment are the cause. Stop the spread to other plats, make sure leaves aren’t near each other. Remove infected leaves, including any that have fallen into the pot. If you’re misting, stop. Treat with fungicide as directed.
-
leaf tips turning brown?
Low humidity, not enough water or irregular watering. Give more attention to watering. Routines matter for this plant. Ensure it’s regular and thorough and that the entire root ball is getting wet. Check the room temp. If it’s over 75 F/24 C and the air feels dry, mist the leaves regularly and consider a humidifier. Or put the pot on a pebble filled tray of water. Make sure the pot doesn’t touch the water.
Make sure you are watering the plant thoroughly and at regular intervals, getting the whole root ball wet.
-
yellowing and wilting leaves?
Probably root rot from overwatering. Do you also notice mushy stems and/or slower growth? These are all signs of root rot. Not to worry, when caught early this is easily fixable. Reduce watering and ensure the soil dries out before watering. Check your pot’s drainage. Does it have a hole that allows excess water to escape? Help things dry by poking holes in the soil. This will get oxygen to the roots. You can also put the pot (with drainage holes) in a tray that’s lined with a layer of dry soil. It acts like a sponge to draw out extra moisture. Now, let’s check for root rot. Dig down and cut out any that look affected. If things are really bad, consider repotting entirely with new soil. For more information check out our Plant 101 section.
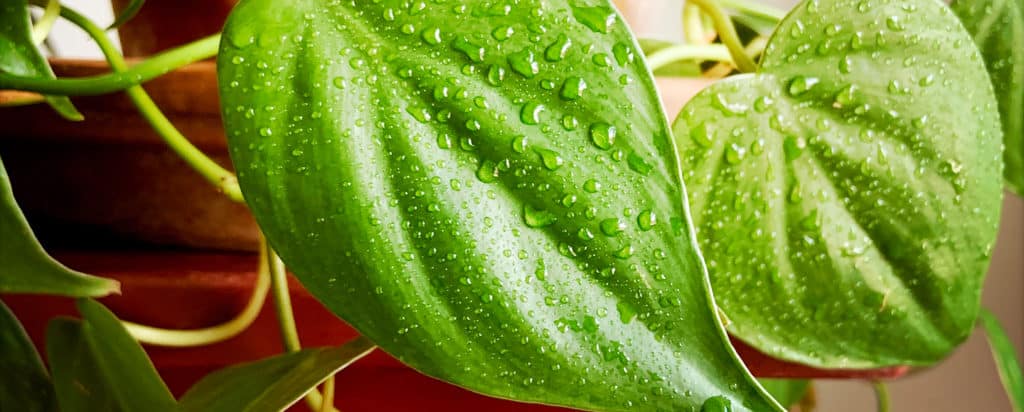
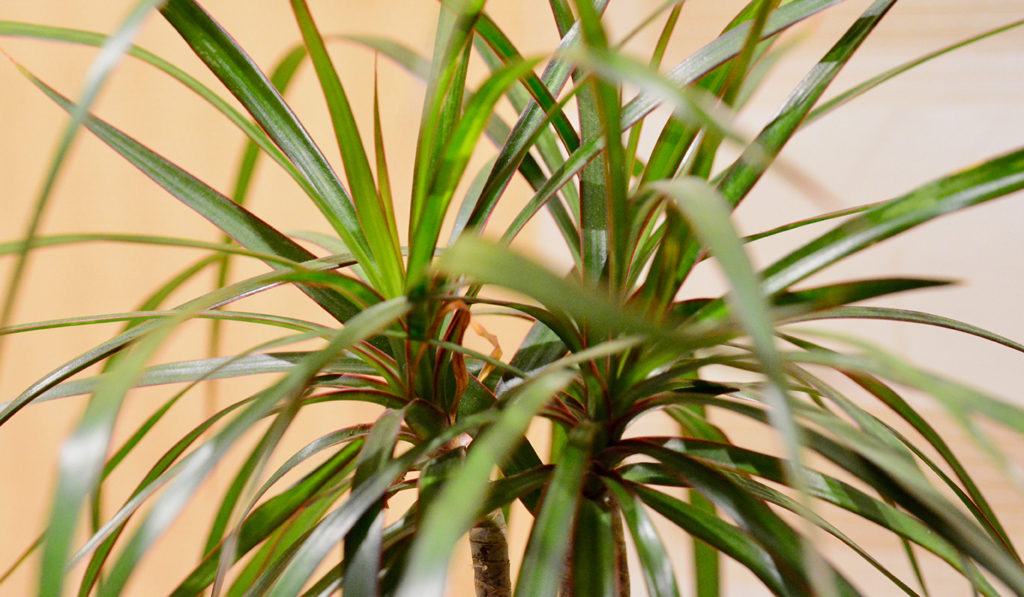
philodendron
aka heart-leaf philodendron, philodendron scandens, philo, sweetheart plant
This adaptable, easy-care plant will climb up your walls, along your shelves, and into your heart! Their leaves are even heart shaped. No wonder it’s one of the world’s most beloved houseplants. Description: Caribbean, central and south America / tropical / many varieties with similar care
variations
Philodendron Hederaceum ‘Brasil’, Philodendron Pink Princess, Philodendron Micans, Philodendron Prince of Orange, Philodendron Birkin, Philodendron Moonlight
light
very flexible
Medium to bright light, but indirect is best. They can even tolerate low light but don’t expect much growth.
water + feeding
avoid overwatering
Make sure the top inch dries out before re-watering. Water less in winter. Feed once a month year-round, especially when it’s in brighter light.
toxic
toxic to humans and pets
Ingestion can cause mouth, stomach irritation and even vomiting.
location
flexible
Settles in nicely to average indoor temperatures. Doesn’t like sudden temperature changes like cold drafts or getting blasted by heater vents.
humidity
loves it
Philodendrons are tropical plants and they appreciate higher humidity.
size
long hanging vines
And we mean long! They can grow 6 to 20 ft in length if you don’t prune them. Consider a moss or coir pole for support.
pro tip
use light to control growth
Put your Philodendron in a bright spot to let it grow. Then move it to a shady spot when you’ve reached your ideal length.
fun fact
natural climber
This “Monkey plant” is happiest when it’s climbing. Out in nature they climb trees to find moist and mossy nooks where they get water through above-ground roots.
beyond the basics
-
soil & potting
This plant likes a light, well-draining soil like Miracle-Gro Cactus, Palm and Succulent Potting Mix. Or add some potting sand or perlite to regular potting soil. A layer of sand on the top will also help prevent rot. You pot must have good drainage and don’t let Dracaena sit in water. If you see water collecting in the drainage tray, dump it.
-
when to repot
Every 2-3 years in the Spring, especially in the earlier years. Increase the pot size by 2 inches each repotting. When your Dracaena is all grown up, you can get away with just replacing the top few inches of soil.
-
propagation
Cut a stem off the plant, and remove the lower leaves. Put the cutting in water to stimulate root growth. Then cut a 2 to 4 inch stub off the bottom of a stem and insert it halfway into a dry potting mix like Miracle-Gro Cactus, Palm and Succulent Potting Mix.
-
pest control
Most common pests are scale insects and mealybugs. Check under leaves when you’re dusting. See our Pest control section in Plant 101 for how to identify and deal with pests on your plant!
troubleshooting
-
brown tips on leaves?
Not enough water, or dry air. Most common in winter when furnaces are running.
Check soil more often and water when mostly dry. Add a humidifier to the room. Mist regularly. Put the pot on a pebble-filled tray of water. Consider moving to a room with more humidity like bathroom or kitchen.
-
yellowing leaves at the base?
Not really a problem! This is natural. That’s how Dracaenas grow. Older leaves fall off to allow for new ones. You can also gently pull off yellowed leaves. If new leaves are growing, everything is fine.
-
wilting leaves?
Overwatering or possible root rot. Wait until soil is medium dry between watering and ensure the pot has good drainage. If the wilt is bad, allow the soil to completely dry before watering. If the problem persists, check for root rot and remove any affected roots. Other moisture control techniques: Poke holes in soil to let oxygen at the roots. Put the pot (with drainage holes) in a tray lined with dry soil. Or go for a total do-over, and repot with a soil that’s formulated for drainage like Miracle-Gro Cactus, Palm and Succulent Potting Mix. For more information check out our Plant 101 section.
-
soft discoloured stems?
Overwatering causing root and stem rot. Cut back any soft, rotting stems. Remove your Dracaena from the pot and cut away any black, mushy roots. Get a sterilised new pot and start over. If the roots are all mush, you can still save your plant baby! Propagate from the top of the plant.
-
plant not growing?
Not enough light. Dracaena is cool hanging out in low light corners of your house, but it takes brighter (indirect) light to make it grow. This gives you the power to control the height of your plant! When you’re at the right height, move to a shadier spot.
Prefer not to spend a ton of green on greenery? Plant swaps are your answer.
The world of plant swapping is blossoming in many ways, thanks to the trading of roots and shoots between savvy plant-lovers. As no money is exchanged, only leaves, this phenomenon attracts many looking for some free and fun plant action. As a plant trader, although you won’t be on the busy floor of a stock exchange floor, but you will help your household economy. Plant trading also provides abundant opportunity to connect with other like-minded plant lovers. You can learn new tips and tricks while sharing your own planting advice with a newfound community of plant-heads.
So, how does a budding plant swapper begin? Facebook Marketplace and Groups are a great place to start, along with your local Kijiji marketplace. Here are our top tips.
Top 7 Tips for Plant Swapping

Good luck on your quest for growing your plant family!
As any chef or amateur cook knows, fresh herbs make a dish come alive. Some like natural herbs for homeopathic and aromatherapy purposes. Whatever your use for them, you can always have fresh herbs handy.
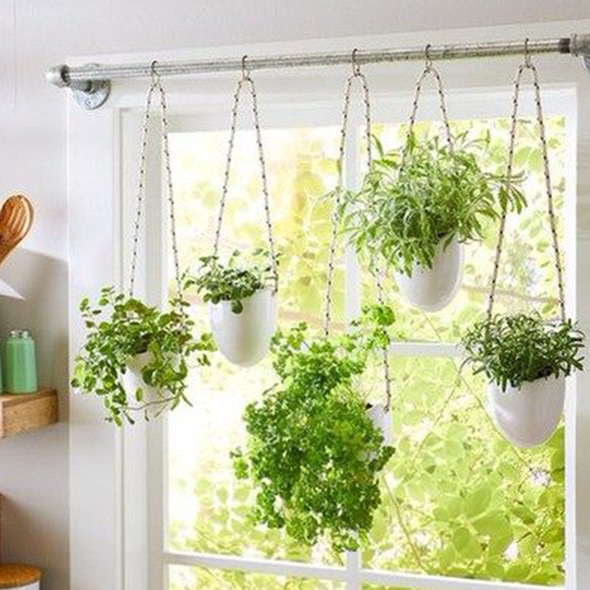
let them hang
On the subject of space, an excellent solution is hanging small herb planters by a window or adjacent wall.
terrariums are terrific
From cooking splatters to being playful cats, fresh herbs can be prone to damage. Not only are terrariums pretty and on-trend, but they also do a great job at protecting dainty herbs.
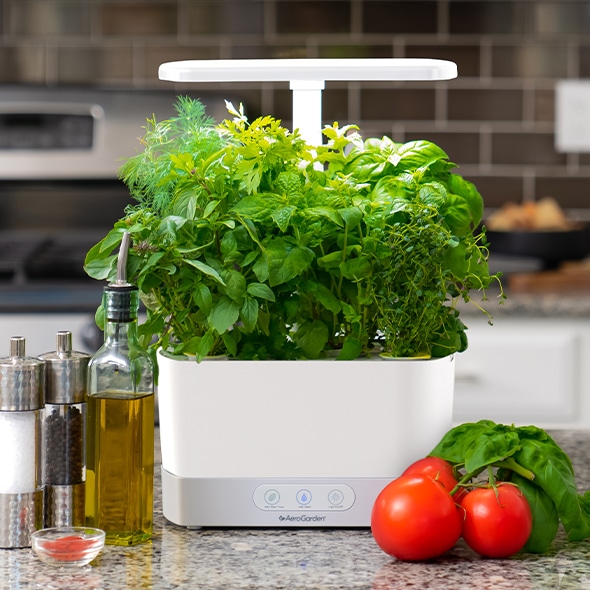
hydroponics
Also known as aero gardening, hydroponic gardening is a tried-and-true method to grow fresh food indoors. Hydroponics will do everything for you except the fun parts – trimming and eating, which you get to do.
companionship
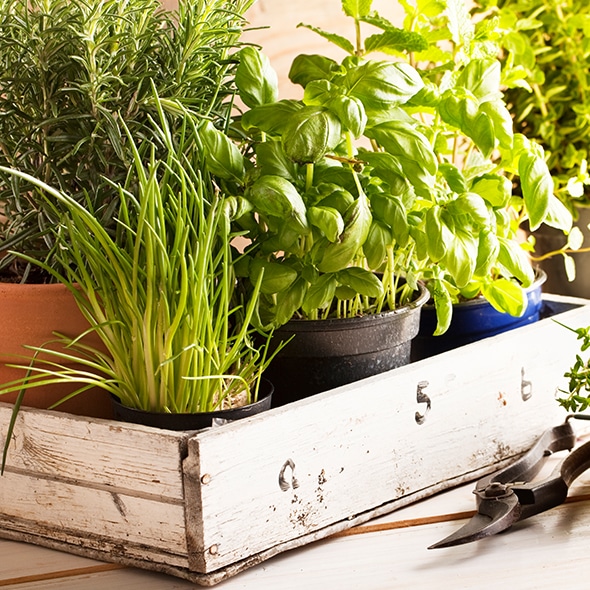
Living things need companionship, and like people, plants are the same! Some herbs thrive better when planted next to certain ones. We have some examples below but a little research will uncover many more pairings. For example, basil and parsley require more water than rosemary and sage. Plant mint by itself as it tends to grow fast and furiously.
#easypeasy
As houseplant owners will have noticed, even indoor plants are affected by seasons. Spring is when indoor plants come out of dormancy, marking the start of their active growing season. Longer days and warmer temperatures make spring one of the most vital times to grow indoor plants.
These changes sometimes present challenges. Here’s our list of top tricks and tips to help make the seasonal transition easier on your green babies and set them up for a bright, bountiful future.
pick herbs you regularly use
If space is a consideration, prune down your indoor herb choices with ones you use frequently. Consult your favourite recipes, take inventory of how much room you have, and observe the flavour profiles you like the most.
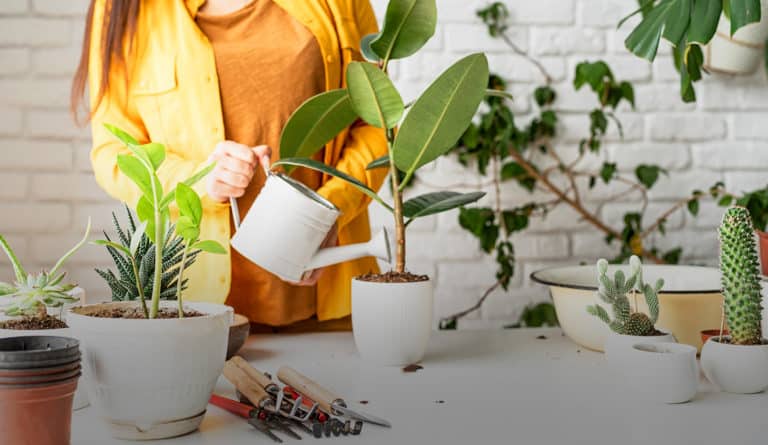
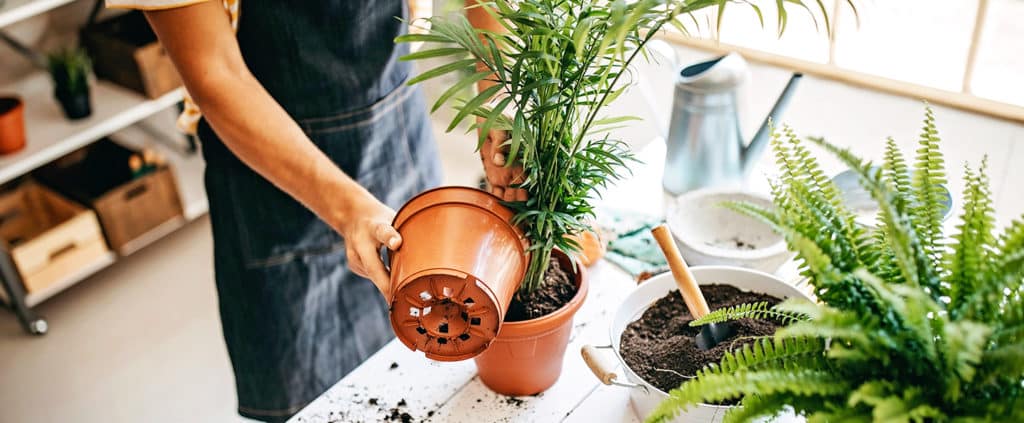
step 2. got to repot
Spring is the optimal time to repot, giving plants more space to flourish. Repotting plants allows them to expand and promotes fresh growth. How to tell if a plant needs repotting? Check for:
• Roots growing out the bottom of the pot or top of the soil
• The pot physically appears to be expanding
• Water leaks right through the soil without absorbing the water
step 3. slowly introduce them to the outdoors
Some indoor plants love spending summer outside but to avoid shocking them, gently transition plants by bringing them out only for a few hours. Gradually increase the time so they adapt to being outdoors, as long as they are not left out at night unless temperatures are consistently mild. Bear in mind, plants can get sunburnt so avoid direct summer sunlight. Drainage holes are a must to prevent drowning from heavy rainfalls.
let them hang
On the subject of space, an excellent solution is hanging small herb planters by a window or adjacent wall.
step five. prune
As you know, although trimming off leaves and branches might seem counterintuitive to allowing plants to grow big, pruning any unhealthy or dried out parts will stimulate new growth.
step 6. bring the outside, in
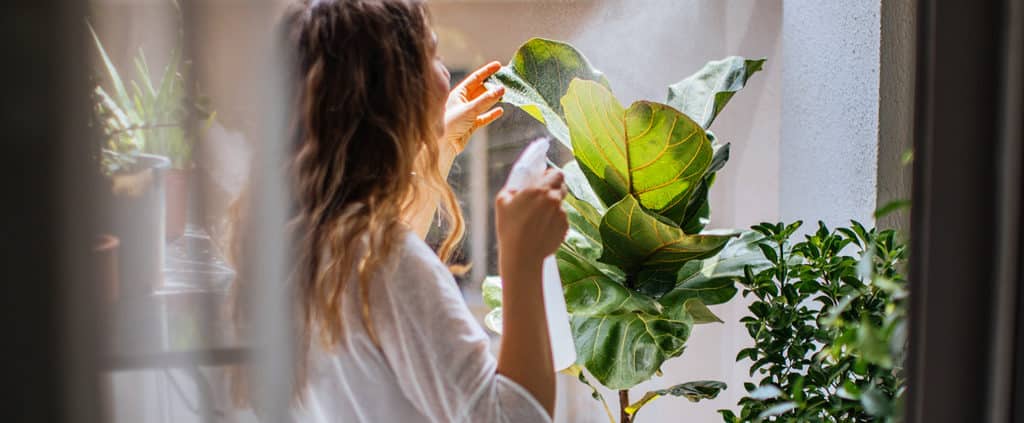
Rainwater is more nourishing for plants than tap water, so collect some on the next rainfall to water your houseplants that remain inside. Place them by open windows when warm enough to give them fresh air and humidity.
step 7. window on, window off
During wintertime you may have relocated a plant from a chilly window, in spring you may wish to get it back. Just be conscious that sunlight can still dry out or burn delicate plants, so opt for indirect light near a window. Being the conscious plant parent you are, you’ll figure out what conditions work best.
Having plants in your home is proven to reduce stress levels, increase oxygen and enhance your overall wellness.
As we learned in science class, plants release oxygen and “breathe” carbon dioxide, the opposite of humans. Having these oxygen producers as roommates provides us with fresher, cleaner air.

here are some more wellness tips that will make you fanatical about your botanicals
Anecdotally, we’ve known for some time how our plant pals relieve stress, but now scientific research proves buds really are our buddies, showing having them around is connected to reduced cortisol (stress hormone), lowered blood pressure and a better mood.
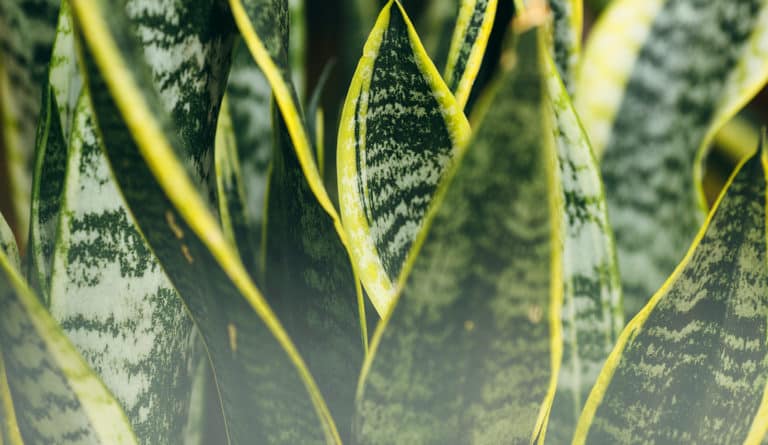
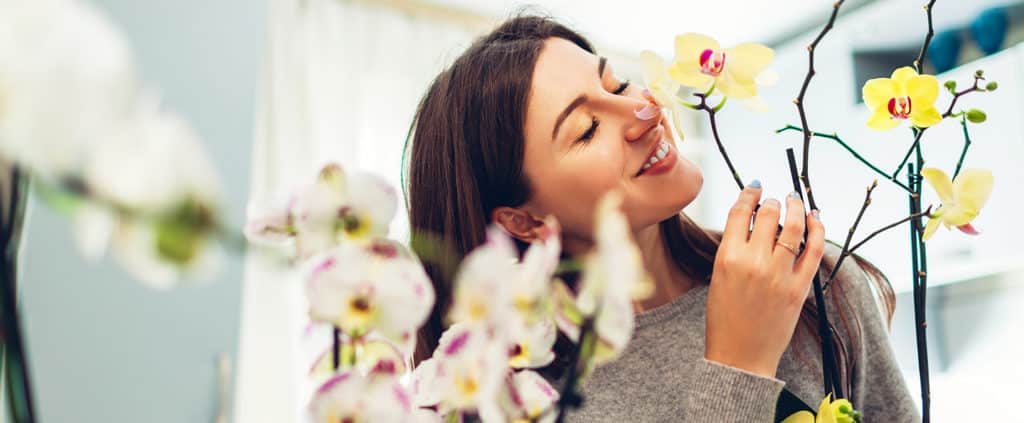
strategically choose plants for the bedroom
Orchids aren’t just a romantic exotic flower, they are different from most plants because they emit oxygen. So do succulents, bromeliads, and snake plants, which are not just photogenic. Instagram darlings, they are perfect to have at your bedside. More oxygen means an optimal slumber.
let them hang
On the subject of space, an excellent solution is hanging small herb planters by a window or adjacent wall.
cheap and cheerful
Don’t shell out on expensive paints or furnishings to add life to a dull room when plants literally can add life. Dress up your windowsills with succulents, go for on-trend macrame hangers or adopt the starlet of social media, a fiddle leaf fig. To keep it cost efficient, check out yard sales for pots or DIY some quirky planters. We also have great ideas on plant swapping
tropic like it’s hot
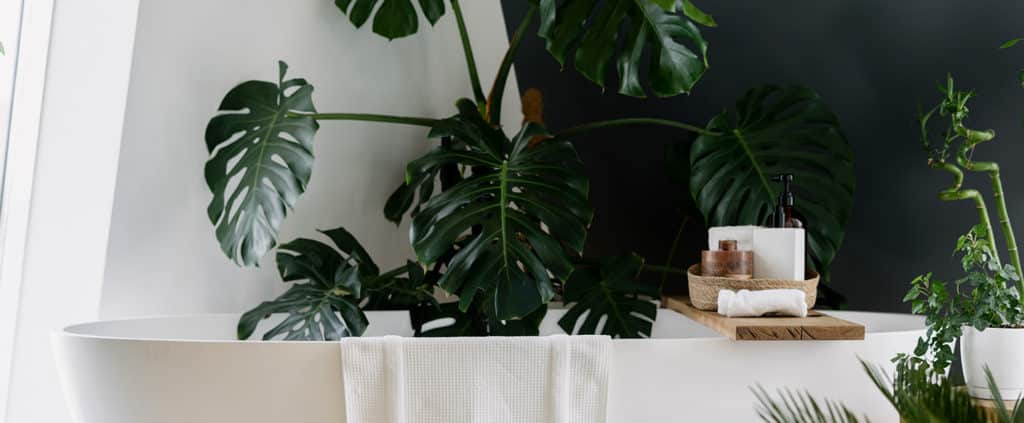
Put the shower-fresh steamy air of your bathroom to use by adding plants that thrive in warm, wet conditions, for example air plants or ferns. Bonus if your bathroom, or even a sunroom, gets super hot, which is great for palms, cacti and most succulents.
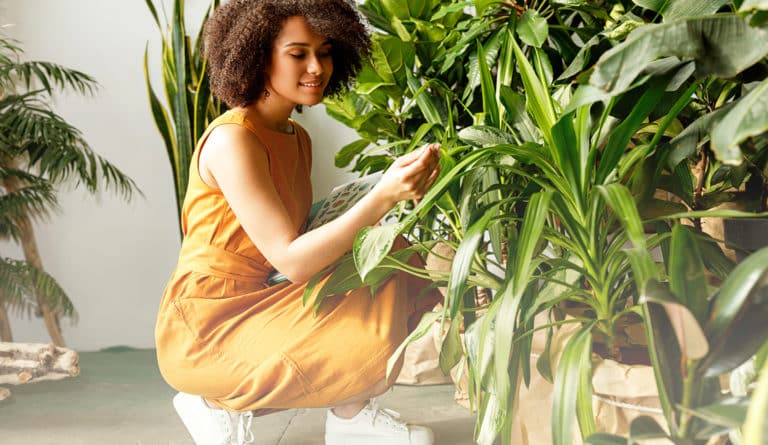
Are you a lover of luscious greenery? You are not alone, considering the indoor jungle garden trend is sprawling over social media. Interior designers are also splashing green in rooms, and we don’t just mean paint.
Besides the obvious aesthetic appeal, plants are proven to help our health, from air purification, lowering stress levels, and overall wellness.
Here are our expert tips to transform your home into an indoor jungle that will make Tarzan and Jane green with envy.
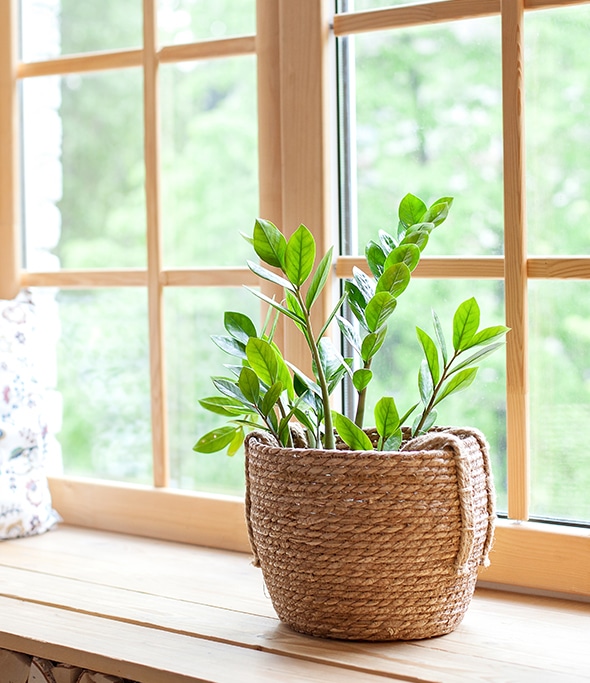
let there be light
Look at what type of natural light you have coming in through your windows. Indirect sunlight generally works best. Be realistic about choosing the types of plants that will thrive in whatever light conditions you have.
credit: www.jeanstofferdesign.com 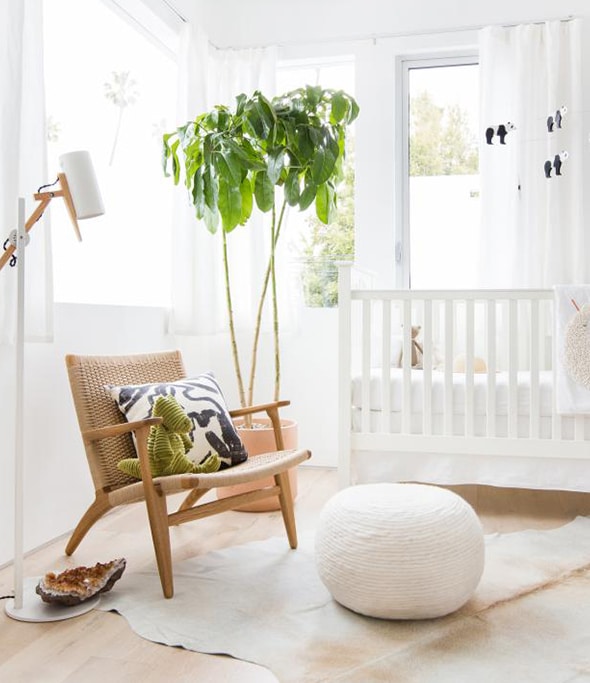
credit: www.tessaneustadt.com
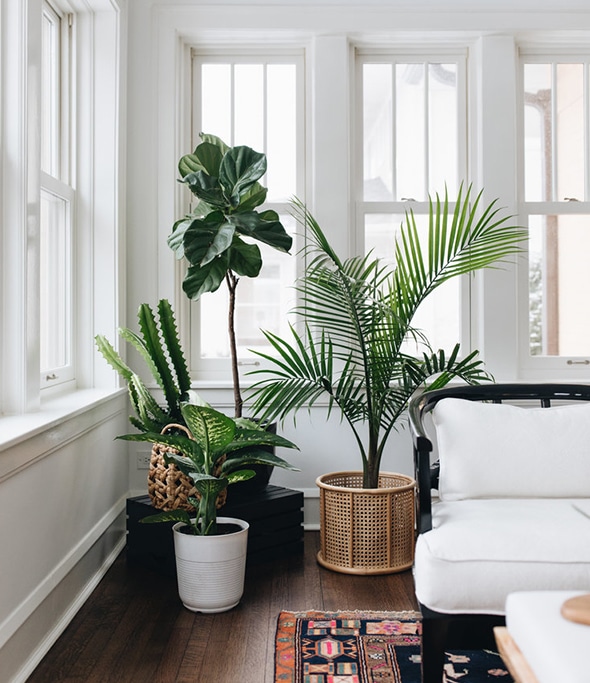
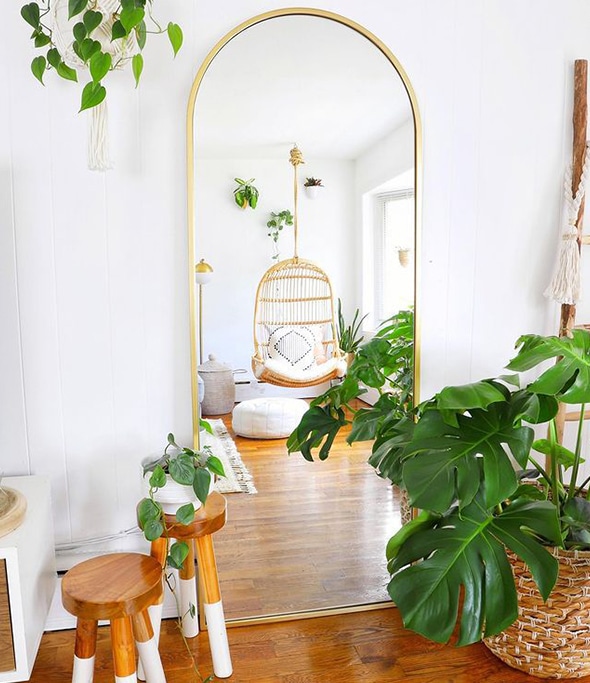
group your greens
By grouping your plants together, especially ones of varying size, you will create eye-pleasing depth. Have fun experimenting with different heights and put them into tableaux on windowsills, shelves, tables and plant stands. Social media has really given rise to suspended hanging planters as well, a beautiful way to add interest and depth.
credit: www.instagram.com/modernhousevibes 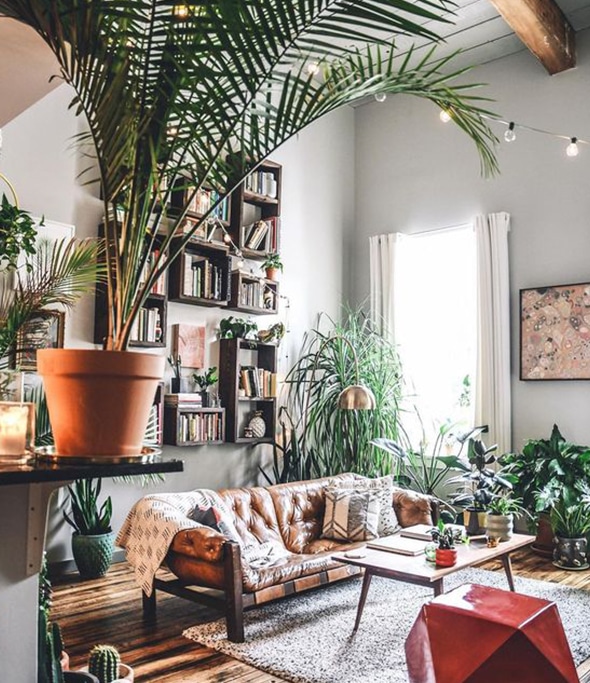
credit: www.instagram.com/hiltoncarter
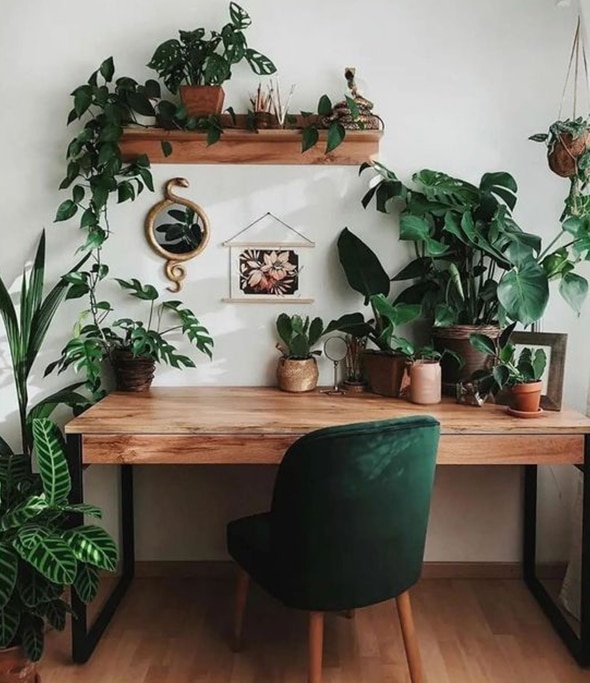
make a shelfie
If video conferencing has taught us anything, it is the importance of beautiful backgrounds, and real-life is always nicer than virtual backgrounds. Group plants on your shelves, both trailing vines and small shelf-sitters for visual appeal. Install shelving if you don’t have it already, and populate them with plants that grow vertically as well as spread out horizontally.
credit: www.instagram.com/saskiatabea 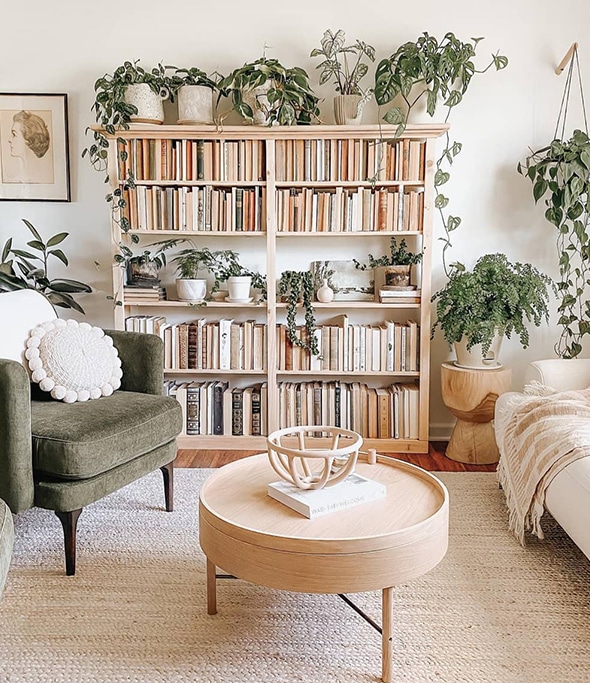
credit: www.instagram.com/thistle.harvest 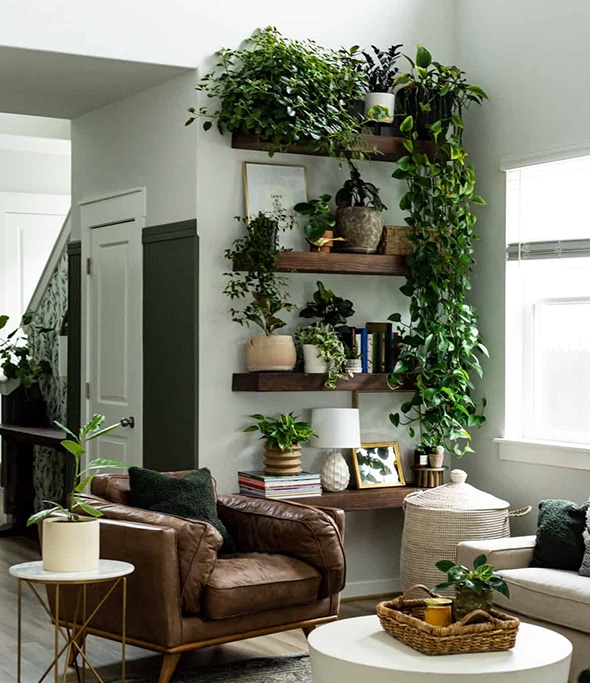
credit: www.loveandrenovations.com
statement pieces
As most interior designers will agree, nothing makes a statement like a large and dramatic tropical plant. Add one to a large pot and place in a corner of the room to add lushness and life. Photogenic and fast-growing ones include palms, birds of paradise or monstera.

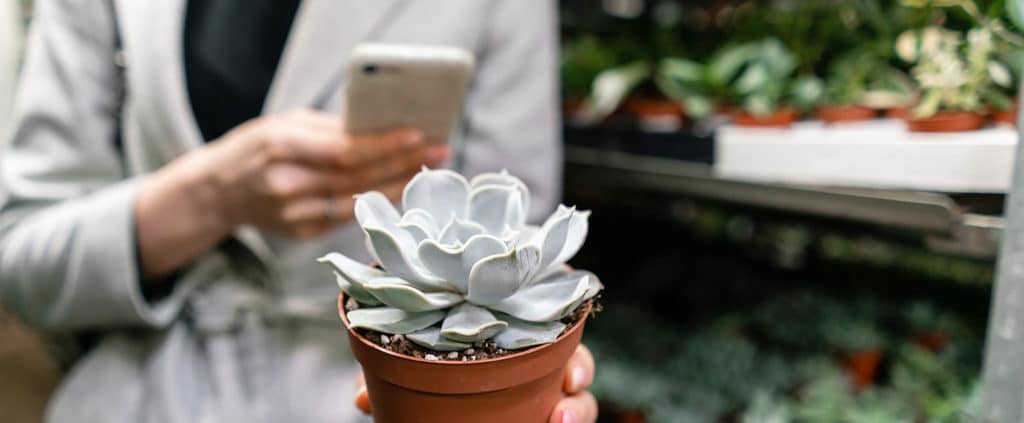
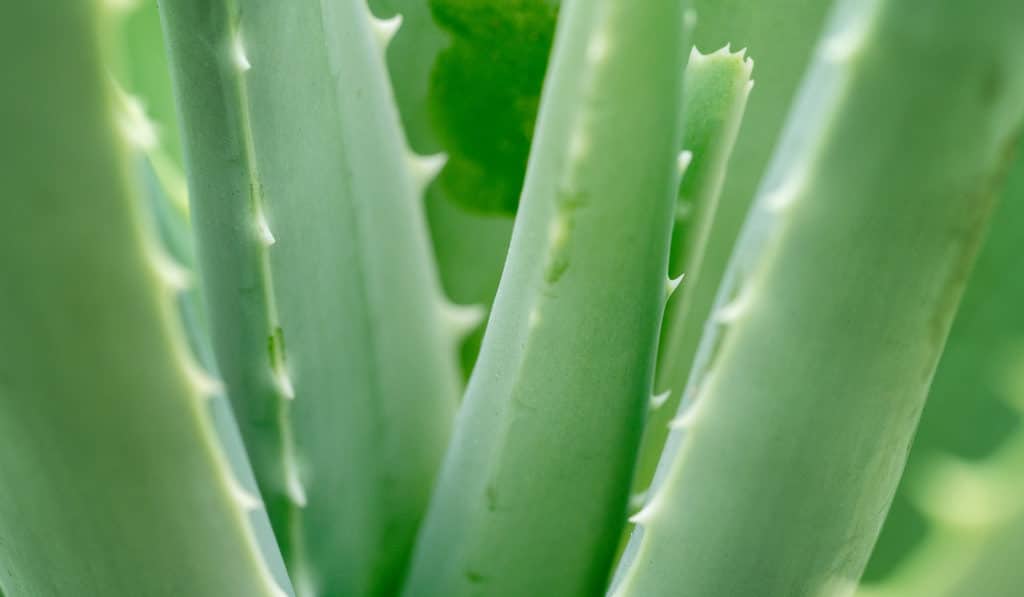
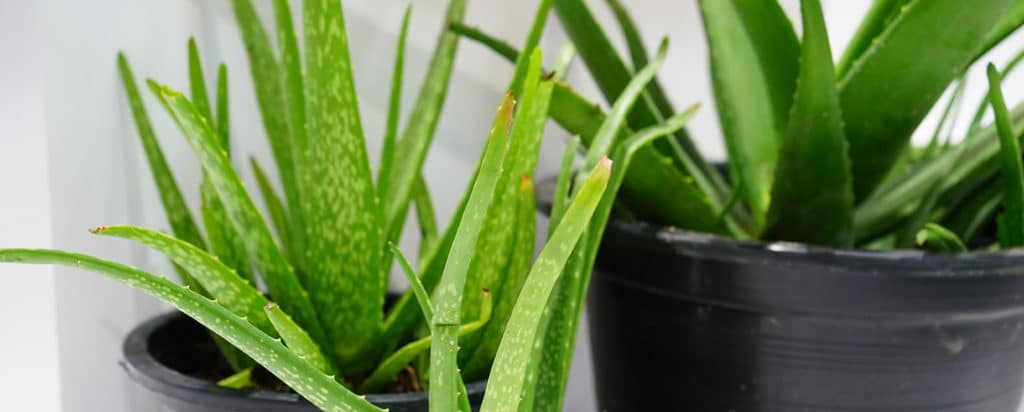
aloe vera
aka aloe barbadensis
Say “Ola” to this easy to grow succulent. Often touted as a “miracle” plant for its skin soothing gel, but the real miracle is how cute they look. An all-around great plant for rookies and exerts alike. Description: easy to grow succulent / soothes burns and skin irritations / southeast Arabian Peninsula / tropical
variations
Aloe Vera has a whopping 250 varieties. So many wonderful little differences to mix and match.
light
bright, indirect light
Find a spot with plenty of indirect light, and ideally a few hours of direct light.
water + feeding
allow to mostly dry out between watering
The top inch should be dry before watering again. Don’t overwater! It’s a desert plant. Feed once in spring, and once in summer.
toxic
safe on skin post likely toxic to ingest
Aloe gel is safe and soothing on the skin. You can even eat some varieties, but note! Most can cause indigestion, vomiting and airway irritation if eaten. Unless you’re 100% sure, keep away from kids and pets.
location
adaptable
Comfy with average indoor temperatures. Prefers things on the warmer side and doesn’t like drafts.
humidity
not an issue
Appreciates an occasional misting to control dust. Humidity levels aren’t a concern for this hearty little fella.
size
small to medium
Usually bought small and can to about 2 feet.
pro tip
water at soil level
Aloe doesn’t like water pooling in the creases between its leaves. That can cause leaf rot.
fun fact
it’s a super soother
Those thick, juicy leaves contain a soothing green gel that can be applied directly to burns (especially sun burns) and bug bites. External use only! It’s toxic to ingest.
beyond the basics
-
soil & potting
Use a light, well-draining potting soil like Miracle-Gro Cactus, Palm and Succulent Potting Mix. Or, use regular potting soil and add some potting sand or perlite. A layer of sand on the top will help prevent rot. Ensure the pot has good drainage and aloe should never sit in water. Empty drainage trays if you see water collecting.
-
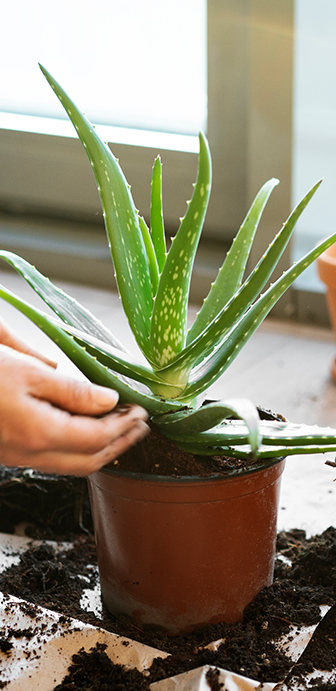
when to repot
Every 3-4 years in the spring. Especially when they’re small and growing. Increase pot diameter by 2 inches each time, and refresh the top few inches of soil. Growing too fast? You can slow the growth by trimming the roots.
-
propagation
Aloe self-propagates. It will make baby offshoots (also called ‘pups’). Leave pups on the main plant or, pot as a separate plant! Wait until the pup is at least 2” tall, then dig under the pup and find the roots at the base. Gently tug or trim the roots, they are key to the pup’s survival. You now have a new plant baby! See Soil + Potting above for planting instructions.
-
pest control
Aloe is prone to scale insects on the leaves. See our Pest control section in Plant 101 for how to identify and deal with pests on your plant!
troubleshooting
-
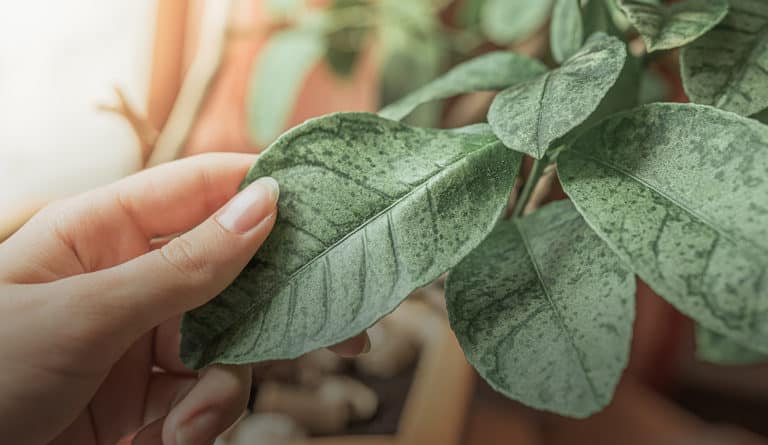
leaves turning brown, red or reddish brown?
Variety of reasons. It could be too much summer sun, overwatering, or roots damage.
First, try moving your plant to a spot with less direct sunlight (but still bright). Reduce watering. If your little aloe buddy doesn’t recover check the roots for damage.
-
dark spots? brown or mushy leaves?
Probably overwatering. Caught early, this problem is easily corrected. Water at soil level and avoid spilling water on the leaves, cuz the pooling water can cause rot. Two inches of sand on top of the soil will help with drainage. Reduce watering and allow plant to dry out completely between watering. Ensure your pot has a drainage hole to let excess water out.
Other tricks: Poke holes in soil to get oxygen to the roots. Put a damp pot (with drainage holes) in a tray or dry soil, to suck up that extra moisture. Check the roots and remove any that have root rot. Consider repotting with new soil if things are a damp mess. For more information check out our Plant 101 section.
-
pale or yellowing leaves?
Overwatering or not enough light. Is the entire plant turning pale or yellow? It needs more light. Move to a brighter spot, watch out for soil dampness and avoid over watering.
-
shrunken, wrinkled leaves?
Your plant needs a drink. But don’t overdo it! Give it a small amount and also mist the leaves. Do this three days in a row. The leaves should rebound, getting nice and plump.
-
aloe not growing?
Not enough light. If your aloe isn’t growing, or the new growth is pale in colour, it’s crying out for more light. Most houseplants don’t like direct sun, but this desert-born baby likes it! A little direct sun every day is good, especially in darker winter months. Find a brighter spot and get growing.
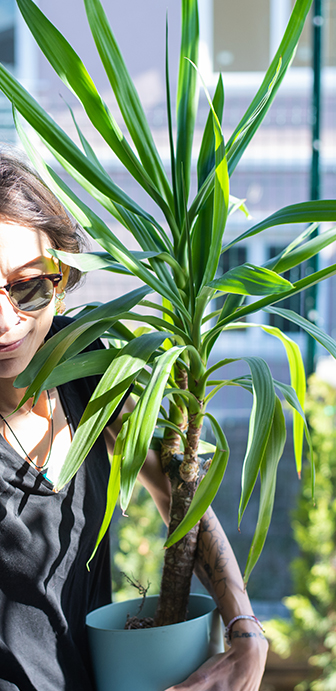
philodendron
aka heart-leaf philodendron, philodendron scandens, philo, sweetheart plant
This adaptable, easy-care plant will climb up your walls, along your shelves, and into your heart! Their leaves are even heart shaped. No wonder it’s one of the world’s most beloved houseplants. Description: Caribbean, central and south America / tropical / many varieties with similar care
variations
Philodendron Hederaceum ‘Brasil’, Philodendron Pink Princess, Philodendron Micans, Philodendron Prince of Orange, Philodendron Birkin, Philodendron Moonlight
light
very flexible
Medium to bright light, but indirect is best. They can even tolerate low light but don’t expect much growth.
water + feeding
avoid overwatering
Make sure the top inch dries out before re-watering. Water less in winter. Feed once a month year-round, especially when it’s in brighter light.
toxic
toxic to humans and pets
Ingestion can cause mouth, stomach irritation and even vomiting.
location
flexible
Settles in nicely to average indoor temperatures. Doesn’t like sudden temperature changes like cold drafts or getting blasted by heater vents.
humidity
loves it
Philodendrons are tropical plants and they appreciate higher humidity.
size
long hanging vines
And we mean long! They can grow 6 to 20 ft in length if you don’t prune them. Consider a moss or coir pole for support.
pro tip
use light to control growth
Put your Philodendron in a bright spot to let it grow. Then move it to a shady spot when you’ve reached your ideal length.
fun fact
natural climber
This “Monkey plant” is happiest when it’s climbing. Out in nature they climb trees to find moist and mossy nooks where they get water through above-ground roots.
beyond the basics
-
soil & potting
Use a rich, well-draining, indoor potting soil, like Miracle-Gro® Indoor Potting Mix. Ensure your pot has good drainage. If you notice water pooling in the drainage tray, empty it.
-
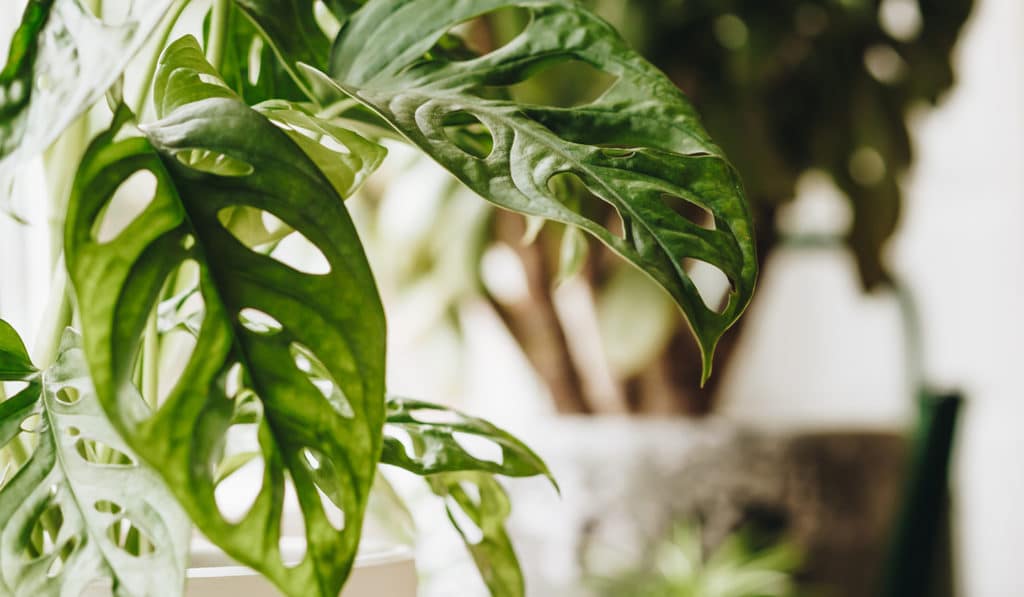
when to repot
Monstera grows fast, filling the pot with roots, and can quickly become rootbound. Repot in the Spring every 1 to 2 years, especially with younger plants. Increase your pot by 2 inches. When your Monstera is more mature, you can get away with just replacing the top few inches of soil.
-
propagation
Monstera is easy to propagate, especially If you have a node or aerial roots. Make your cut just below the node , then remove the lower leaves. Place your cutting in a glass jar with water and roots will grow within a couple weeks. For more information on propagation check out our propagation project page!
-
pest control
The most common pest is mealybugs. Look under those leaves when doing your regular cleaning. Check out our Pest control section in Plant 101 for how to identify and deal with pests on your plant!

troubleshooting
-
yellow leaves?
You’re probably overwatering. Are the leaves are also wilting? It’s almost certainly too much water, but this problem is easy to solve if caught early. Let your Monstera dry out completely. Make sure your plant pot has a drainage hole to allow excess water to escape.
If you’ve caught it early you should be able to fix this rather easily. Try poking holes in soil to allow for oxygen to get to the roots, or place pot (with drainage holes) in a tray or container with dry soil. This will soak up excess moisture. Finally check for root rot, remove any roots that seem affected, you may want to repot with fresh dry soil. For more information check out our Plant 101 section.
-
leaf tips and edges turning brown?
Could be a variety of reasons. Dry air, dry potting mix, too low of temperatures, or outgrowing pot size. If the room this plant is in is over 75 F/24 C and the air feels dry try a humidifier or placing plant on a pebble filled try of water. Mist leaves regularly. If near a heat vent move it away. If the room is too cold, or near a cold window move somewhere warmer.
Check if roots are bound or sneaking out the bottom drainage hole. Repot if necessary.
-
plant ‘crying’?
Too much water. Monstera leaves can drip if their potting mix is too wet. Slow down on the watering. Make sure the top two inches of potting mix get fully dry between waterings.
-
no holes in the leaves?
Probably not a problem! Young plants don’t have them. But if you have a mature plant that’s stopped producing holes with leaves, something is wrong. Check your location, watering and feeding routine.
-
mold on the surface soil?
Overwatering, too little time between watering. Mold (and even mushrooms) growing on your soil is not a direct threat. But it IS a sign of overwatering. Root rot can follow if not addressed. Water less frequently and make sure you let the top two inches of soil fully dry before watering. Ensure you have proper drainage. If things look really moldy, you can remove the top inch or so of soil.