- Pine
- Cedar
- Fir
- Oregonia
- Birch Poles
- Ilex Berries
- Curly Willow
- Miracle-Gro Potting Soil
- Pot liners/ Container
- Fairy Lights
- Accents & Decor
- Jumbo Christmas Lights
- Pine cones
- Wooden dowl
- Floral Tape
- Floral Wire
- Diagonal cutters/ tin snips/ needle nose clippers/ or flower sheers
Hello Everyone! My name is Shavonne, and you can find me anywhere on social media under the name Once Upon a Bungalow. Plant Project Canada has graciously asked me back to give you some tips on creating outdoor holiday arrangements. Now, I’ll be honest with you, this was my first time making an outdoor arrangement. I’m not claiming to be an expert. I am, however, going to show you everything I learned, along with the materials I used to make these as quirky and unique as possible – a common theme in our bungalow. Be sure to check out this holiday outdoor arrangement reel on Instagram, Facebook, or Tiktok!
Alright, let’s go!
First things first: If you don’t know how to do something, ask someone who does! That’s precisely how I started this project, asking our local expert so that I could give you the best “how-to” article possible. I’d love to give a HUGE shout-out to Jacqueline Williams of Just a Girl in her Garden, a local greenhouse and flower shop. She took the time out of her busy holiday schedule to give me a course on how to create a long-lasting and gorgeous arrangement for our cold Saskatchewan winters. Check out Just a Girl in Her Garden’s webpage here.


step 1.
Select you greens: I used three main foliage types for the arrangements (photographed above in order): Pine, Cedar, and Fir. Using different kinds of foliage gives the arrangement different colours, textures, and dimensions. I purchased an equal amount of each of these varieties, and I recommend you source your foliage from your local greenhouse to ensure the quality of the product. If you already have a garden full of these greens, you can also just cut off your own!


For accents, I used Oregonia, birch poles, and Ilex berries. These are more of an investment; however, you only need a few of them, and they add so much flair and personality to your arrangement. Later in this article, I’ll also show you the curly willow that is incorporated into the final design.


step 2.
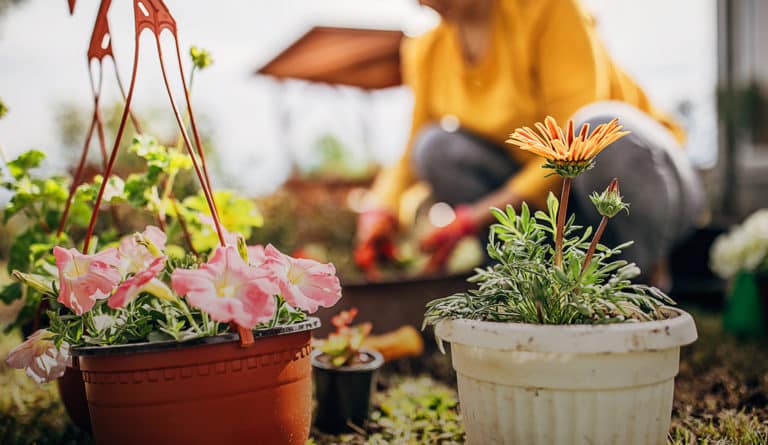
Select you soil, pot, and decide on a layout: There are many options that can be used as a basis for the arrangement. Some prefer sand, and some prefer floral foam; however, in the harsh Saskatchewan climate that fluctuates regularly and sees extremely cold temperatures, our local garden expert, Jacqueline, recommended starting with the soil. I chose to use Miracle-Gro Potting Mix, which is ideal for outdoor and indoor containers. This will also help us prevent the branches from rotting and ensure we have a long-lasting holiday arrangement. This potting mix facilitates soil aeration that ensures oxygen reaches the plant branches, which is an essential factor in promoting overall arrangement health.
Your pot selection depends on the size of your arrangement and whether or not you would like to use a liner in your main pot. These three arrangements were going to be featured in our outdoor privacy wall planter, so I knew just the pot liner would work well for this project. You can also choose to build your arrangement directly into your main pot; a liner is unnecessary.
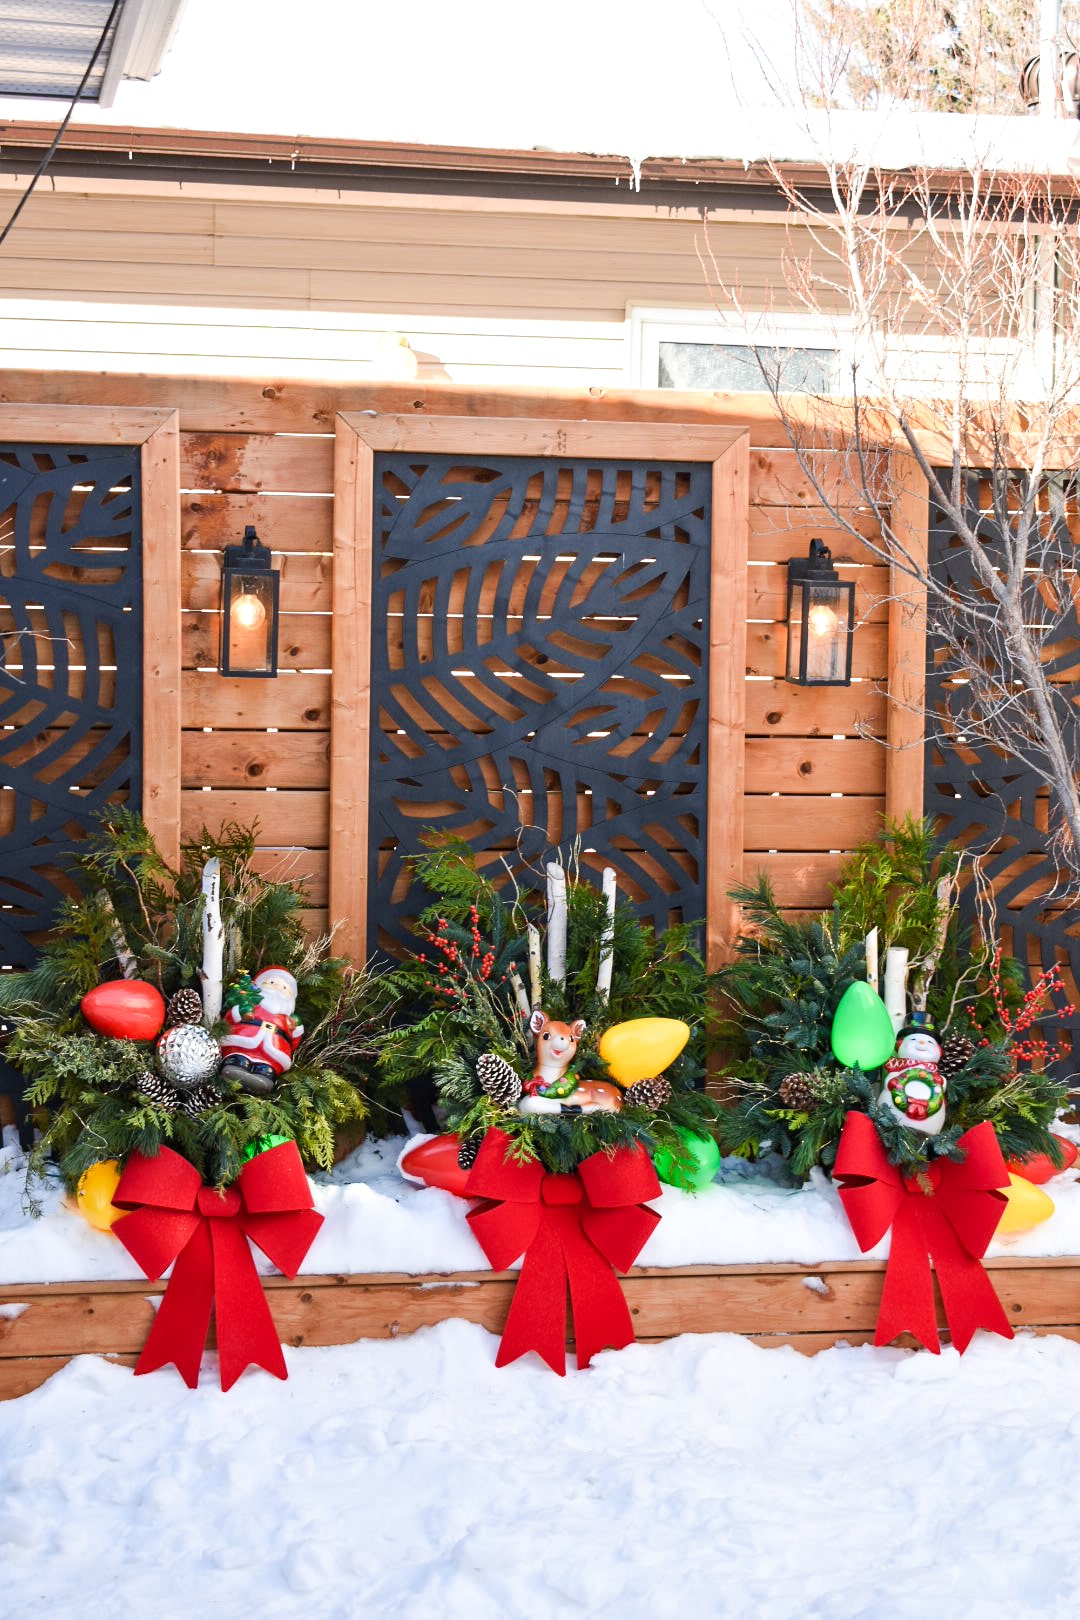
Deciding on your arrangement layout depends on how you want people to view it. Where is your arrangement going? Will it be seen by all the sides? Or will it only be seen from the front? Asking yourself these questions will determine how you build your design. For my vintage holiday arrangements, I knew there would be a backside that would rest against the privacy wall in our backyard. Instead of a “mound” style that is beautiful from all angles, I went for a forward-facing arrangement that will be primarily viewed from the front. Knowing my design direction, the back of my arrangement didn’t have to look good, and I could create height at the back of the pot instead of the middle. Tip: Explore Pinterest for inspiration before beginning.


step 3.
Start with the poles: Start with your birch poles. I used three as I like an odd number, but you can use as many as you like! This creates a central focus for your arrangement, and you can start building the rest from there. Stagger the poles to create different heights and vary the angles at which they are added to the pot. Remember, if you are building a mound arrangement (an arrangement that will be viewed from all angles), you will want to place these in the center. However, these were placed more toward the back because I am building a forward-facing arrangement.


step 4.
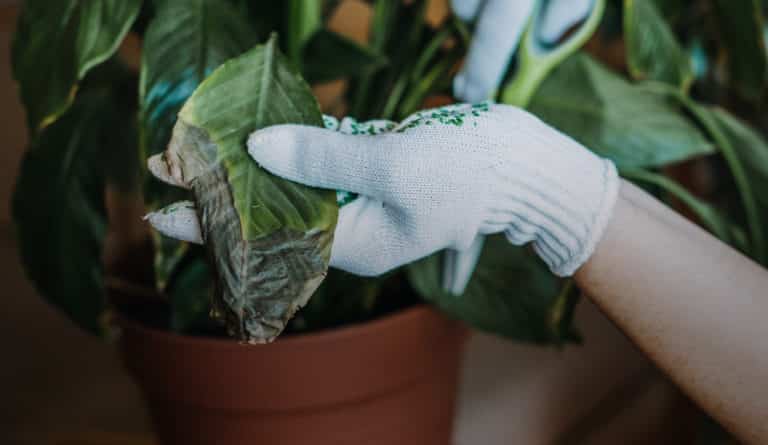
Add the greens: One of the biggest things I learned from my class at Just a Girl in Her Garden was to make sure that you take off the lower branches, needles, and leaves from the base of your foliage to ensure that the plant does not rot within the soil. Before placing it in the pot, ensure the bottom 3-4 inches are clear of all needles, leaves, and branches. Some you can remove with your hands, and others can use either tin snips, floral sheers, diagonal cutters, or needle nose clippers.


step 5.
Add the accents: Take into consideration what you want in the center of your arrangement. I knew that I wanted the vintage Santa, reindeer, and snowman as my focal point, so I included parts of the shorter greenery facing downwards in the front to create a resting spot for these elements. After putting all the fir, pine, and cedar in place, I added some curly willow, glitter branches and pine cones. To attach your accent items and focal point items, use floral wire and wrap the wire around the item you would like to secure, and then anchor the wire to a birch pole, or another strong point of your foliage. This keeps everything secure and in place.


step 6.
Add the lighting: Next, I added the Ilex berries, jumbo-size Christmas lights and fairy lights. The lights do make all the difference! These fairy lights were battery operated, but I recommend getting plug-in lighting or solar lighting that you can set to come on when it gets dark out at night – it’s just less hassle.


step 7.
Water your arrangement: After completing all these steps, ensure you water your arrangement well; however, do not overwater. If you accidentally put too much water in the soil (like I did), drain it out before putting it outside to freeze. If you fail to do this and have too much water in the pot, the plastic can burst open with the expansion of the frozen water! Remember, if temperatures go above zero, you must water these arrangements often! They do drink quite a bit. If temperatures stay below zero, they should remain lovely, lush, and green, and you won’t have to worry about watering.
ta-da! you’re done!
Honestly, I was pretty worried about messing up before I started making these! As it would turn out, you really can’t mess up! Have fun with it, get creative and add finishing touches that make your arrangement represent what makes you happy and brings you joy. I went for an over-the-top, vintage, quirky Christmas, and I’m so glad I did. I hope you guys enjoyed this tutorial! Happy Holidays from my family to yours! – Shavonne
Follow Shavonne on Instagram and TikTok


#happycreating!
Hello Everyone! My name is Shavonne and my social channels are called Once Upon a
Bungalow. I’m so happy to have been invited to Plant Project Canada’s webpage to share a
how-to on this very exciting project. This time I have instructions on how to build our Light-Up
Living Plant Wall. Check out our video for this project here! This project is for beginner to
intermediate woodworkers and is a great way to display your plants outdoors in the day or in the
evening. In case you missed it, click here for my instructions on making Planter Boxes with a
Blooming Trellis Archway, my first article with Plant Project Canada.
These instructions are based on our backyard living wall, feel free to adjust the
measurements to fit your space appropriately. Alright, Let’s get started on this unique and
whimsical plant wall…Here we go!


Here’s what you’ll need:
Material list:
– 1 ¾” Deck Screws
– 3 ½ ” Deck Screws
– 2 – Pressure-treated 4×4’s (8’-0” Long)
– 4 – Pressure-treated 2×4’s (10’-0” Long)
– 12 Pressure-treated fence boards (10’-0” Long)
– 2 Black Acrylic Privacy Panels (2’-0” x 4’-0”)
– 6 Hanging Plant Pots (I used metal plant pots)
– 3 Rectangle Plant Pots (For the top, these can be any pots you like!)
– Stain and or Paint
– LED Strip Lights (65.6ft, self-adhesive)
– 12 Metal Flower Pot Clips (Typically used for hanging clay pots on a fence)
– Optional: Vinyl cut out with a quote of your choice (This adds some magic to the project!)
– Plants! (I used all tropical plants that can be brought indoors in the winter)
Tools:
– Table Saw
– Metre Saw
– Tape Measure
– Various Clamps
– Speed Square
– Drill
– Impact Driver
– Pencil
– Level
step 1.
Creating the sides of the base to the Plant Wall: Cut two 4x4s at 65 ¾” on the metre saw and toenail these with four 3 ½” screws into your deck. Use a level to ensure your 4x4s are straight. Note: If creating a living wall on the ground, dig your 4x4s 3’-0” into the soil and anchor it with gravel or concrete. Add 3’-0” to the 65 ¾” measurement above. See the images below.


step 2.
Add 1 ½” x 1 ½” to the 4x4s to create an inset space to attach the fence boards: Next, take a 2×4 and cut it in half on the table saw lengthways, creating two 1 ½ x 1 ½ pieces. Cut these 1 ½ x 1 ½ pieces at 51” on the metre saw. Attach these vertically flush with the back and top of your 4×4 pieces. Anchor these with 3 ½” deck screws, every 12” forming a base for the fence boards to be screwed to. Once these pieces are in place on both sides, find the measurement inside of the 4x4s. See the images below.


step 3.
Add your fence boards: Measure from inside the 4×4 space and cut your fence boards to fit. Use a level to ensure the top board is straight. Attach fence boards on the outer edges with two 1 ¾” screws with no spaces between each board. Our fence boards were cut at 57 ¼”. We used 9 fence boards going
horizontally down, as we had a window we didn’t want to cover. If desired, boards can extend to the ground. See the images below.


step 4.
Make a frame for the black acrylic privacy panels to be attached to: Use your 2x4s to create a frame for the black acrylic privacy panels to be attached to. Cut the top and bottom pieces first at 57 ¼”. Place these two pieces at the top and bottom (flush with the top fence board and flush with the last fence board attached on the bottom.) Attach with two 1 ¾” deck screws on the ends of the board, toenail the sides to secure the boards. Cut three 2×4 pieces at 44”. Place 2 of the 44” 2×4 pieces on each side, snug beside the 4x4s and attach with two 1 ¾ deck screws on each side, along with a toenail screw on the sides. Next, find the center, use a level to ensure the board is straight, and then attach the third 44” board by using two 1 ¾” deck screws on both ends and then toenail the sides again until secure. See the images below.


step 5.
Add the LED Strip lighting: Drill one small hole in the bottom inner corner of each frame for the cord of the strip lights to go through. Attach self-adhesive LED strip lights around the inner edges of the frame you just made. With a 65.5ft pack of LED lights, which is sold in two separate sections, I wrapped the
LED lighting around the inner edge of the frame three times. Run an extension cord behind the plant wall to plug in the strip lights, and tuck any cords up behind the project to hide them from sight. See the images below.


step 6.
Add blocking to the plant wall to support the hanging plant pots: The plant pots need something strong to hold on to, as they cannot hang off the black panels alone. We used six hanging wall pots and needed two rectangular pieces behind each pot to act as studs behind each pot. Cut the remaining 1 ½” 2×4 pieces into twelve 3” rectangles. Attach “stud pieces” with two 1 ¾” deck screws in places that align with the plant pots required in the placement desired. Get creative and design your own unique placement, or feel free to copy ours! See the images below.


step 7.
Attach the black acrylic privacy screens: Next up, the black panels! Using four 1 ¾” deck screws for each panel, attach the black panels to the frame at the top and bottom. See the images below.


step 8.
Attach the hooks to hold the plant pots: Take 12 metal flower pot clips and attach each clip with one 1 ¾” deck screw to the blocking behind the black panel. If the design pattern of the black acrylic panel doesn’t work out to lay directly in front of your hook, use a washer to shim out the space and attach your plant clip. If two hooks are required for each pot, use a level to ensure you are creating a straight line that your pot will hang upon. See the images below.


step 9.
Add the outer frame and top piece to finish off the look: Using a table saw cut 2 fence boards to 4” in width. Cut two pieces with a 45-degree angle using a metre saw at 58” and two pieces at 50 ½” to form a border around the black panels securing them in place and creating your trim work. Secure these to the plant wall with 1 ¾” deck screws. Cut one fence board at its original width at 64” in length to create the top and final piece of wood to the plant wall. Place on top and secure downwards with 1 ¾” deck screws. See the images below.


step 10.
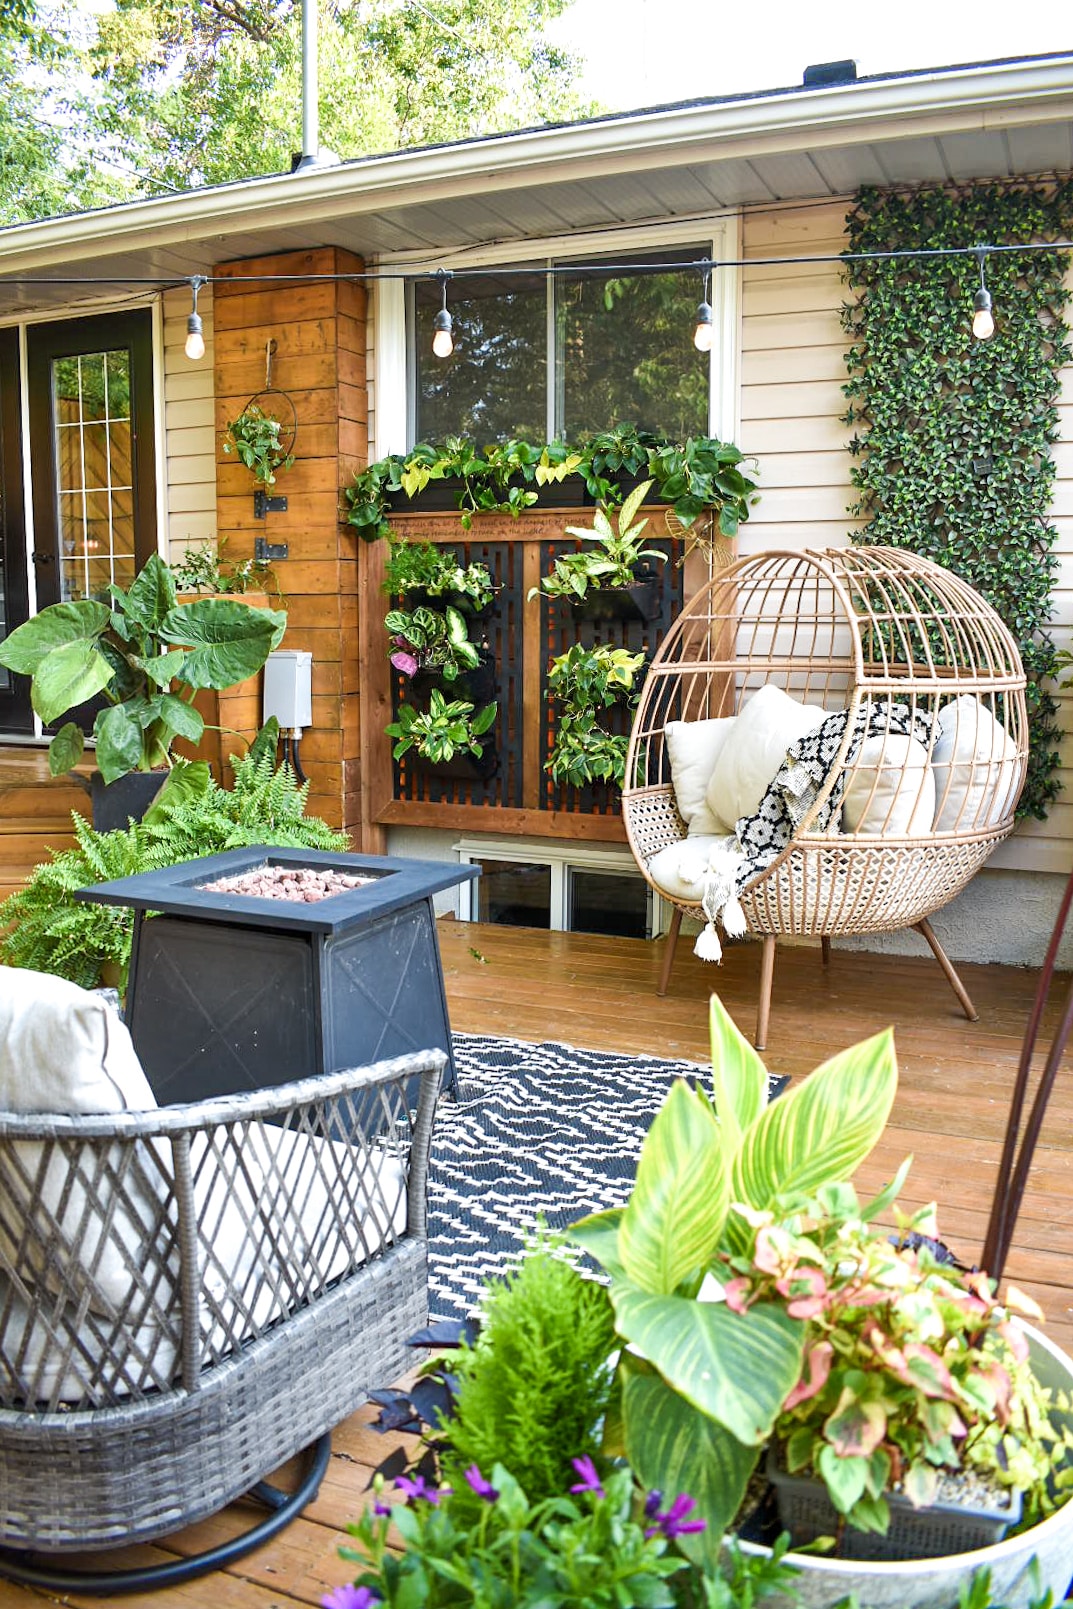
Add the plants: For our plant wall, I went with all tropical plants that I could bring inside during the winter months. The plants I chose include different variations of pathos, prayer plants, snake plants, and other various tropical plants. To ensure these plants stay happy in the summer heat, and with my tendency to over-water, I chose to use Miracle-Gro® Moisture Control Potting Mix. This soil helps you protect your plants from over and under-watering! It absorbs 33% more water than your basic soil and releases it as the roots need it. It’s also nutrient-rich and contains a slow-release fertilizer within the soil to provide those essential nutrients to your plants over time. Moisture control Potting Mix also helps with airflow within the dirt, giving the roots the oxygen they need, which is essential for the plant’s development and vitality. See the images below.


step 11.
Add personal touches and details: I added a vinyl sticker featuring a quote about light from our favourite book series. I thought this quote suited the project as it lights up beautifully at night. 10 points to Gryffindor if you can recognize where this quote is from! I also added a metal flying key to add more whimsy and personalization to the project. For extra glowing magic, add fairy lights to each plant! See the
images below.


There you have it! That’s how you can build your very own plant wall. I hope you enjoyed our
tutorial. Please tag @PlantProjectCanada and @OnceUponaBungalow if you do create one too.
Find my family and me on all socials under the name “Once Upon a Bungalow.” Thank you to
Plant Project Canada for having us on the blog again, we loved creating this how-to! Check out
more images from this project below.
Happy Planting!
Xo Shavo
Follow Shavonne on Instagram and TikTok


#happycreating!
A transformation happened! Our backyard living space was completely changed.
Initially, our goal was simple: build a deck to host family BBQs and birthday parties. But what we didn’t realize was how quickly we’d fall out of love with it. In just one year, the deck went from being our favourite lounge spot to a big, wooden pathway. This was especially tough for me since I had put my heart and soul into building that deck.
I take a lot of pride in my property, so I needed to breathe some new life into my once-beloved deck. And then it hit me – we needed something natural to break up the straight lines and dead wood. I spend most of my time building gardens for people passing by my house, but I had neglected the space I built for my own family. So, one day, while topping up my porch planters with some Miracle-Gro® moisture control potting soil and Miracle-Gro® plant food, I had an idea. We needed planters to bring life and contrast to this barren wooden platform. Since our deck had no rails or border, we decided to create some planter benches for both functionality and beauty.
Here’s my step-by-step guide on how to create your own planter benches. This project is designed to be modular, repeatable, and simple enough for even a beginner DIYer with minimal tools. We’ll walk through constructing two planters and one bench, but you can expand or reduce the project to fit your space. That’s the beauty of this design.


Here’s what you’ll need:
Tools You’ll Need
Clickbait alert! “You can complete this project with a screwdriver, a saw, and a measuring tape!” While that’s technically true, here’s a more comprehensive list of tools I suggest:
- Measuring tape – Must have. You’ll use it a lot.
- Drill – I used two: one for drilling pilot holes and one for fastening.
- Saw – Essential. You could bring the cut list to your local lumber dealer, but I suggest cutting your own wood to ensure accuracy and reduce waste.
- Level – To make sure your benches don’t slope.
- Drill bits / pencil – Necessary for the fasteners listed in the materials section and for marking measurements.
Nice to have:
- Second drill for pilot holes – This prevents wood from splitting. You can swap bits if you only have one drill.
- Speed Square – Makes measuring and marking easier.
- Chop Saw / Miter Saw – A big upgrade for cutting wood, great for making repeat cuts.
- Clamps – Handy when you need an extra pair of hands and you’re working alone.
Materials You’ll Need
This guide will yield one bench and two planters:
- 2×4’s, 8 feet long (qty. 15) – Pressure treated or rot-resistant wood like cedar for longevity.
- Deck Boards, 8 feet long (qty. 10) – Must be pressure treated, typically labeled 5/4 x 6.
- 1 ½ “ Deck screws (qty. 144) – Exterior grade. Buy a box; they’re handy elsewhere. Used only for fastening deck boards.
- 2 ½ “ Deck screws (qty. 104 ish) – Exterior grade. Buy a box; they’re handy elsewhere.
- 4” Framing screws (qty. 40) – Exterior grade. These make siding the planters simpler and provide a strong structural hold.
- 15” Square plastic planters (qty. 2) – For easy maintenance and to protect the wood.
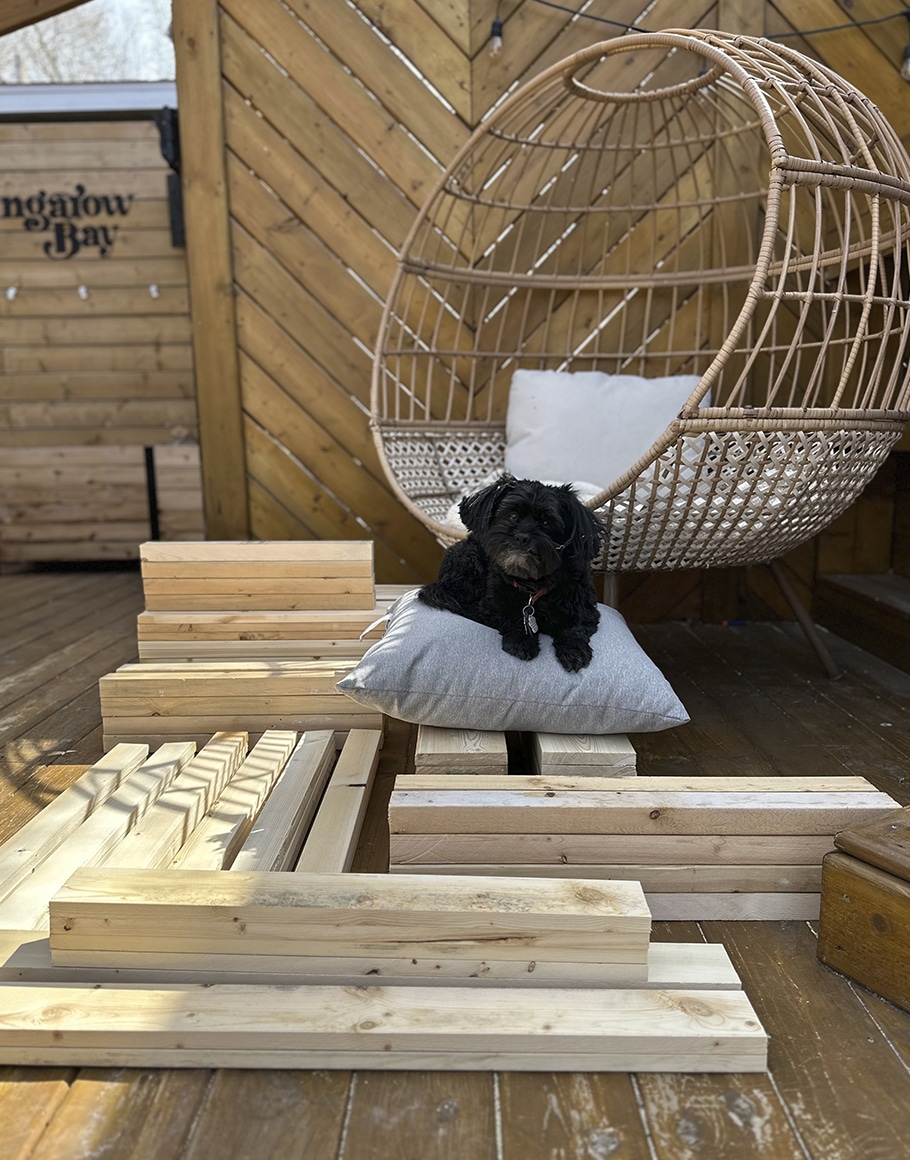
Cut List
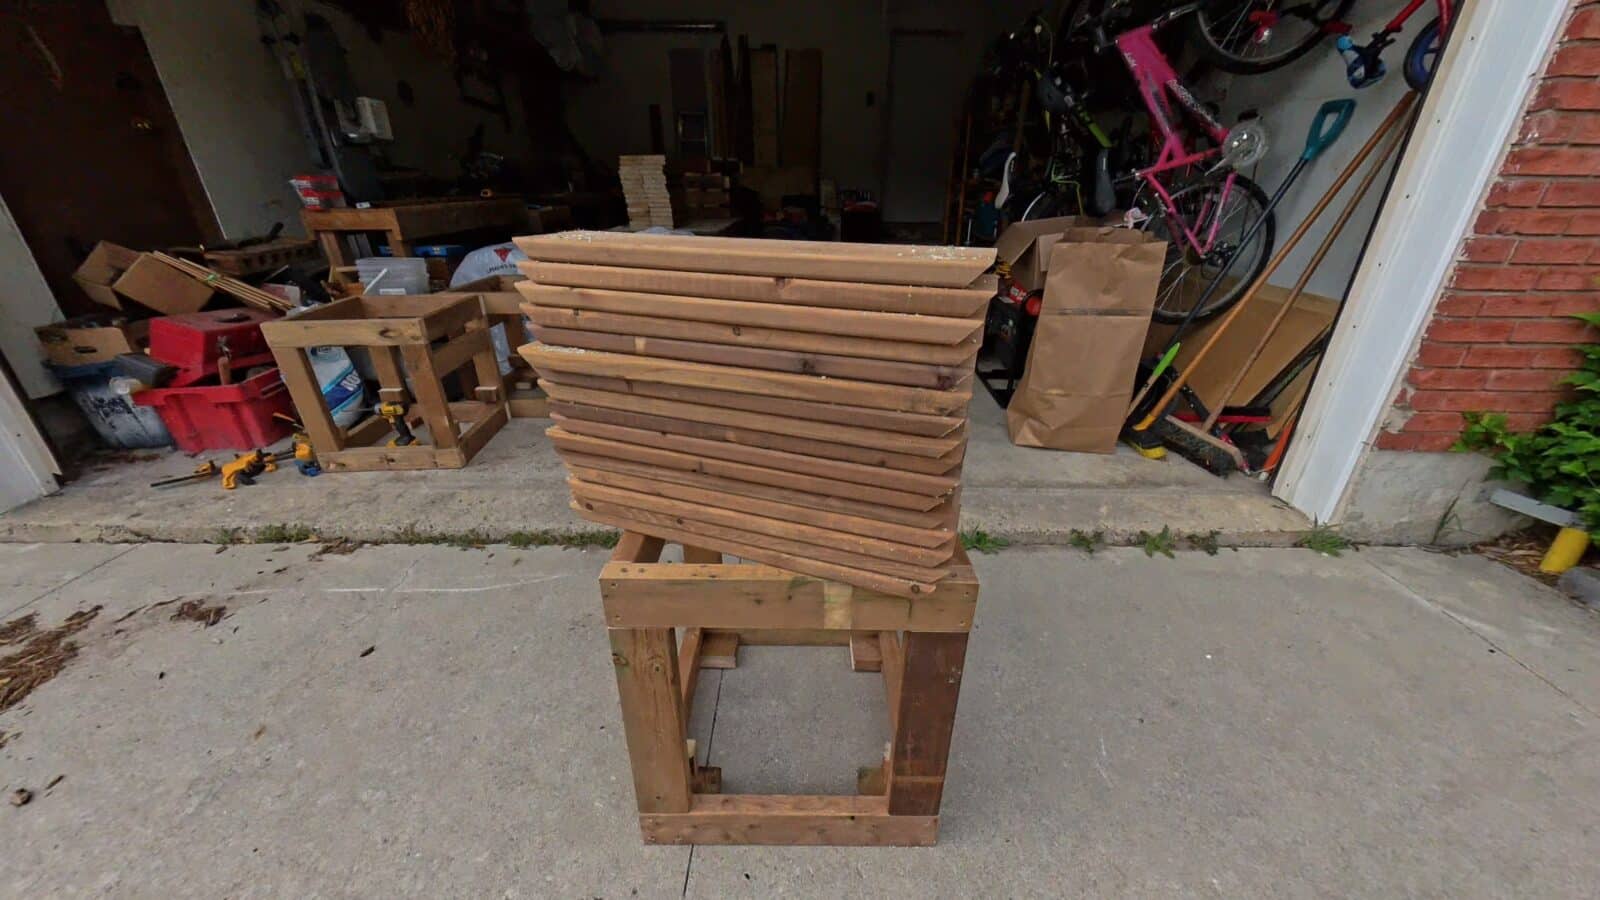
I’ve broken the build into components for easier assembly. Make these cuts and label them for later. I suggest making all the cuts before starting assembly.
Planters x2
Platform:
- [2×4] – 4x 17.5”
- [2×4] – 4x 14.5”
- [Deck board] – 4x 17.5”
Uprights:
- [2×4] – 8x 16.5”
Supports:
- [2×4] – 2x 18”
Squares:
- [2×4] – 4x 18”
- [2×4] – 4x 21”
Siding:
- [Deck Board] – BEGINNER 16x 23” & 16x 21”
- [Deck Board] – INTERMEDIATE 32x 23 1⁄8 (These should be cut with a 45-degree miter on both sides)
Bench
- [2×4] – 2x 17”
- [2×4] – 6x 48” (This assumes a 4-foot-long bench but can be altered to fit your space)
The Full Build Walk-Through
step 1.
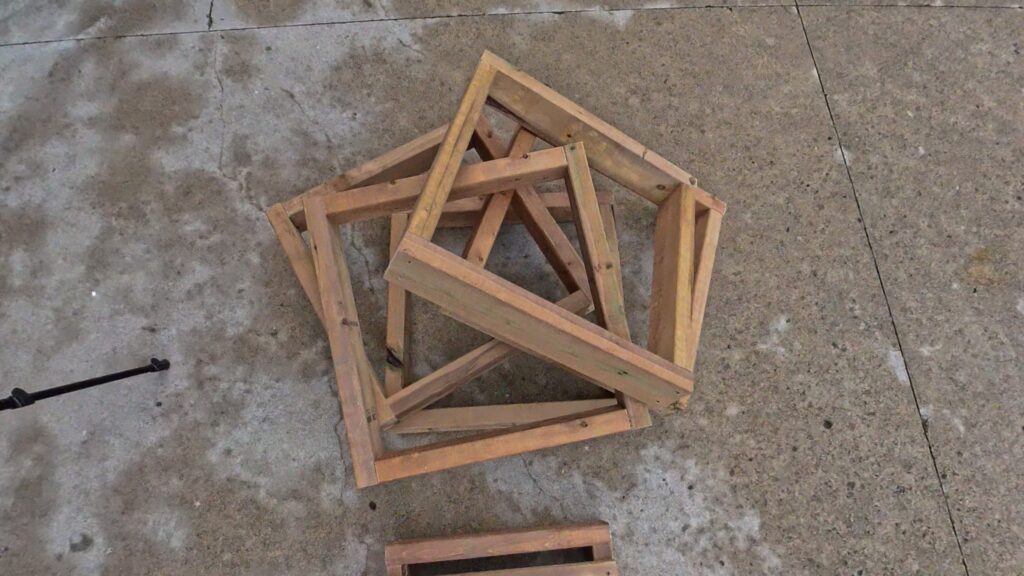
Start by building the platform pieces. These are the most forgiving and a great introduction to the rest of the build. Turn the 2×4 components into a square by fastening the two 14.5” pieces inside the 17.5” pieces. Use 2 screws at each joint with pilot holes (implied for each joint moving forward). Ensure you’re fastening through the 17.5” piece into the 14.5” piece, creating a 90-degree angle. Attach the two deck board pieces to the top of the square and repeat. Set aside for later. [16x 2 ½“ screws & 16x 1 ½“ screws]

step 2.
Build 4 more squares. This will be the beginning of your planter. Fasten two 18” pieces and two 21” pieces to create a square, just like the platform square (longer cuts on the outside). Repeat 4 more times. [16x 2 ½“ screws per planter]
step 3.
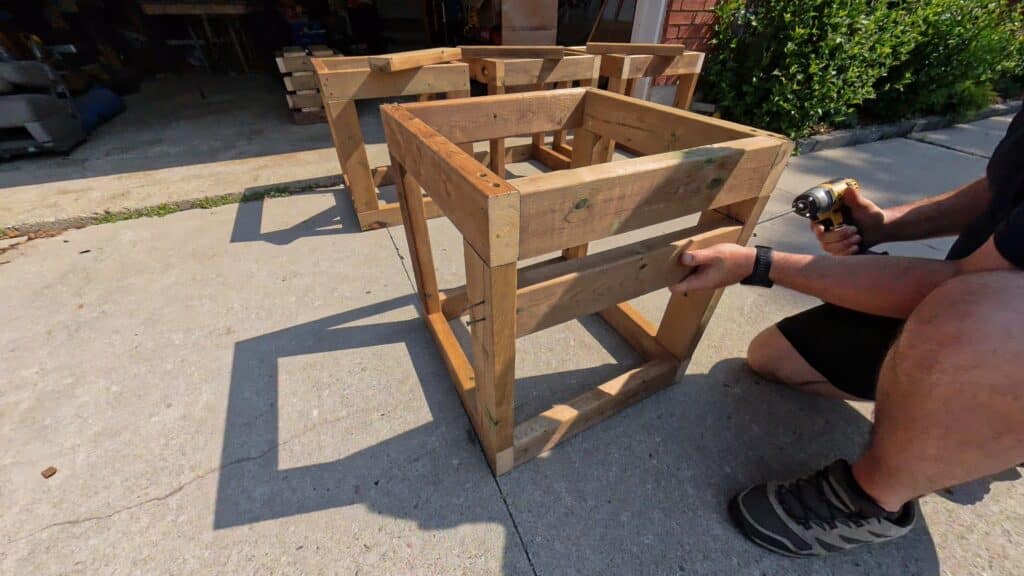
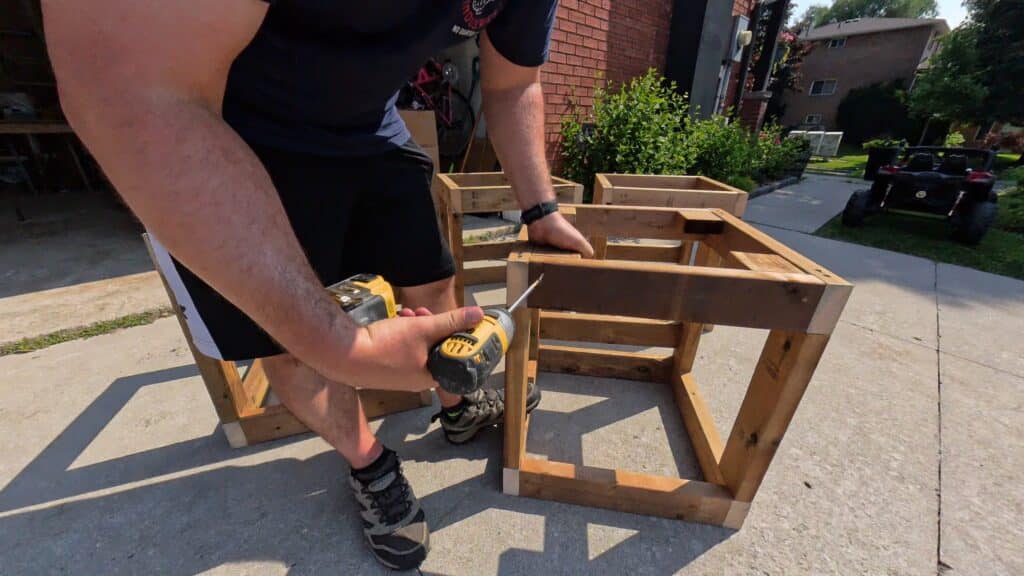
Combine two squares from the previous step with four 16.5” upright pieces to create a box. Using the 4” framing screws, drill down through the 21” pieces into the 16.5” uprights, creating a 90-degree angle. Repeat until all 4 uprights are installed, creating your planter skeleton. Make 2 of these. [16x 4” framing screws per planter]


step 4.
Measure 18” up from the bottom of the box for the bench height. This will be the top of your bench support. Fasten the bench support so the top of the 2×4 is at 18” from the ground. [4x 2 ½“ screws per planter]
step 5.
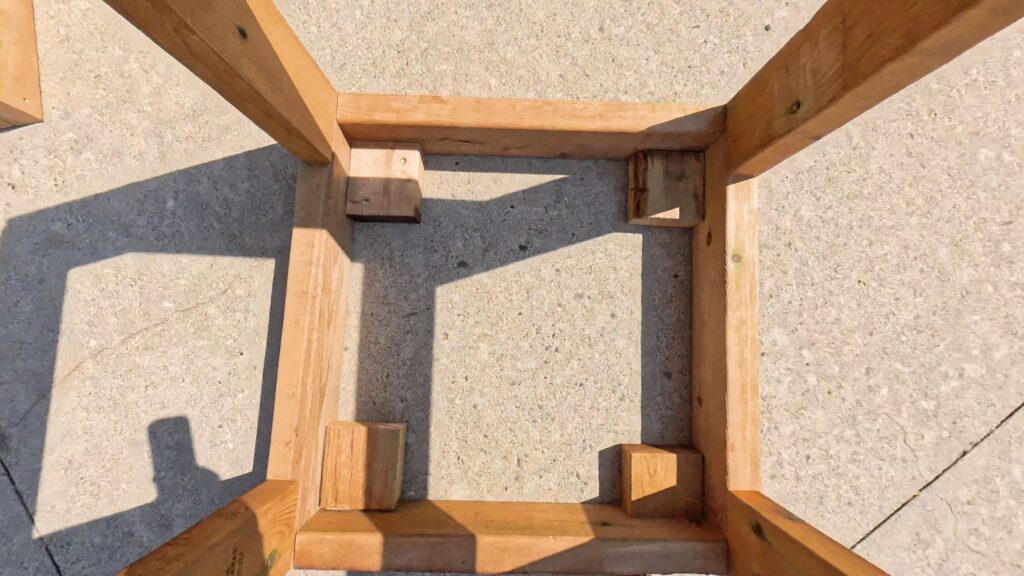
Create feet on the bottom side of the planter box to anchor it to the deck. Use 2×4’s of approximately 3” length and fasten them to the inside of the bottom square from the outside with 3 screws per foot. [12x 2 ½“ screws per planter]
step 6.
Set your platform blocks. This makes the build customizable to plastic planter pots up to 18”. Measure 16.5” down from the top of the planter box. This ensures the 15” planters sit flush with the top of the box. Repeat on all 4 uprights. [8x 2 ½“ screws per planter]

step 7.
Now for the siding. This is when you feel like you’ve truly made something. I chose a miter joint, which might be more challenging but looks great. Set your top boards first, ensuring the inside of the miter joint is in line with the corner of your box. For beginners, make 4 more squares, fastening the deck boards to the box to form a square. Set your top boards first and move down, fastening all 16 deck boards. [64x 1 ½“ screws per planter]

The hard part is done, and you’ve created 2 planters. Now, let’s move on to the bench.
step 8.
Using two 17” pieces and six of the pieces cut to your desired length, ensure the boards are all showing the narrow side. Create a rectangle using the two 17” pieces and two of the length pieces, fastening through the 17” pieces. The remaining four length pieces should fit perfectly in this rectangle with equal spacing of a 2×4. [24x 2 ½“ screws]


step 9.
Mount the bench between your 2 planters using a level. Fasten the bench to the planters using the 4” framing screws from inside the planter through the bench support and into the 17” end pieces of the bench. Ensure the bench height matches the supports at 18”.


This project will add much-needed seating and plant life to your deck or patio. I hope you enjoyed the guide. Happy planting!
Follow @brandonkoruna on Instagram and TikTok for more garden tips!


#happycreating!
DIY planter boxes
Hello Everyone! My name is Shavonne and I’ve popped over to Plant Project Canada’s webpage
from Once Upon a Bungalow with instructions on how to build planter boxes with a stunning
blooming trellis archway. This is a great beginner woodworking project and the final result will
have you beaming with pride.
If you already have two planters that will work for this project and only want to build the
archway, scroll past the planter instructions to find the arch instructions. However, if you’re like
me and love a good DIY project, follow along with these instructions to build the planter boxes
too!
Here we go!


Here’s what you’ll need:
These planter boxes are ideal for raised vegetable gardening as they are deep and have ample soil space for your rooted vegetables to thrive.
The below instructions will build two planter boxes. Each finished planter box will bed 39” W x 26 ½” H x 26” D. I used non-pressure-treated pine to create my planters, but this can be substituted for any ideal preferred type of wood. Start by cutting all the pieces first, to save time throughout the build.
materials:
– 1 ¾” Deck Screws
– 2” Deck Screws
– 1 ¼” Brad Nails
– 32 Pine Fence Boards (1”x 6” x 6’-0”)
– 6 Pine Boards (2” x 2” x 8’-0”)
– Sandpaper
– Wood Glue
– Wire Mesh
– Stain and or Paint
tools:
– Table Saw
– Mitre Saw
– Brad Nailer
– Tape Measure
– Various Clamps
– Electric Sander
– Jig Saw
– Speed Square
– Pocket Hole Jig (Optional)
– Staple Gun
cut list:
– 8 2×2’s at 26” (Leg’s)
– 4 2×2’s at 22” (Side Supports)
– 4 2×2’s at 22 ½” (Bottom Supports)
– 4 2×2’s at 20 ¼” (Bottom Supports)
– 24 Fence boards at 35” (6” width) (Long sides & bottom of the planter)
– 16 Fence boards at 24” (6” width) (Short sides of the planter) *Tip: Use a table saw to cut the following pieces at 2 ½” width first, for less material waste.
– 16 Fence board pieces at 26” (2 ½” width) (Side Trim)
– 4 Fence board pieces at 38 ¾” (3” width) (Top Trim)
– 4 Fence board pieces at 26” (3” width) (Top Trim
step 1.
Making the long sides of the planter box: Take 4 of the 35” fence boards and lay them out on a flat surface. Use clamps to press the four fence boards together for an even and taught placement. Place the 26” 2×2’s on either end of your 4 boards, with the top of the 2×2 flush with the top of your planter—the remaining length of the 2×2 will overhang. Use wood glue on the back of the legs. Use clamps to secure the legs in the right position before anchoring them with screws. Once the legs are in place, pre-drill holes and then use 1 ¾” deck screws to secure the legs. Find the center position using a tape measure, and place the 22” middle support using the same process of wood glue, clamps, pre-drilled holes, and screws. Repeat step one 4 times. See the images below.


step 2.
Attaching the short sides of the planter box: Lay one of the completed “long sides” on a flat surface to begin attaching the 24” fence boards to the 2×2 leg on the “long sides” assembled in step one. Attach these boards flush, use wood glue, pre-drill the holes, and then secure with 1 ¾” deck screws. Continue attaching until all four 24” pieces are attached. Once complete, attach the other completed “long side” to the other end of the 24” piece. Complete the box by adding the 4 remaining 24” pieces to the opposite end. Use a speed square to ensure all corners of the box are at a 90-degree angle. See the images below.


step 3.
Bottom supports: Measure 8 ½” over on the “long side” from each 2×2 leg. Attach the 22 ½” 2×2’s from the outside by using wood glue, pre-drilling, and then using 2” inch deck screws. The 22 ½” boards may have to be trimmed to fit in this space (That’s okay!). There will be another support between the legs of each of the “short sides” of the planter. The 20 ¼” 2×2’s should fit snuggly between the two legs. Use a pocket jig to pre-drill the holes to attach these, or toenail screw from the front side. See the images below.


step 4.
The planter’s bottom: Using the remaining 35” fence pieces, place one piece in the base of the planter box. Press these boards up against the sides until they are snug. Mark where the legs butt up against the fence piece. Mark these locations with a pencil on the fence piece. Measure the length that the leg protrudes into the box and measure this distance onto the fence piece. Use a Jig Saw to cut out these notches. There may be space between these boards, which is okay, as it will allow for drainage in the planter. See the images below.


*Note: Once I was at this stage of the build, I took the time to stain the planter box with an outdoor deck stain. I then painted the side trim pieces in black before attaching them to the planter boxes. * Tip: Having a friend with you helps speed up the process! See the images below.


step 5.
Side trim pieces: Attach the 26” side trim pieces using wood glue and 1 ¼” brand nails. Place the first trim piece on the “short side” flush with the edge. The piece should sit flush with the ground and flush with the top of your box. Then place another trim piece on the “long side” of the planter, glue, and then brad nail. Repeat this process on each corner of the garden box. Use wood filler to fill in all brad nail holes, sand, and then touch up paint. See the images below.


step 6.
Top trip pieces: Cut the 26” fence pieces with a 45-degree angle to frame the top of the garden boxes. Using wood glue and a brand nailer, attach each of the pieces, only after arranging all 4 pieces on the top to ensure an even trim for the top of the planter. Use wood filler to fill in all gaps and brad nail holes, sand, and then touch up the stain of the top trim. See the images below.


DIY planter boxes arch trellis
step 1.
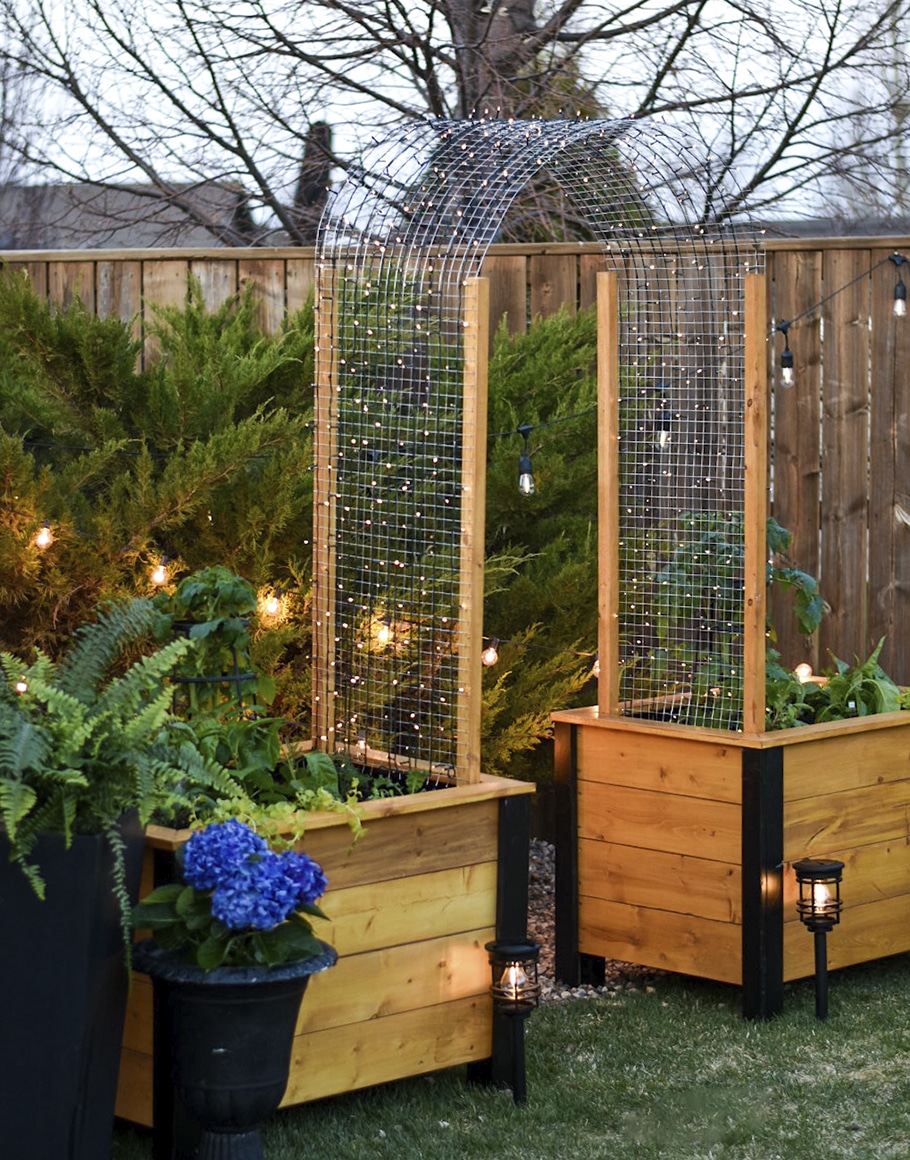
Creating the supports: Cut 2×2’s at the desired height. 62” inches is the height of the supports shown in the image below. Stain or paint the supports to match the design cohesively. Attach supports to the 2×2 legs inside the planters using 1 ¾” deck screws. 3 screws in each support should be sufficient. See the images below.


step 2.
Adding the wire mesh: Measure the distance between the two supports. Using that measurement cut the wire mesh to size. Start below the trim of the planter box and attach the wire mesh to the supports using construction staples. Remember, the mesh doesn’t have to go all the way down into the box, it just has to begin at soil level.


step 3.
Light it up: Using solar lights, string the lights over the archway to create a stunning glowing effect in the early months of spring before the trellis fills in with your gorgeous climbing plants.


DIY planter boxes with arch trellis tips & tricks:
- Fill the planters with sticks, grass clippings, and leaves before adding the soil. This will naturally enrich the soil over time and it will take up space in each planter, costing less to fill.
- Use both Miracle-Gro Garden soil and potting soil. Using a 50:50 blend of these two soils will provide a lighter, more suitable mix for raised bed plants to thrive.
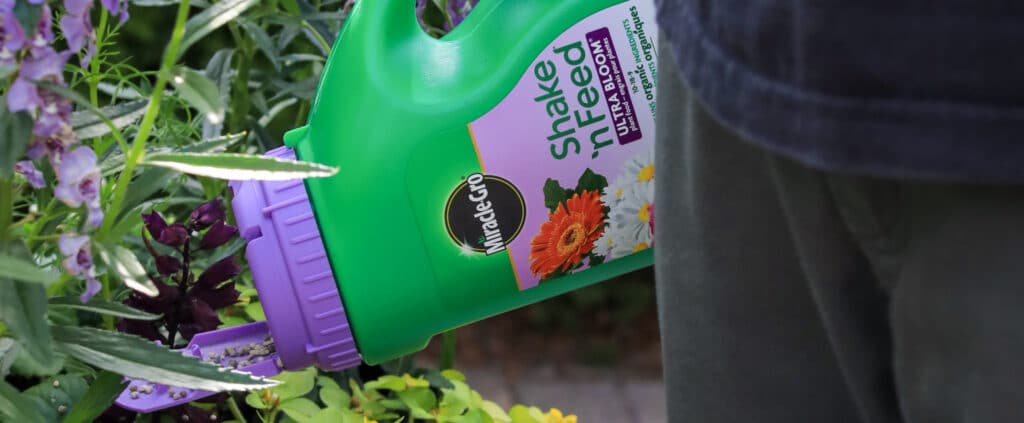
- Use Miracle-Gro Shake n’ feed to give your garden a boost and remember to fertilize every week as this makes all the difference.
I’m so honoured to be a guest on Plant Project Canada’s blog, and I look forward to seeing all of
the planters and trellises you create! Be sure to tag me in your creations. Thank you for stopping
by!
Xo Shavo
Follow Shavonne on Instagram and TikTok


#happycreating!
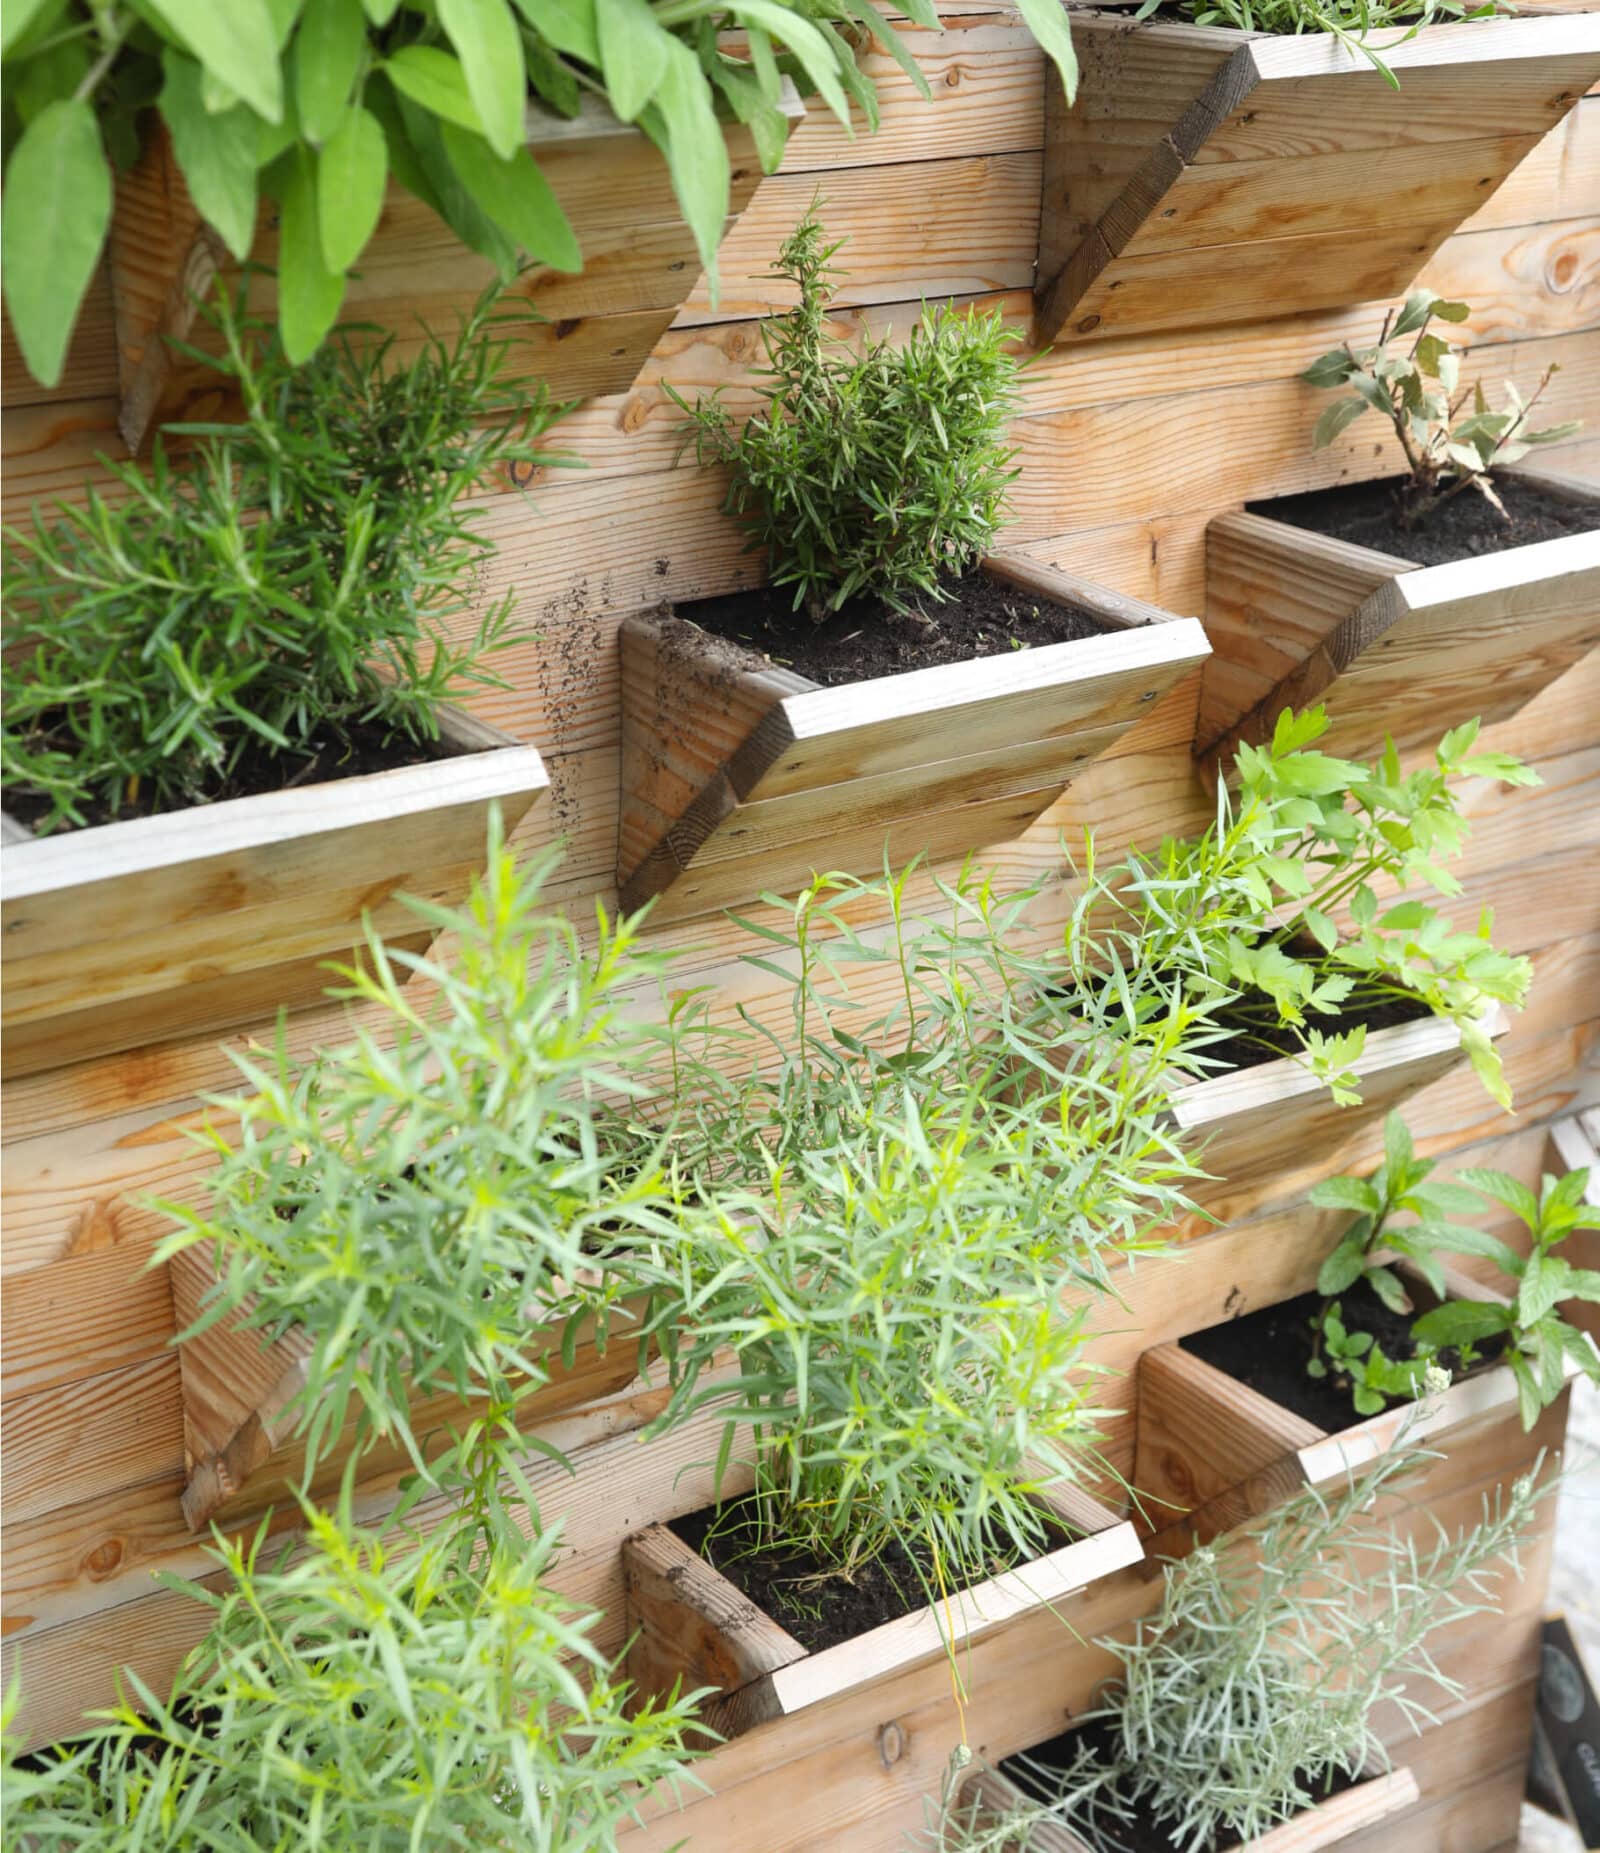
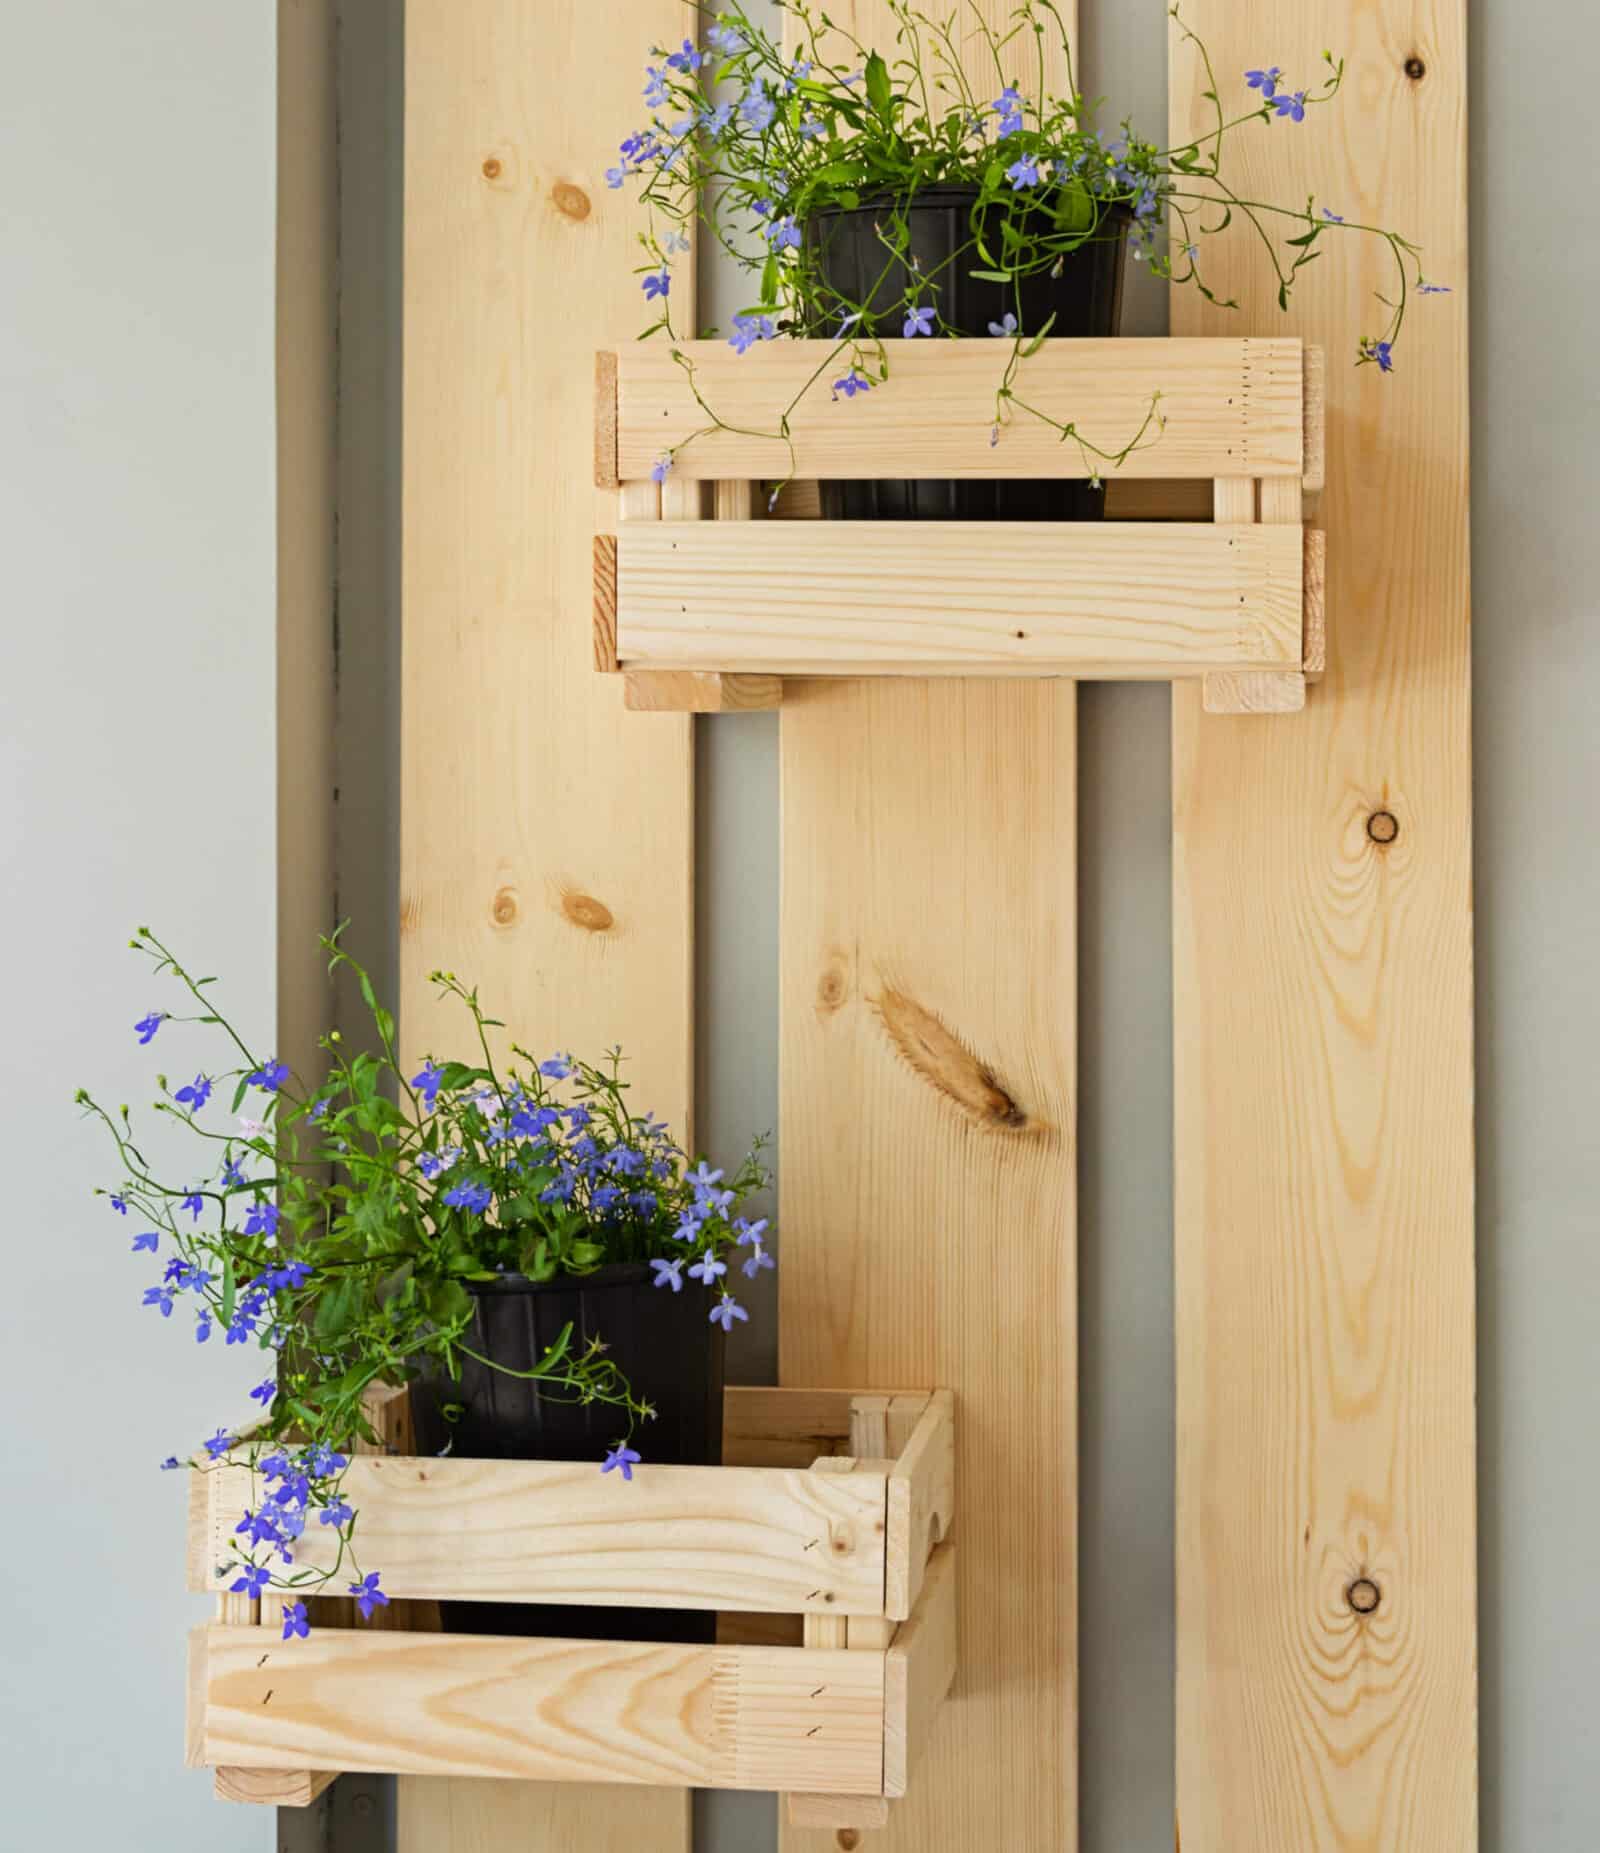
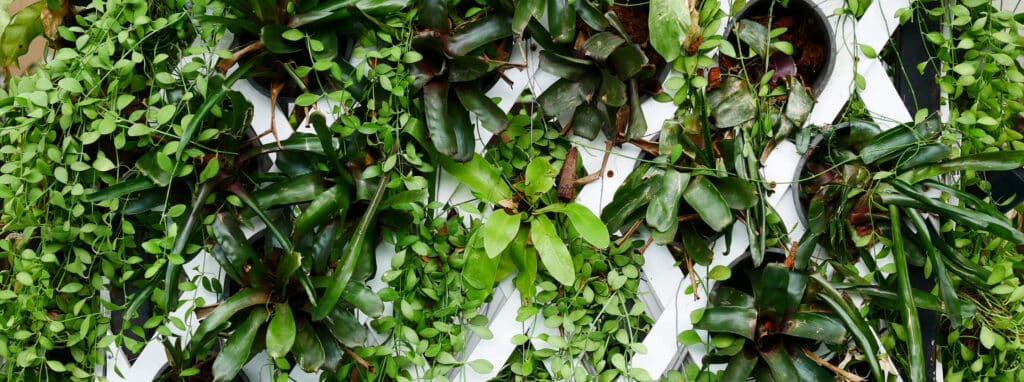
are you looking to spruce your outdoor space with a unique and creative garden? Look no further than creating your own vertical garden!
Vertical gardens are the perfect way for gardeners of all skill levels to create aesthetically pleasing and eco-friendly backyard decor that brings an extra level of life, colour, texture and personal expression into any outdoor living area. Plus, they can provide fresh herbs, fruits, and veggies right in your kitchen. How cool is that?
starting your vertical garden journey
If you thought a vertical garden was only for large backyards, think again! They are perfect for smaller spaces like balconies too. You can design them any way you like and choose the plants that suit your fancy. With a vertical garden, you’ll have a touch of nature and beauty at your doorstep. So, what are you waiting for? Let’s get gardening!
here’s what you need
If you’re into vertical gardening, let’s get your plants up and growing! First things first, you’ll need some supplies. Grab yourself a vertical planter or frame – it’s like a fancy framework for your plants to climb on. You can buy one from a garden store (think trellis or wooden ladder) or get creative and use what you already have, like your deck or fence. Feeling crafty? Build your own and make it totally unique to your yard and plants. You can use nursery pots within your vertical structure, similar to the ones featured here. For a bit of a different look, use clay or painted pots. Whatever pot you choose to use, make sure there’s ample drainage.
choosing the perfect plants
With so many different plants to choose from, how do you know which ones are right for you? First, think about how much sunlight your space gets. Some plants, like succulents and ferns, are great with less light, while others, like herbs and veggies, crave that sweet sunshine. Before you get too carried away, decide if your garden will be indoor or outdoor. Also, consider the size and weight of your plants. If they’re big and heavy, they might need some extra support. It’s also essential to consider the aesthetic you want to bring to your garden. Do you want that lush, leafy look, or are you more into the sleek and modern vibe? Keep all this in mind before you dive into the world of vertical gardening.
nurturing and nourishing your vertical garden
Once you’ve got your plants, it’s time to pick the perfect soil. Our top recommendation? Miracle-Gro® Moisture Control Potting Mix – it’s jam-packed with all the essential nutrients your plants need to thrive. Bonus points for this potting soil because it helps to regulate the moisture in the soil, and protects your plants from over and under watering. Regular watering and pruning are vital to keeping those pesky diseases at bay and promoting healthy growth.
Speaking of watering, maintaining a vertical garden can be a challenge, but investing in a drip irrigation system is a game-changer. It ensures your plants get an even dose of hydration without one area getting drenched. Smart, right? Oh, and let’s not forget about lighting. If your wall is a bit shady, no worries! You can always go for plants that don’t need as much sunlight. Or, if you’re feeling fancy, supplement with some cool artificial light.
revitalizing the environment and your health
Vertical gardens are fantastic for so many reasons! First, they’re like superheroes for the environment because they absorb carbon dioxide and other pollutants from the air while giving us clean oxygen in return. Plus, they’re like magical noise blockers, shielding you from those noisy neighbours and giving you peace and quiet. But that’s not all! You’ll have your own organic produce parade with a vertical garden. Think about it – fresh yummy fruits and veggies, growing all within reach! And here’s the cherry on top: gardening is the ultimate stress reliever. So, when you add a vertical garden to your outdoor space, you’re not just taking care of your health and the planet but also putting a smile on your face. It’s a win-win!
Whether you have a tiny apartment or a spacious house, a vertical garden is a fantastic chance to bring joy to your outdoor space! Plus, you don’t need to break the bank. Many folks have been pleasantly surprised to discover that this seemingly intimidating project is totally doable! So, if you’re looking for some cool ideas to live a greener life, why not try a vertical garden? Trust me, it’s worth it!
#easypeasy
If you love plants, then it’s likely that you’re familiar with the fear and frustration of discovering pests in your garden! It can seem daunting but don’t worry. With some know-how, it’s possible to identify different garden pests quickly so you can plan how to deal with them effectively. So, let’s get started spotting those troublesome insects.
identifying common garden pests
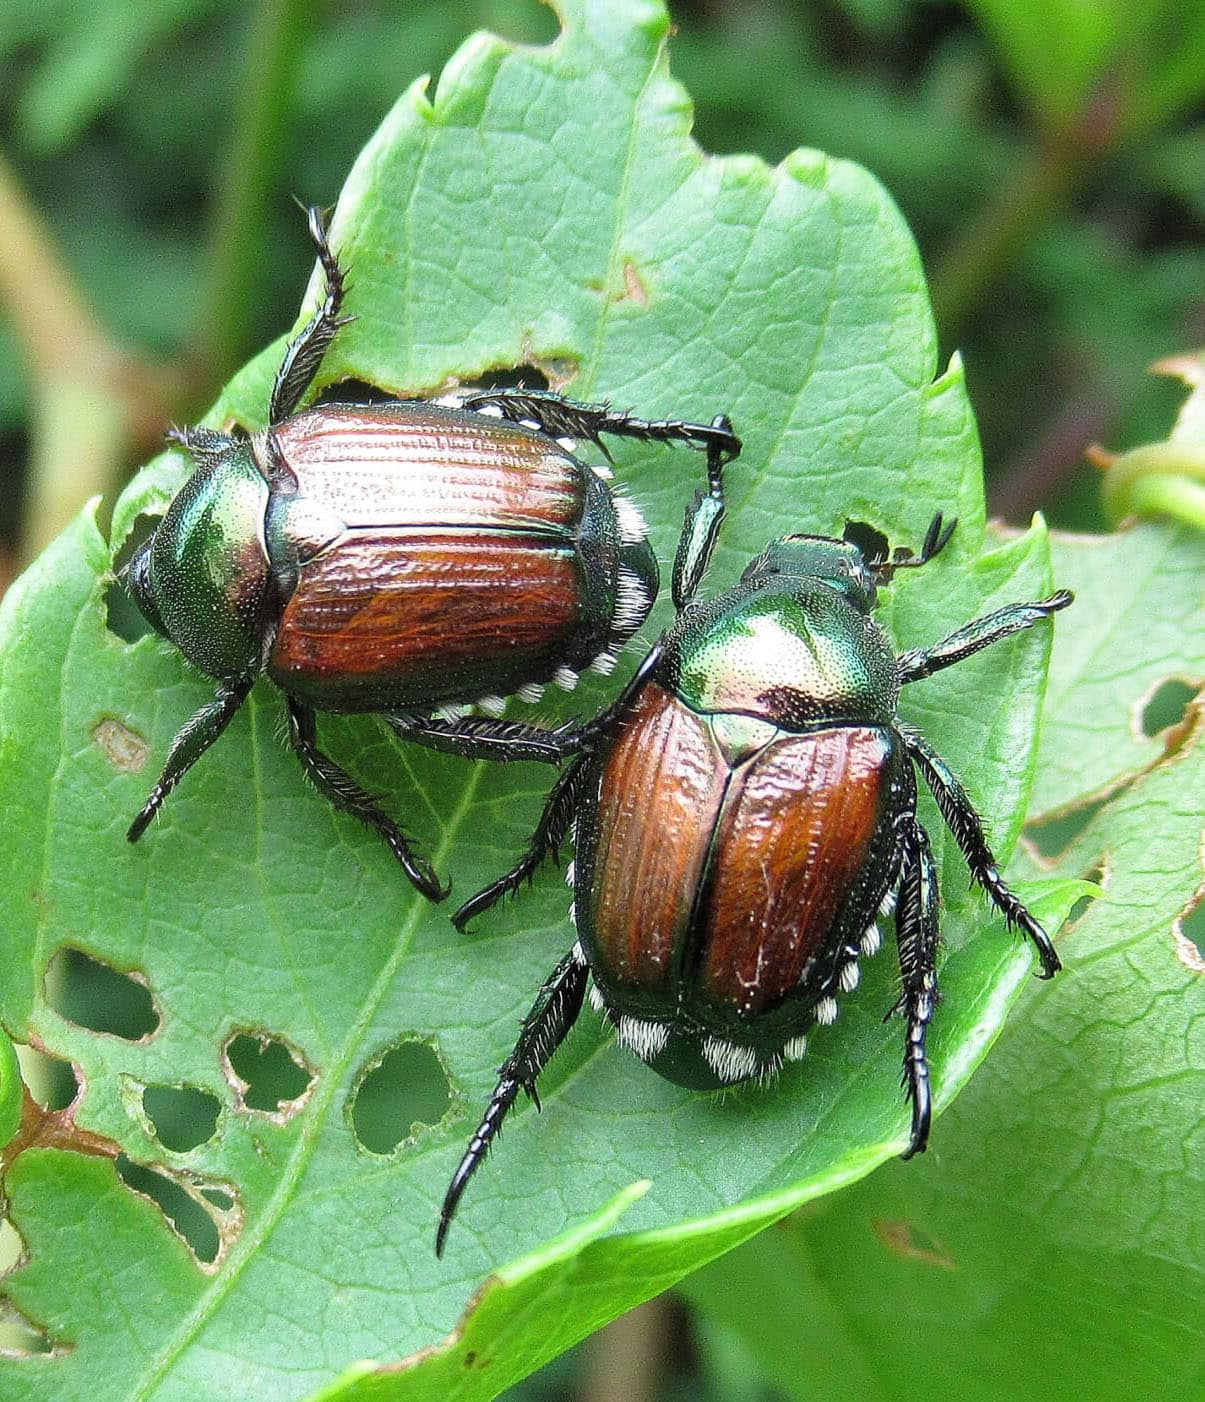
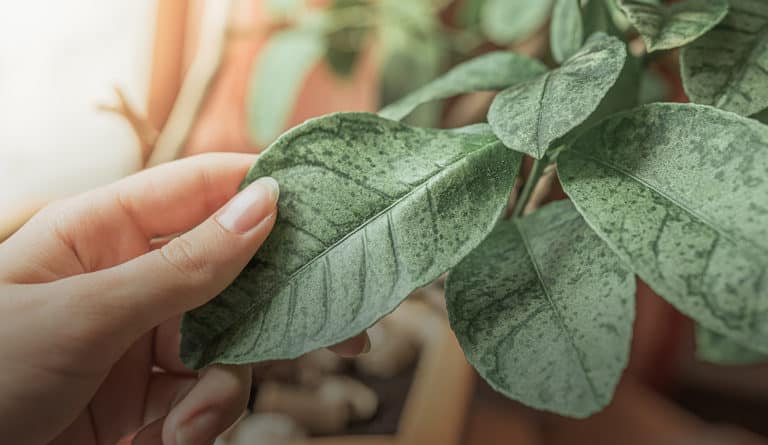
Let’s talk about those pesky garden pests that can wreak havoc on your plants and veggies. Identifying them is crucial to preventing them from destroying your garden. One troublemaker is the aphid, causing leaves to wilt, turn yellow, and curl. Then we have the spider mite, leaving yellow or brown spots and even defoliating your precious plants. Oh, and watch out for the Japanese beetle – it loves to chow down on plants, shrubs, and fruit trees. Spotting the Japanese beetle can be tricky for inexperienced gardeners because of the insect’s small size and coppery green colour that blends into your plants. And let’s not forget about slugs and snails; those appetite-driven fellows leave holes and scalloped edges on leaves. Catching these pests early is the key so that you can protect your beloved garden.

different types of damage caused by garden pests
Garden pests can cause many different types of damage to our beloved plants, from creating holes in leaves to gnawed-through and broken stems. Some bugs, such as aphids, can suck the sap from leaves and leave them yellowed and wilted. Others, like slugs and snails, can leave a slime trail behind as they munch their way through essential parts of the plant. Some pests even cause damage underground, eating away at the roots and compromising the stability of the plant. It’s important to be familiar with different signs of pest damage so you’ll immediately know what they mean.
how to prevent bug infestation in your garden
Spotting signs of pests in your garden is just the first step. Now, it’s time to learn how to prevent them. One of the most effective ways to avoid pests is to encourage beneficial insects like ladybugs and praying mantises that feed on pests to live in your garden. These little helpers can act as soldiers, defending your plants from harmful pests and promoting a healthy ecosystem. You can also place bird feeders in your garden to attract natural predators that feed on bugs.
Additionally, make sure to water them appropriately and give them the right amount of fertilizer. Weak plants can be super attractive to bugs, so you need to keep them happy and healthy. Also, did you know planting herbs and flowers like lavender or marigolds can repel insects? Remember to inspect your plants and remove any signs of infestation regularly. Dealing with a small bug problem is easier than a big headache later. So follow these tips, and enjoy your garden… pest free!
how to control and eliminate pests in your garden
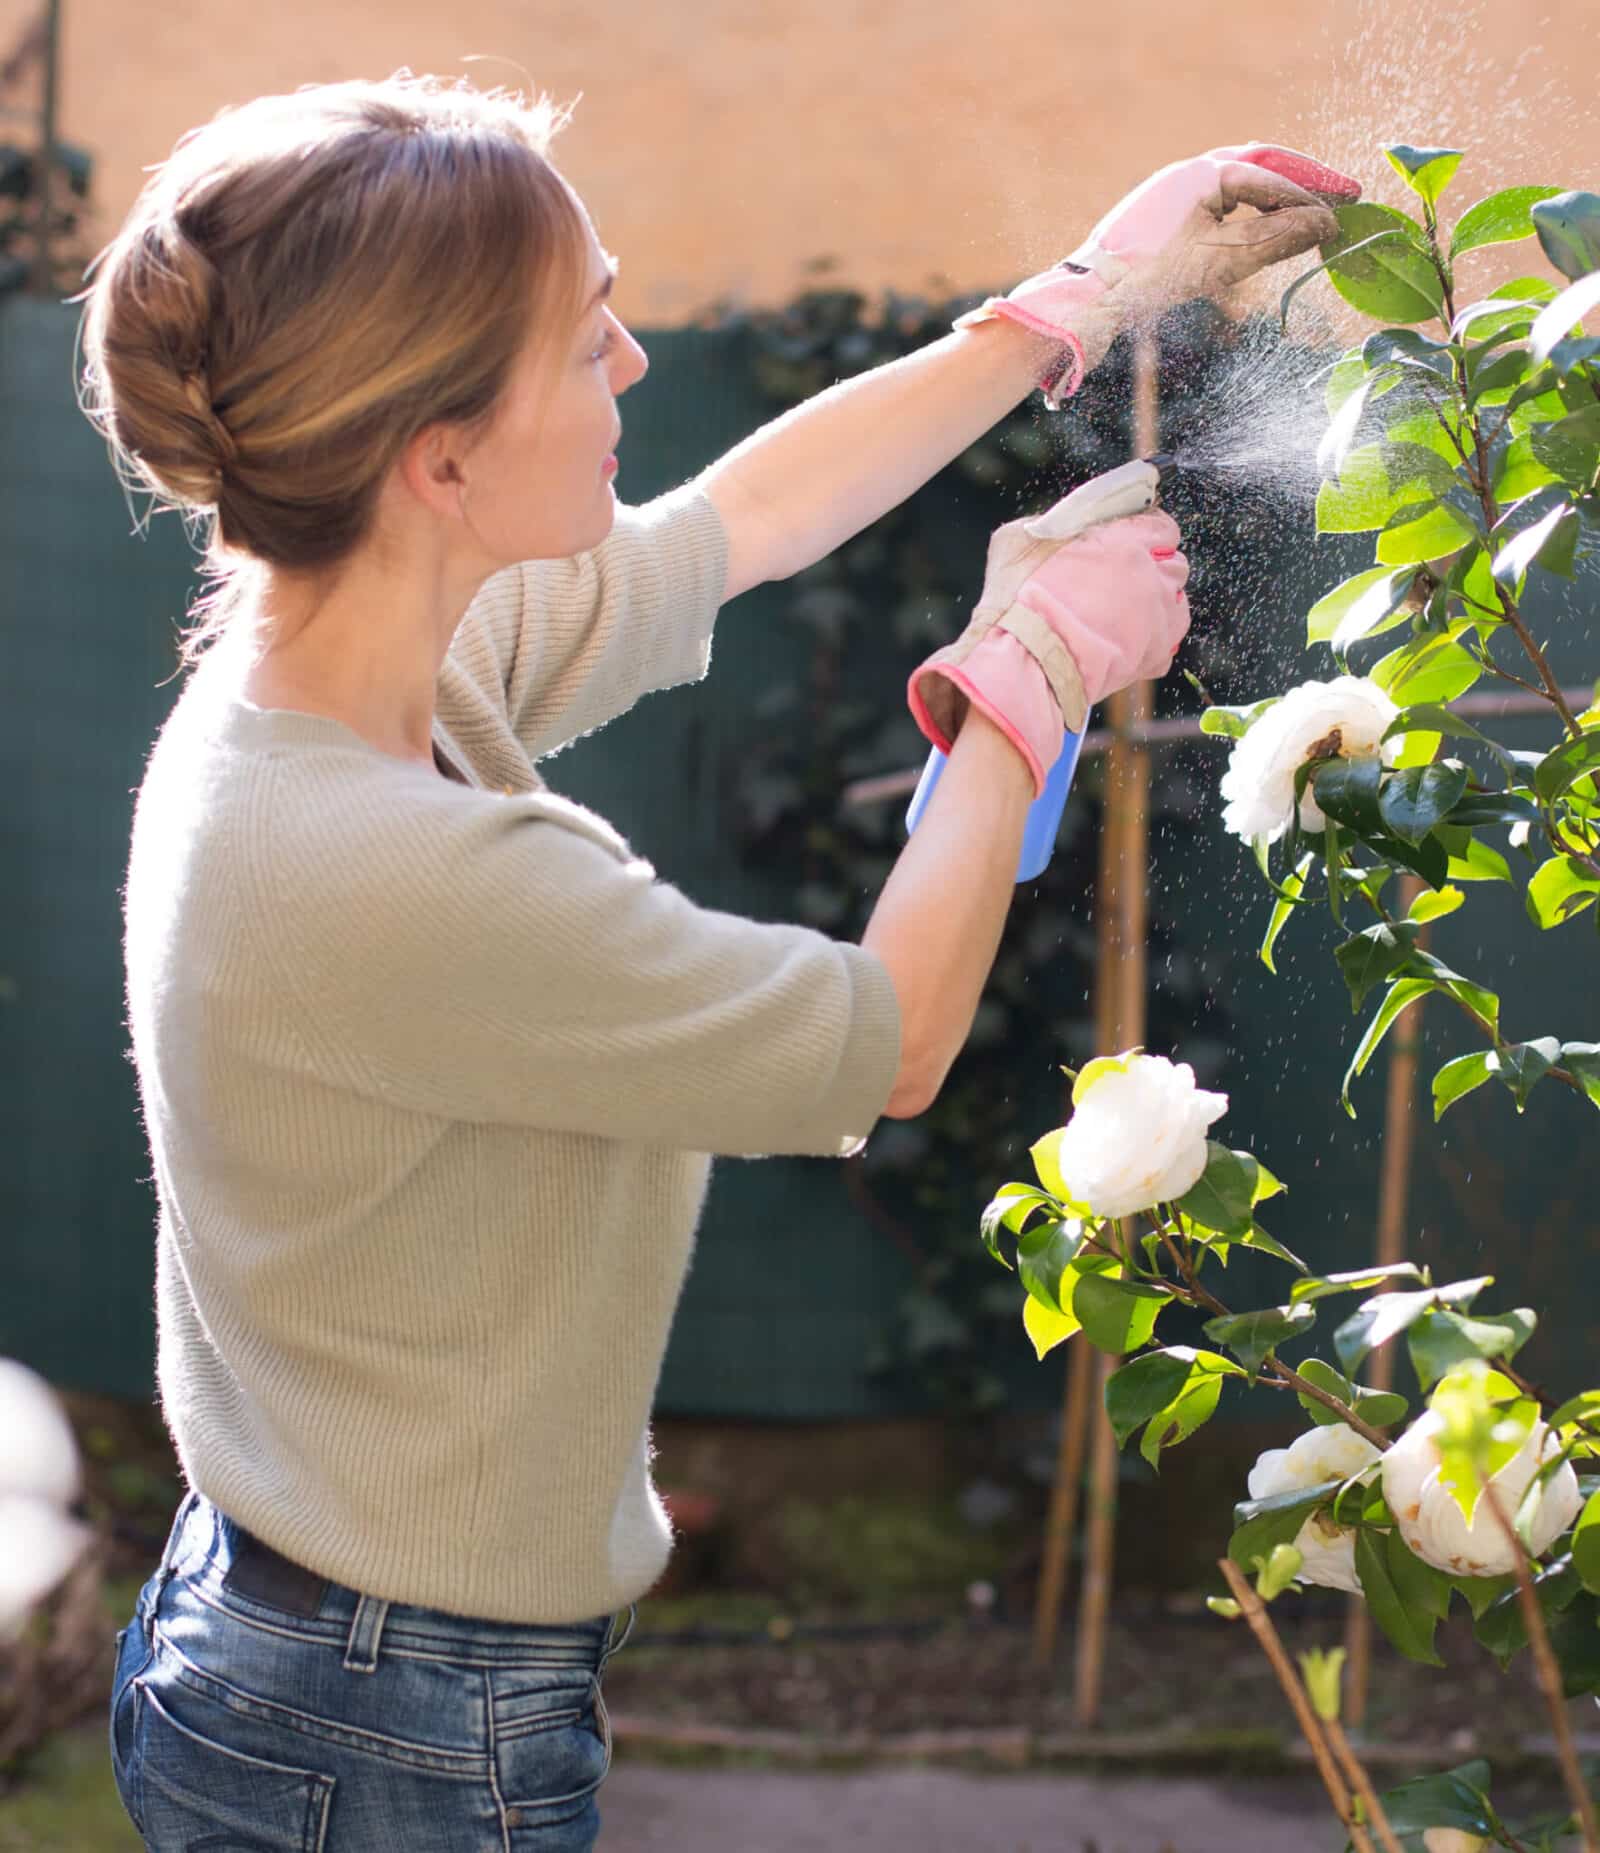
The first step is to identify the pest and its life cycle. Once you understand the pest, you can choose the best control method. Physical removal may be the easiest way to eliminate pests like slugs and snails. However, if you have a larger infestation, you may need to use bug-control products.
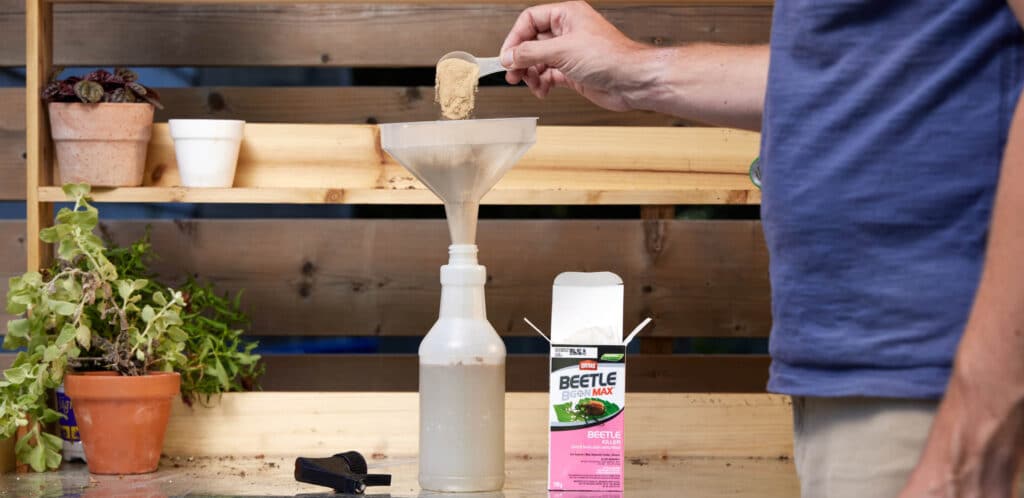
Ortho Bug B Gon Insecticidal Soap is a popular option, offering a solution for various insects, including ants, caterpillars, and beetles. Slug B Gon might be the best solution for slugs, as it targets these slimy pests and gives your plants a chance to flourish. And for beetle problems, Beetle B Gon can help get rid of Japanese Beetles and other types that destroy your landscaping and vegetation. With these solutions, you can keep your garden pest-free and thriving.
Pests in the garden can be discouraging but being informed on how to prevent and manage them is key. Identifying the bug types and different signs of damage is important for preventing the problem from escalating. Additionally, beneficial insects and using brighter colours around your garden to attract beneficial predators can play a huge role in naturally balancing out populations of unwanted bugs.
Now that you’ve learned how to deter pests and safeguard your gardens, you can be better prepared when unwelcome visitors arrive!
#easypeasy


snapdragons
aka antirrhinums, dragon flowers, and dog flowers
Snapdragons are a beloved choice for cottage gardens and perennial flower beds, adding charm and beauty to any landscape. These flowers possess a unique charm with their dragon-like flower heads and a stunning range of colours including white, yellow, pink, orange, and purple.
variations
Tall snapdragons, Dwarf snapdragons, Twining snapdragons (climbing snapdragons), and Angelonia snapdragons.

light
full sun
For best blooming results, make sure they receive at least 6 hours of direct sunlight daily.

water + feeding
thirsty
Snapdragons are somewhat drought-tolerant and prefer a good drink followed by a period of dryness.

toxic
yes
While Snapdragons are safe for humans they can lead to an upset stomach for furry friends.

size
it depends
Snapdragons come in different sizes depending on the variation. On average, they grow between 1 and 3 feet tall. Dwarf varieties only reach up to 10 inches, while larger species can reach 4 feet.

pro tip
give them room to bloom
Snapdragons like to have a bit of personal space. Make sure to leave about 6 to 12 inches between each plant to provide ample space for them to expand and thrive. Plus, it can actually help prevent the spread of diseases. These aren’t wallflowers—they like a little room to show off their vibrant blooms!

fun fact
snap it open!
The name ‘Snapdragon’ comes from an old superstition that says if you hold the flower by the stem and squeeze it, its mouth will “snap” open and close. They may not actually snap at you, but it’s still a fun way to engage with these beautiful plants! So don’t be afraid to give them a gentle squeeze and watch their petals snap.


beyond the basics
-
soil and potting
Snapdragons thrive in nutrient-rich, well-draining soil like Miracle-Gro® Moisture Control® Garden Soil. For outdoor planting, choose a sunny spot with ample spacing of 6 to 12 inches. In containers, use a pot that is at least 12 inches deep and wide, providing the roots with enough space to expand and thrive. Also, make sure the pot has good drainage to keep those roots from getting waterlogged.
-
companion planting
Snapdragons are versatile plants that effortlessly blend into any garden. They complement summer blooms like petunias, lavender, and sunflowers, as well as aromatic herbs like rosemary and sage.
-
blooms
Different varieties of snapdragons have single, double, or frilly petals and come in many vibrant colours. The most common variations are tall snapdragons that feature flowers with broad petals on strong stems, dwarf snapdragons that boast delicate blooms in an array of colours on short stems, and double snapdragons which feature multiple rows of ruffled petals.
-
pest control
Snapdragons generally are resistant to pests, but it’s important to keep an eye out for aphids and thrips. If you happen to spot any of these pests, it’s recommended to employ natural methods such as using an insecticidal soap like Ortho® Bug B Gon® ECO Insecticidal Soap or rinsing the foliage thoroughly with a forceful stream of water to dislodge any potential invaders.

troubleshooting
-
why aren’t my snapdragons blooming enough?
Insufficient sunlight exposure or subpar fertility conditions. To ensure your Snapdragons thrive, ensure your plants receive a minimum of 6 hours of direct sunlight each day. To improve soil fertility, you can enhance it by incorporating a nutrient boost like Miracle-Gro® Water Soluble All Purpose Plant Food. This will enrich the environment for your plants and promote their growth. Also, to encourage the formation of new buds, try deadheading to clear up any withered blossoms.
-
why are my snapdragon’s leaves powdery?
Fungal disease. This tends to appear in warm and humid climates. To prevent and treat this condition, ensure adequate air circulation between plants by leaving sufficient space when planting, avoid wetting the foliage during watering sessions, and use fungicides if necessary.
-
why does it look like my snapdragons are wilting?
Over watering or under watering. Excess moisture can result in root rot, hindering your flowers’ ability to absorb essential nutrients. Conversely, a lack of moisture can cause your flowers to dry out or wither. To ensure optimal growth, carefully assess soil moisture levels and adjust watering practices accordingly.
-
why are my snapdragons falling over?
Insufficient sunlight. To address this, try moving the plant to a spot that ensures 6 hours of sunlight. Additionally, consider pruning the leggy stems and using supports such as stakes or trellises to help the stalks stand tall.
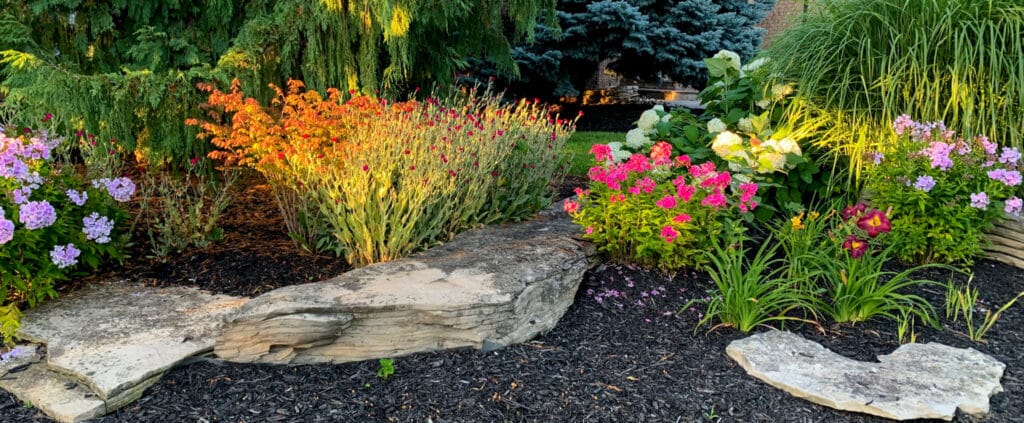
are you looking for some gardening tips to keep your garden in top shape?
Whether it’s a small container garden, flowerbed, or larger outdoor landscaping project, these five tips will help you keep your green space healthy and beautiful.
1
invest in quality soil and plant food
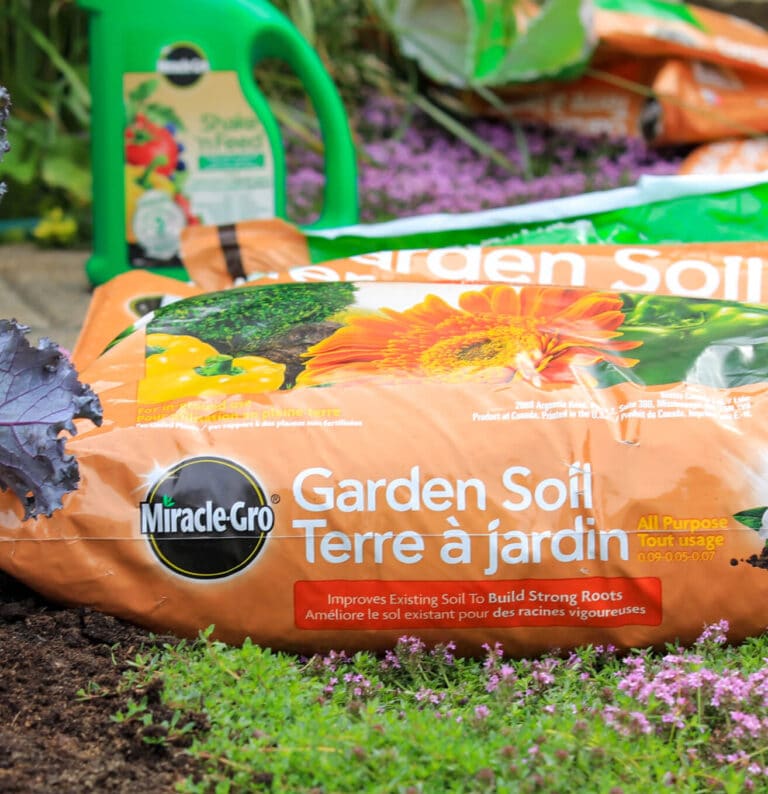
To ensure a healthy garden, it’s important to invest in high-quality soil and plant foods. First thing’s first, for happy plants, consider using a soil with lots of nutrients to help your plants grow big and strong. An all-purpose soil like Miracle-Gro® All Purpose Garden Soil is an excellent option.
2
monitor moisture levels
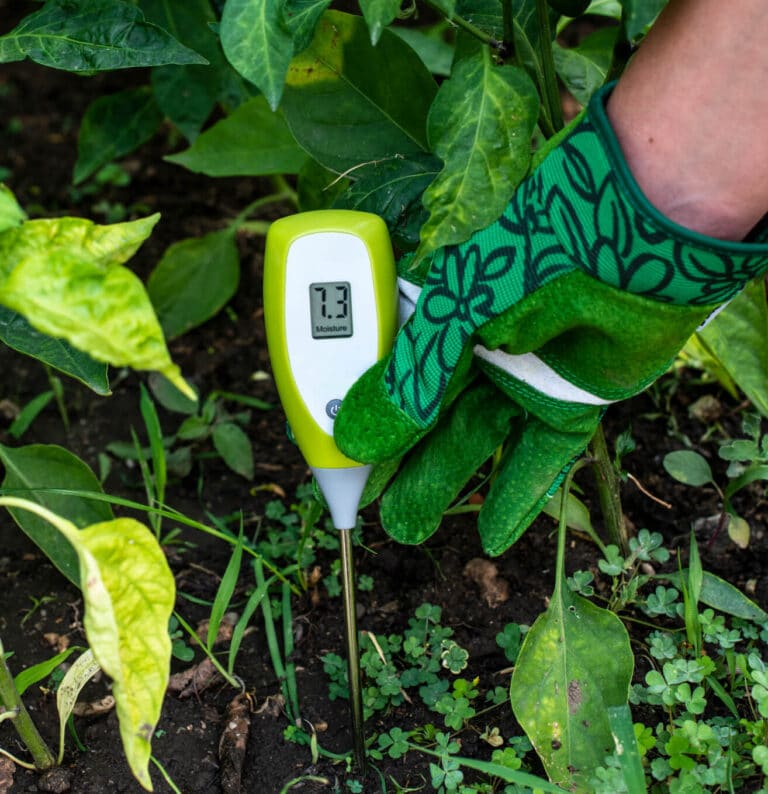
Healthy plants require moisture, but it’s important to avoid both overwatering and under-watering. To find the right balance, it is important to regularly check the moisture level of your soil. You can use a moisture meter or the finger test (insert a finger into the soil to feel how wet it is) and adjust accordingly by watering or adding mulch if necessary.
3
keep an eye out for weeds
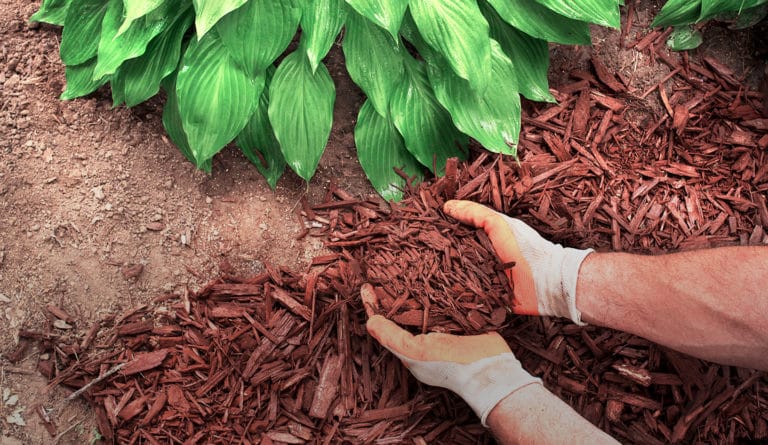
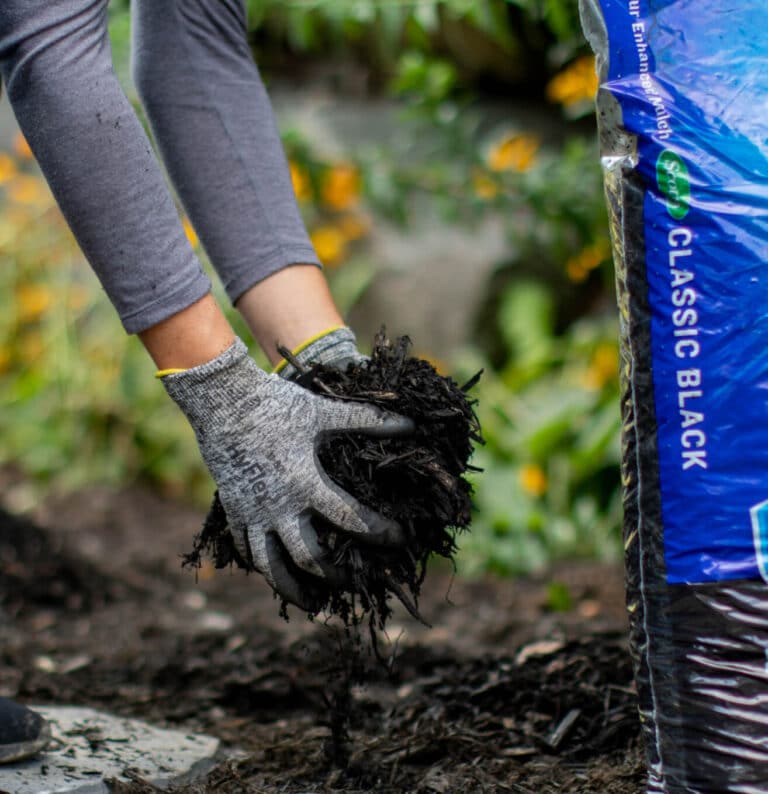
Weeds can harm your plants and take essential nutrients needed for growth. Take routine strolls around your garden to keep an eye out for growing weeds. If you’re finding that pulling the weeds out isn’t enough, you can Simply apply about an 8cm / 3-inch blanket of mulch like Scotts® Nature Scapes® Mulch around your veggie planter or garden.
4
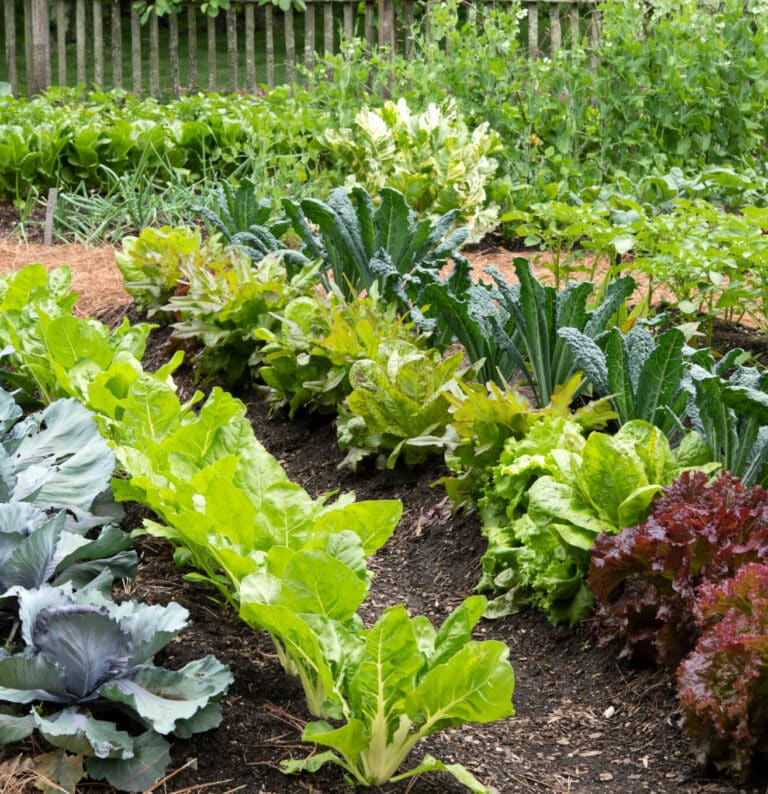
plant with the future in mind
Thinking ahead about how your plants will grow over time can help you to better plan your garden design. Try to think about what size plants may become in a few years and be sure to leave enough room around them so they can flourish without being overcrowded or impeded by other plants or structures.
5
enjoy yourself
Don’t forget to enjoy yourself while gardening! Try to look forward to the experience as something enjoyable. Also, remember to take breaks from the demanding work of tending to your garden and take pleasure in the beauty of nature that you have created.
While gardening is enjoyable, it does require regular maintenance. Following these tips can help you to create and maintain a beautiful garden that will last for years to come!
#easypeasy

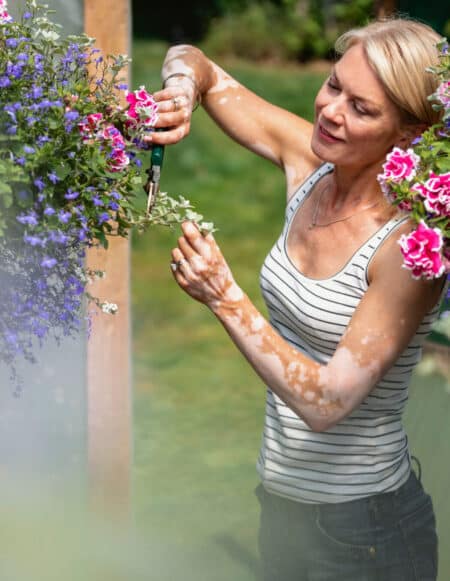
we all want a stunning garden, right? one awesome way to achieve this is by deadheading your flowers.
If you’re not familiar with it, deadheading means snipping off the dead or faded blooms from your plants. It not only spruces up your garden, but also helps keep your plant babies healthy and blooming for longer. So, let’s dive into everything you need to know about deadheading flowers, including why, when, and how to do it!

benefits of deadheading flowers
Deadhead your flowers once their blooms start to look worn out and droopy. Snipping off the dead flower heads stops the plant from wasting energy on seed development and redirects it towards producing fresh new blooms. It’s best to deadhead frequently throughout the growing season for happy, healthy flowers. Keep in mind, some flowers prefer to hold onto a few seeds, so don’t remove every deadhead completely.
The timing of deadheading can vary depending on the type of plant species. With some plants, like petunias and geraniums, you might need to deadhead every few days to maintain a continuous bloom cycle. Be sure to research your flower type to know the perfect timing to deadhead.
when should you NOT deadhead flowers?
At the start of the season, hold off on deadheading until the plant has produced a few seeds. This is most vital for plants that require their seed pods to produce new flowers in the following season, like lilies. Additionally, some plants, such as cosmos and zinnias, have a beautiful seed head that can add interest to your garden even after the blooms have faded.
Certain flowers produce deadheads that contain seeds birds love to munch on. Flowers like aster, bee balm, black-eyed susans, coneflowers, false sunflowers, gayfeather, globe thistle, ligularia, pennisetum, sedum, and sunflowers are some examples. For these flowers, resist the urge to deadhead. Leave the deadheads as nature’s snack bar for our bird friends!

comment étêter les fleurs
Supprimer les têtes de fleurs mortes est un jeu d’enfant! C’est comme si vous donniez une petite coupe de cheveux à vos plantes, mais avec beaucoup moins de tracas. Voici comment procéder :
- Repérez la fleur morte ou fanée et faites vos adieux.
- Repérez l’endroit où vous devez couper : au-dessus de la première série de belles feuilles ou de bourgeons et en dessous de la fleur morte.
- Sortez votre beau sécateur ou vos ciseaux et commencez à couper! Attention aux bourgeons frais.
- Après avoir coupé les têtes mortes, donnez à vos plantes un peu de soin avec de l’eau et de la nourriture, pour aider vos fleurs à reprendre de la vigueur et à être encore plus belles. Pensez à utiliser un engrais comme l’Engrais pour Plantes Ultra Bloom Miracle-Gro® Shake ‘N Feed.
- Enfin, rangez et désinfectez vos outils de taille avec de l’alcool à friction. Et voilà, c’est fait : votre jardin ressemblera à un paradis fleuri en un rien de temps!
So why not try deadheading your flowers? It’s not rocket science, and there are a variety of techniques you can try until you find what works for you. You might even find it to be a relaxing and enjoyable way to connect with your garden. Give it a go and get ready to show off your beautiful garden full of healthy plants and stunning blooms!
#easypeasy

we all want a stunning garden, right? one awesome way to achieve this is by deadheading your flowers.
If you’re not familiar with it, deadheading means snipping off the dead or faded blooms from your plants. It not only spruces up your garden, but also helps keep your plant babies healthy and blooming for longer. So, let’s dive into everything you need to know about deadheading flowers, including why, when, and how to do it!
benefits of deadheading flowers
Deadheading does more than just make your garden look tidy – it can also make your blooms last longer and keep your plant healthy. It helps redirect the plant’s energy to producing more blooms instead of seeds, resulting in a fuller and healthier plant. With a healthier plant, you’ll be less likely to have to deal with pesky diseases and insects. And let’s face it, there’s just something satisfying about snipping off dead and fading blooms.
when should you NOT deadhead flowers?
At the start of the season, hold off on deadheading until the plant has produced a few seeds. This is most vital for plants that require their seed pods to produce new flowers in the following season, like lilies. Additionally, some plants, such as cosmos and zinnias, have a beautiful seed head that can add interest to your garden even after the blooms have faded.
Certain flowers produce deadheads that contain seeds birds love to munch on. Flowers like aster, bee balm, black-eyed susans, coneflowers, false sunflowers, gayfeather, globe thistle, ligularia, pennisetum, sedum, and sunflowers are some examples. For these flowers, resist the urge to deadhead. Leave the deadheads as nature’s snack bar for our bird friends!
comment étêter les fleurs
Supprimer les têtes de fleurs mortes est un jeu d’enfant! C’est comme si vous donniez une petite coupe de cheveux à vos plantes, mais avec beaucoup moins de tracas. Voici comment procéder :
- Repérez la fleur morte ou fanée et faites vos adieux.
- Repérez l’endroit où vous devez couper : au-dessus de la première série de belles feuilles ou de bourgeons et en dessous de la fleur morte.
- Sortez votre beau sécateur ou vos ciseaux et commencez à couper! Attention aux bourgeons frais.
- Après avoir coupé les têtes mortes, donnez à vos plantes un peu de soin avec de l’eau et de la nourriture, pour aider vos fleurs à reprendre de la vigueur et à être encore plus belles. Pensez à utiliser un engrais comme l’Engrais pour Plantes Ultra Bloom Miracle-Gro® Shake ‘N Feed.
- Enfin, rangez et désinfectez vos outils de taille avec de l’alcool à friction. Et voilà, c’est fait : votre jardin ressemblera à un paradis fleuri en un rien de temps!
So why not try deadheading your flowers? It’s not rocket science, and there are a variety of techniques you can try until you find what works for you. You might even find it to be a relaxing and enjoyable way to connect with your garden. Give it a go and get ready to show off your beautiful garden full of healthy plants and stunning blooms!